> ## Documentation Index
> Fetch the complete documentation index at: https://docs.cloudthinker.io/llms.txt
> Use this file to discover all available pages before exploring further.
# Code Review Setup
> Connect your GitHub, GitLab, Bitbucket, or Azure DevOps repositories for automated AI-powered code reviews
Connect a Git provider once and every new pull request in your selected repositories gets an AI review automatically. New to Code Review? Read the [overview](/guide/code-review/overview) first.
## Prerequisites
* A GitHub, GitLab, Bitbucket, or Azure DevOps account with repository access
* Permission to install apps or create access tokens for your organization
* A CloudThinker workspace
## Connect a repository
Go to **Code Review** from the navigation menu.
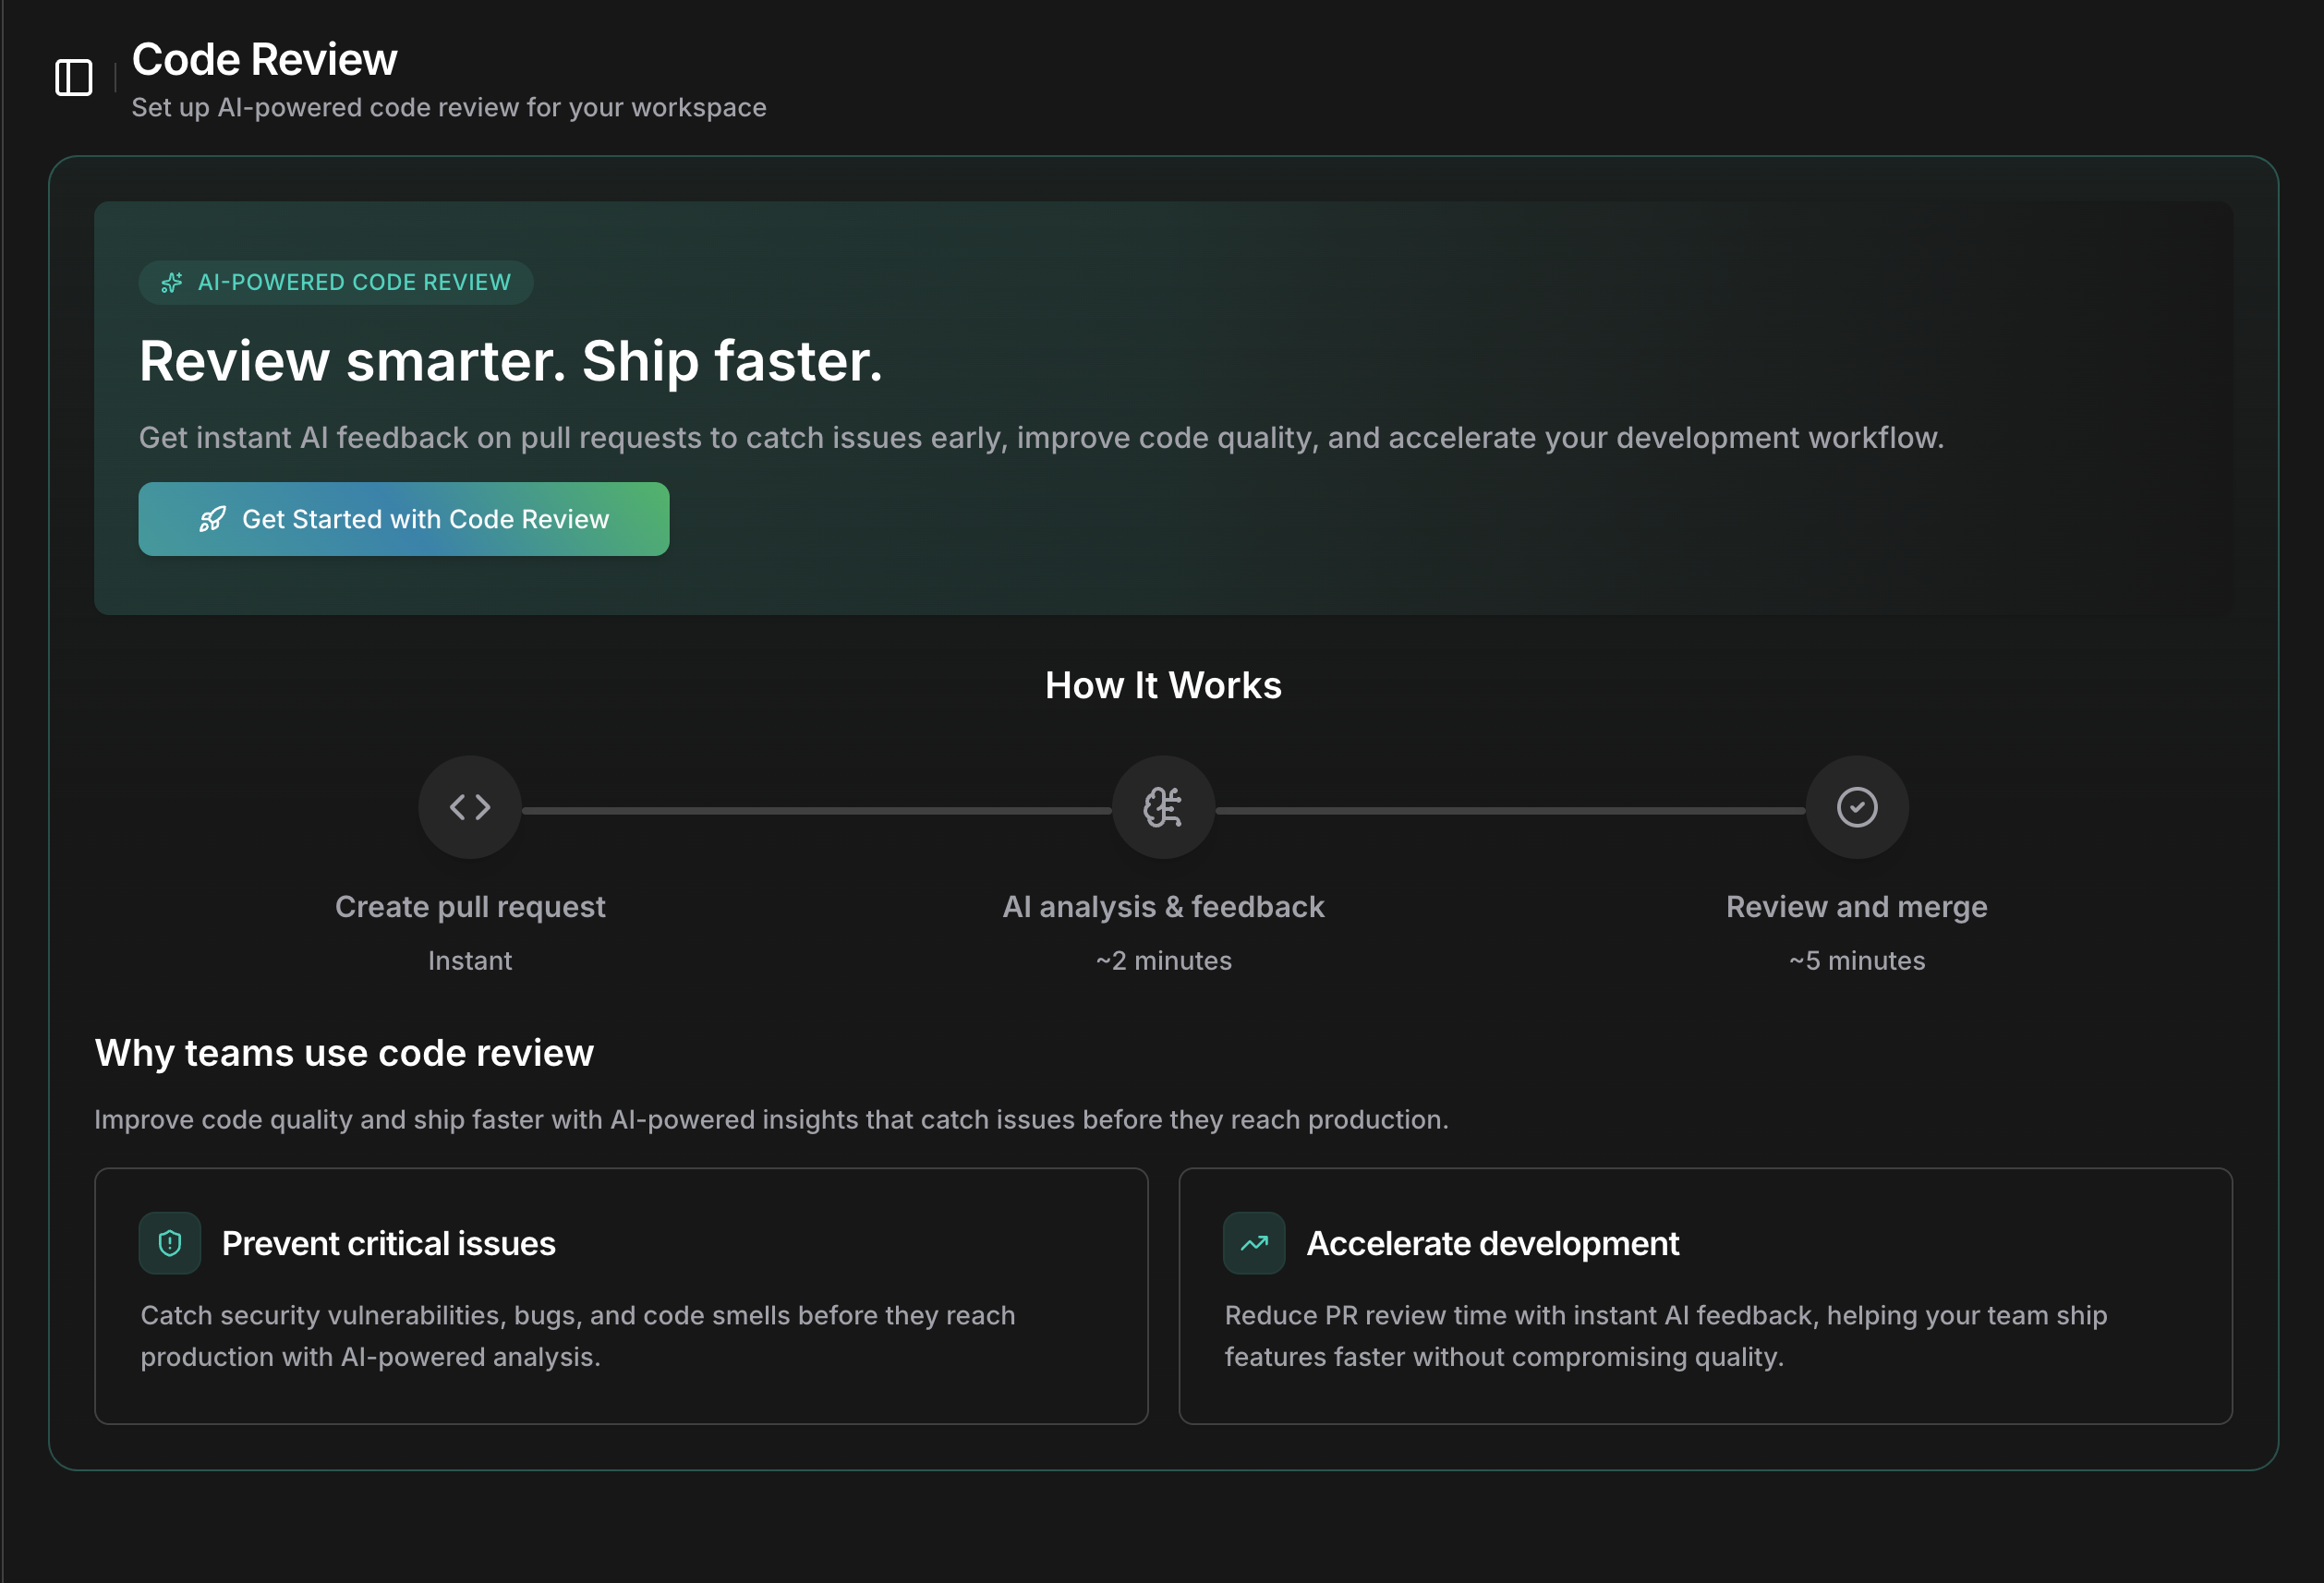 Click **Get Started with Code Review** to open the setup wizard.
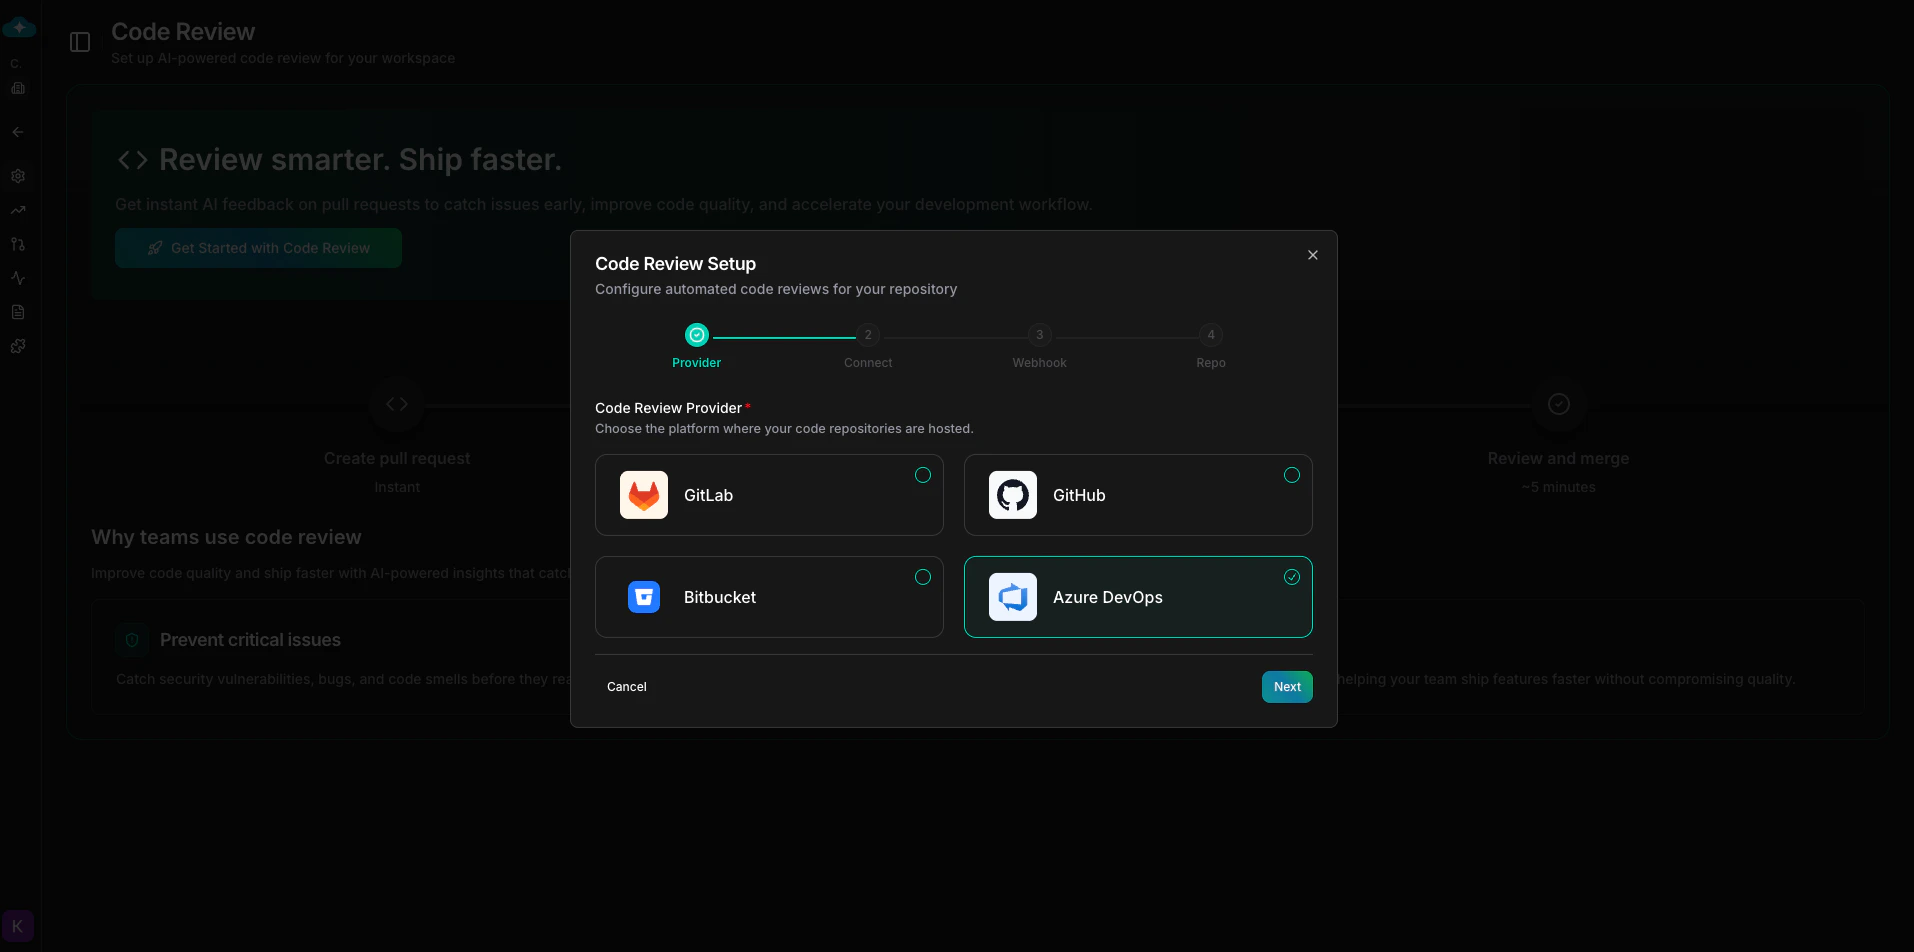 Select **GitHub**, **GitLab**, **Bitbucket**, or **Azure DevOps** as your Git provider.
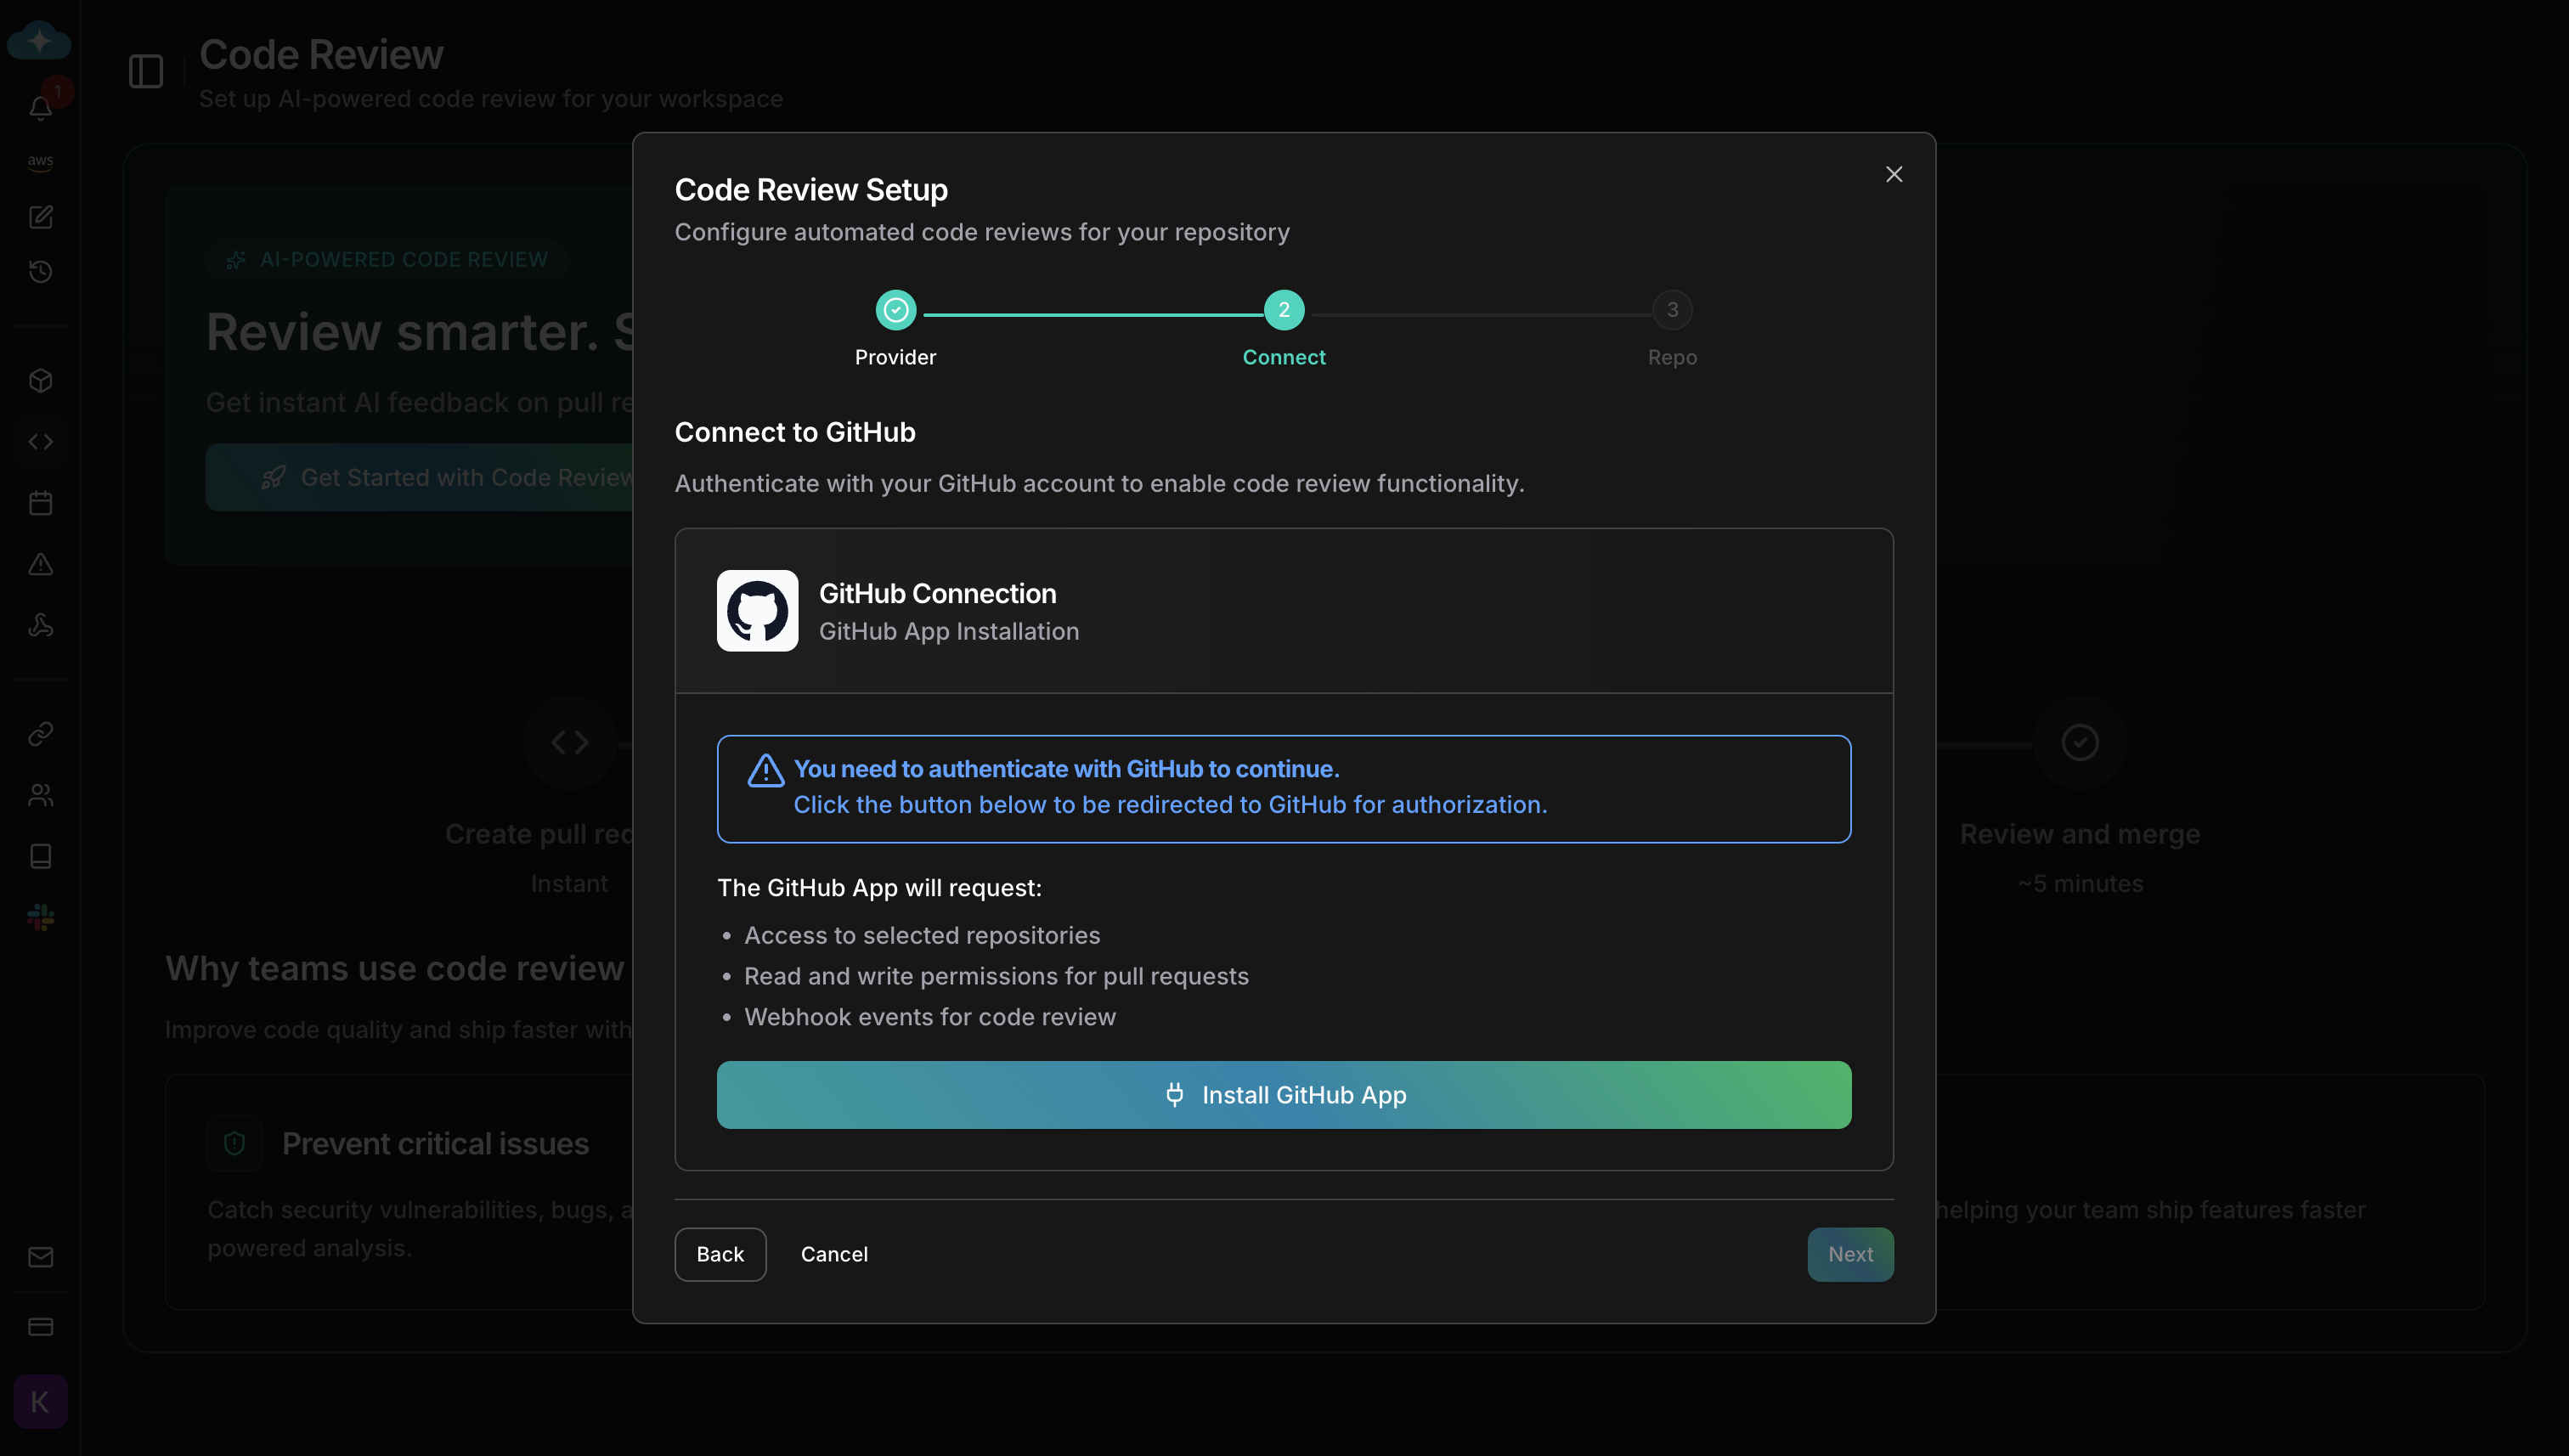 Click **Install GitHub App** to begin the GitHub App installation.
GitHub redirects you to select an organization and grant repository access. After you authorize, the wizard resumes automatically. Webhooks are registered by the GitHub App — no manual webhook configuration is needed.
Installing CloudThinker to a GitHub organization requires **Organization Owner** permissions. If you are not an owner, ask an owner to install the app.
Click **Connect to GitLab** to authenticate via OAuth. This is the simplest option for GitLab.com users.
After connecting, [configure a webhook manually](#configure-webhooks).
Use a **Project Access Token** or **Group Access Token** for self-hosted GitLab instances or if you prefer manual token management. Comments then appear from a bot user, tokens stay scoped to specific projects or groups, and access is easy to revoke. CloudThinker supports self-hosted GitLab **version 12.0 and above**.
**Connection details:**
1. **GitLab URL**: Enter `https://gitlab.com` for GitLab.com, or your self-hosted instance URL (e.g., `https://gitlab.example.com`)
2. **Token Type**: Select **Project Access Token** (single project) or **Group Access Token** (all projects in a group)
3. **Access Token**: Paste your generated token
1) Go to your project → **Settings** → **Access Tokens**
2) Click **Add new token**
3) Set role to `Developer` or higher
4) Select scope: `api`
5) Set an expiration date (recommended)
6) Copy the generated token
1. Go to your group → **Settings** → **Access Tokens**
2. Click **Add new token**
3. Set role to `Developer` or higher
4. Select scope: `api`
5. Set an expiration date (recommended)
6. Copy the generated token
The token must have **Developer** role or higher to post code review comments. Guest and Reporter roles cannot comment on merge requests.
After connecting, [configure a webhook manually](#configure-webhooks).
Click **Connect to Bitbucket** to authenticate via OAuth. Bitbucket redirects you to authorize workspace access.
Webhooks are registered automatically — no manual webhook configuration is needed.
Connect using a Bitbucket access token. Choose the token type that matches your access level:
| Token Type | Scope | Plan Required |
| --------------------------- | ------------------------------- | ------------- |
| **Workspace Access Token** | All repositories in a workspace | Premium |
| **Project Access Token** | All repositories in a project | Premium |
| **Repository Access Token** | Single repository only | Free |
**Connection details:**
1. **Token Type**: Select the token scope from the dropdown
2. **Bitbucket Workspace**: Enter your workspace slug (from the URL: `bitbucket.org//repo`)
3. **Repository Slug** (Repository tokens only): Enter the repository slug
4. **Access Token**: Paste your generated token
Click **Validate Token** first to verify access, then click **Connect** to complete.
**Required token permissions:**
* Account: Read
* Repositories: Read, Write
* Pull requests: Read, Write
* Webhooks: Read and write
* Pipelines: Read, Write
1. Go to **Workspace** → **Settings** → **Access tokens**
2. Click **Create workspace access token**
3. Enable the required permissions listed above
4. Set an expiration date (recommended)
5. Copy the generated token
1. Go to **Project** → **Project settings** → **Access tokens**
2. Click **Create project access token**
3. Enable the required permissions listed above
4. Set an expiration date (recommended)
5. Copy the generated token
1. Go to **Repository** → **Repository settings** → **Access tokens**
2. Click **Create Repository Access Token**
3. Enable the required permissions listed above
4. Set an expiration date (recommended)
5. Copy the generated token
Webhooks are registered automatically — no manual webhook configuration is needed.
Azure DevOps uses a **Personal Access Token (PAT)** for authentication.
**Connection details:**
1. **Organization URL**: Enter your Azure DevOps organization URL (e.g., `https://dev.azure.com/your-org` or `https://your-org.visualstudio.com`)
2. **Project**: Enter the project name containing your repositories
3. **Personal Access Token**: Paste your generated PAT
Click **Validate PAT** first to verify access, then click **Connect** to complete.
**Required PAT scopes:**
* `Build` — Read
* `Code` — Read & Write
* `Pull Request Threads` — Read & Write
1. Go to **Azure DevOps** → **User Settings** (top-right) → **Personal Access Tokens**
2. Click **New Token**
3. Set the organization and expiration date
4. Select the scopes listed above
5. Click **Create** and copy the generated token
PATs expire on the date you set during creation. Rotate your PAT before it expires to avoid disrupting reviews.
After connecting, [configure webhooks manually](#configure-webhooks).
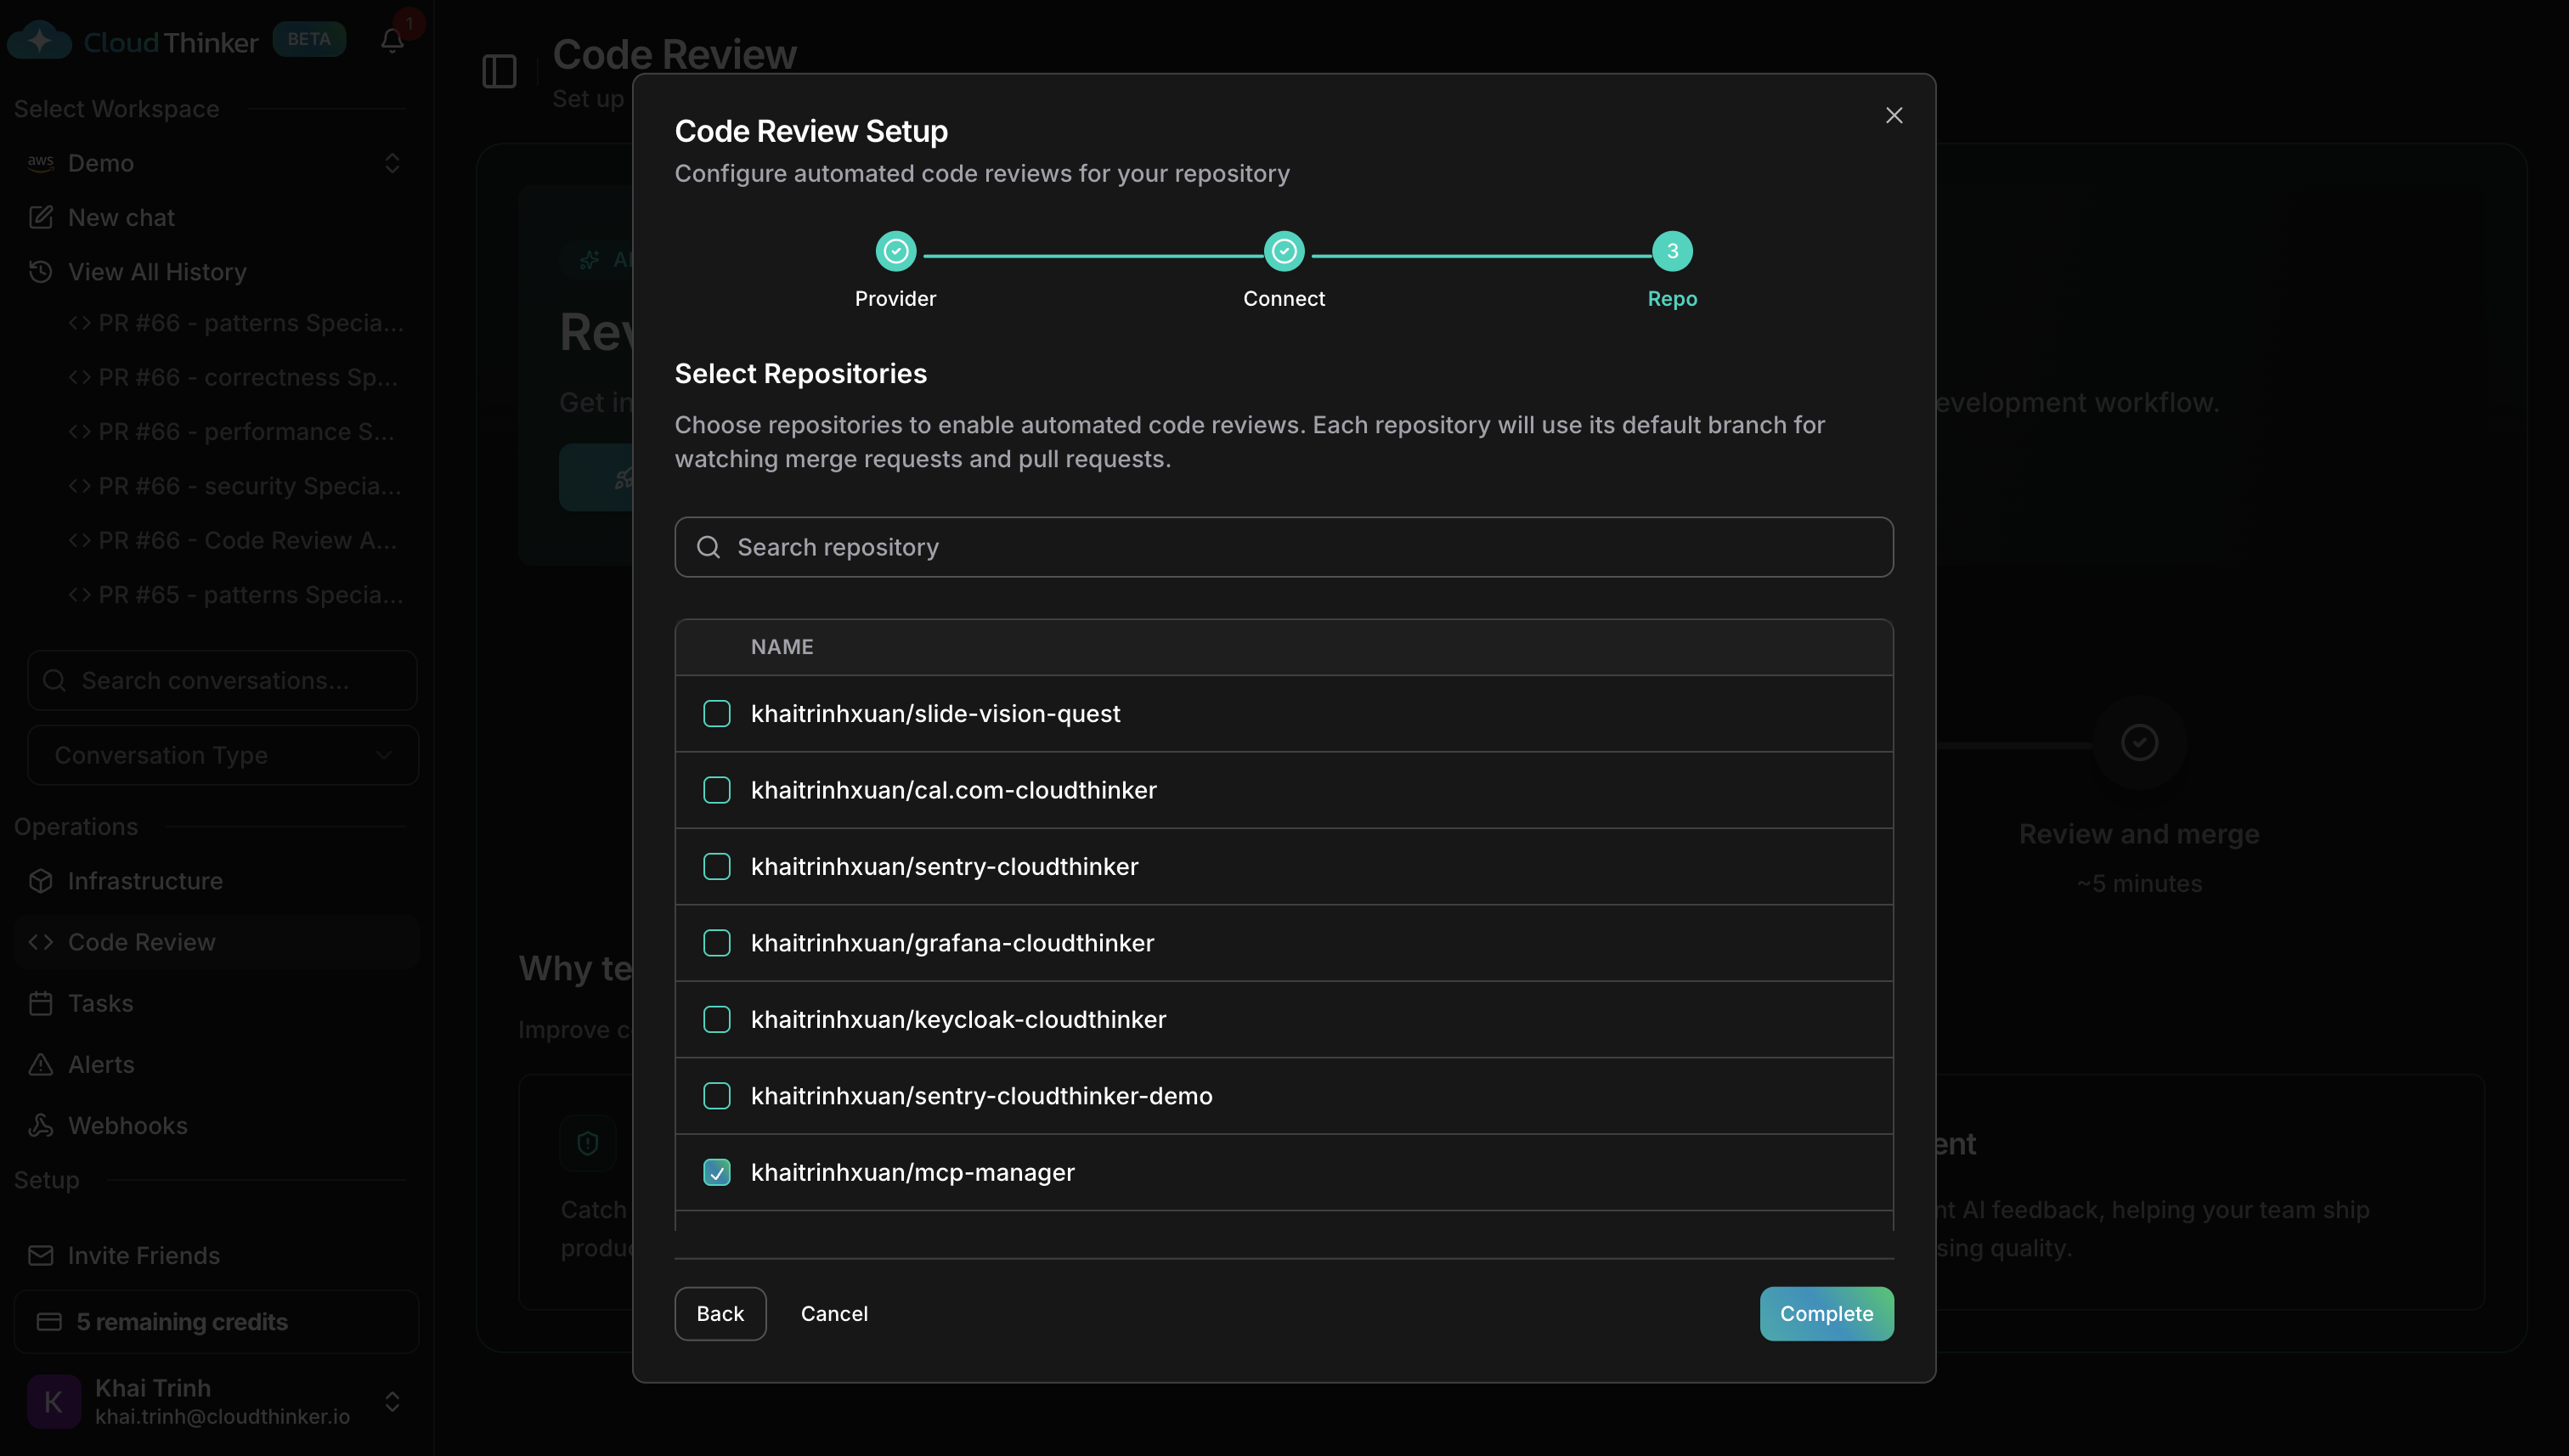
Select the repositories you want to enable for code review and click **Complete** to finish setup.
Click **Install GitHub App** to begin the GitHub App installation.
GitHub redirects you to select an organization and grant repository access. After you authorize, the wizard resumes automatically. Webhooks are registered by the GitHub App — no manual webhook configuration is needed.
Installing CloudThinker to a GitHub organization requires **Organization Owner** permissions. If you are not an owner, ask an owner to install the app.
Click **Connect to GitLab** to authenticate via OAuth. This is the simplest option for GitLab.com users.
After connecting, [configure a webhook manually](#configure-webhooks).
Use a **Project Access Token** or **Group Access Token** for self-hosted GitLab instances or if you prefer manual token management. Comments then appear from a bot user, tokens stay scoped to specific projects or groups, and access is easy to revoke. CloudThinker supports self-hosted GitLab **version 12.0 and above**.
**Connection details:**
1. **GitLab URL**: Enter `https://gitlab.com` for GitLab.com, or your self-hosted instance URL (e.g., `https://gitlab.example.com`)
2. **Token Type**: Select **Project Access Token** (single project) or **Group Access Token** (all projects in a group)
3. **Access Token**: Paste your generated token
1) Go to your project → **Settings** → **Access Tokens**
2) Click **Add new token**
3) Set role to `Developer` or higher
4) Select scope: `api`
5) Set an expiration date (recommended)
6) Copy the generated token
1. Go to your group → **Settings** → **Access Tokens**
2. Click **Add new token**
3. Set role to `Developer` or higher
4. Select scope: `api`
5. Set an expiration date (recommended)
6. Copy the generated token
The token must have **Developer** role or higher to post code review comments. Guest and Reporter roles cannot comment on merge requests.
After connecting, [configure a webhook manually](#configure-webhooks).
Click **Connect to Bitbucket** to authenticate via OAuth. Bitbucket redirects you to authorize workspace access.
Webhooks are registered automatically — no manual webhook configuration is needed.
Connect using a Bitbucket access token. Choose the token type that matches your access level:
| Token Type | Scope | Plan Required |
| --------------------------- | ------------------------------- | ------------- |
| **Workspace Access Token** | All repositories in a workspace | Premium |
| **Project Access Token** | All repositories in a project | Premium |
| **Repository Access Token** | Single repository only | Free |
**Connection details:**
1. **Token Type**: Select the token scope from the dropdown
2. **Bitbucket Workspace**: Enter your workspace slug (from the URL: `bitbucket.org//repo`)
3. **Repository Slug** (Repository tokens only): Enter the repository slug
4. **Access Token**: Paste your generated token
Click **Validate Token** first to verify access, then click **Connect** to complete.
**Required token permissions:**
* Account: Read
* Repositories: Read, Write
* Pull requests: Read, Write
* Webhooks: Read and write
* Pipelines: Read, Write
1. Go to **Workspace** → **Settings** → **Access tokens**
2. Click **Create workspace access token**
3. Enable the required permissions listed above
4. Set an expiration date (recommended)
5. Copy the generated token
1. Go to **Project** → **Project settings** → **Access tokens**
2. Click **Create project access token**
3. Enable the required permissions listed above
4. Set an expiration date (recommended)
5. Copy the generated token
1. Go to **Repository** → **Repository settings** → **Access tokens**
2. Click **Create Repository Access Token**
3. Enable the required permissions listed above
4. Set an expiration date (recommended)
5. Copy the generated token
Webhooks are registered automatically — no manual webhook configuration is needed.
Azure DevOps uses a **Personal Access Token (PAT)** for authentication.
**Connection details:**
1. **Organization URL**: Enter your Azure DevOps organization URL (e.g., `https://dev.azure.com/your-org` or `https://your-org.visualstudio.com`)
2. **Project**: Enter the project name containing your repositories
3. **Personal Access Token**: Paste your generated PAT
Click **Validate PAT** first to verify access, then click **Connect** to complete.
**Required PAT scopes:**
* `Build` — Read
* `Code` — Read & Write
* `Pull Request Threads` — Read & Write
1. Go to **Azure DevOps** → **User Settings** (top-right) → **Personal Access Tokens**
2. Click **New Token**
3. Set the organization and expiration date
4. Select the scopes listed above
5. Click **Create** and copy the generated token
PATs expire on the date you set during creation. Rotate your PAT before it expires to avoid disrupting reviews.
After connecting, [configure webhooks manually](#configure-webhooks).
Select the repositories you want to enable for code review and click **Complete** to finish setup.
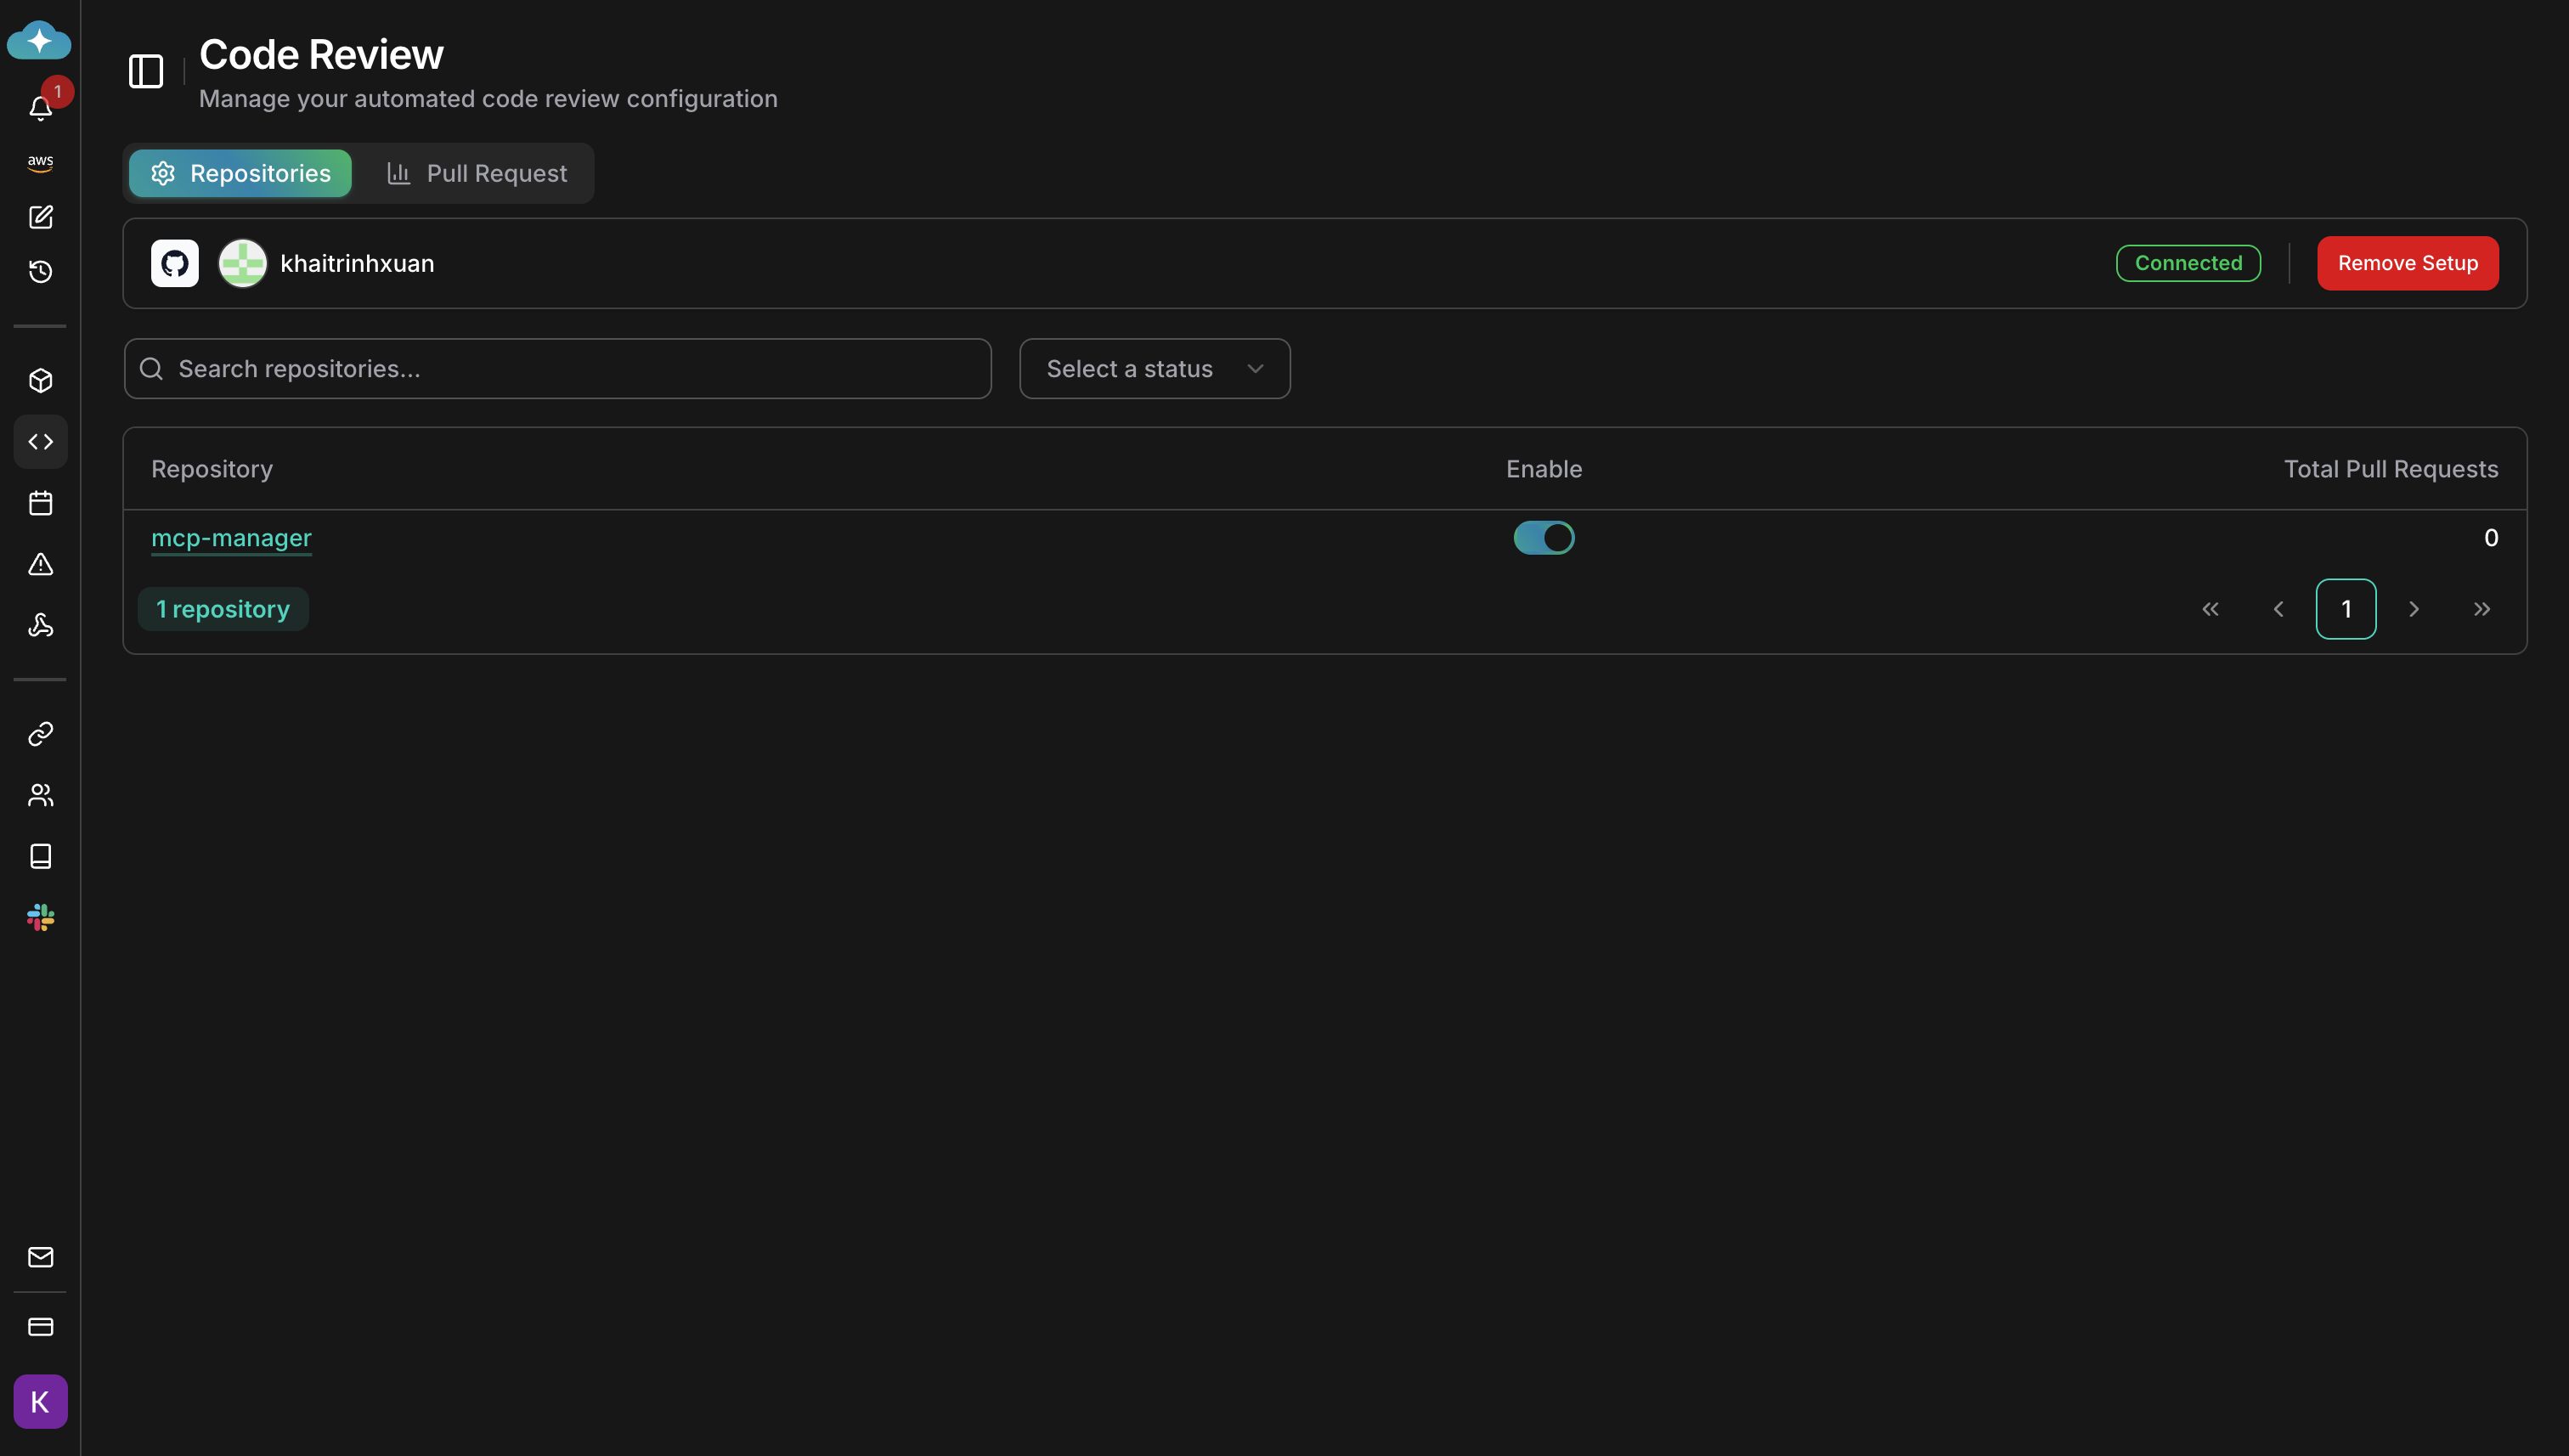
 After setup, open repository settings to adjust auto-review, [review mode](#review-modes), [pipeline monitoring](#pipeline-monitoring), and [filters](#filter-configuration) per repository.
**Success state:** Your repositories appear in the Code Review dashboard — CloudThinker is now monitoring their pull requests and merge requests.
After setup, open repository settings to adjust auto-review, [review mode](#review-modes), [pipeline monitoring](#pipeline-monitoring), and [filters](#filter-configuration) per repository.
**Success state:** Your repositories appear in the Code Review dashboard — CloudThinker is now monitoring their pull requests and merge requests.
 ## Configure webhooks
GitHub and Bitbucket register webhooks automatically — no action is needed. GitLab and Azure DevOps require manual webhook configuration:
After connecting your GitLab account, configure a webhook in your GitLab project or group:
1. Go to your project/group → **Settings** → **Webhooks**
2. Paste the webhook URL shown in the setup wizard
3. Enter the secret token provided
4. Enable these triggers:
* **Merge request events**
* **Comments**
* **Pipeline events**
5. Click **Add webhook**
After connecting your Azure DevOps project, create **4 separate service hooks** in Azure DevOps:
1. Go to **Project Settings** → **Service hooks**
2. Click **Create subscription** and select **Web Hooks**
3. Create one hook for each of these events:
* **Pull request created**
* **Pull request updated**
* **Pull request commented on**
* **Build completed**
4. For each hook, paste the webhook URL shown in the setup wizard
5. Use **Basic authentication** with the secret token as the password (leave username empty)
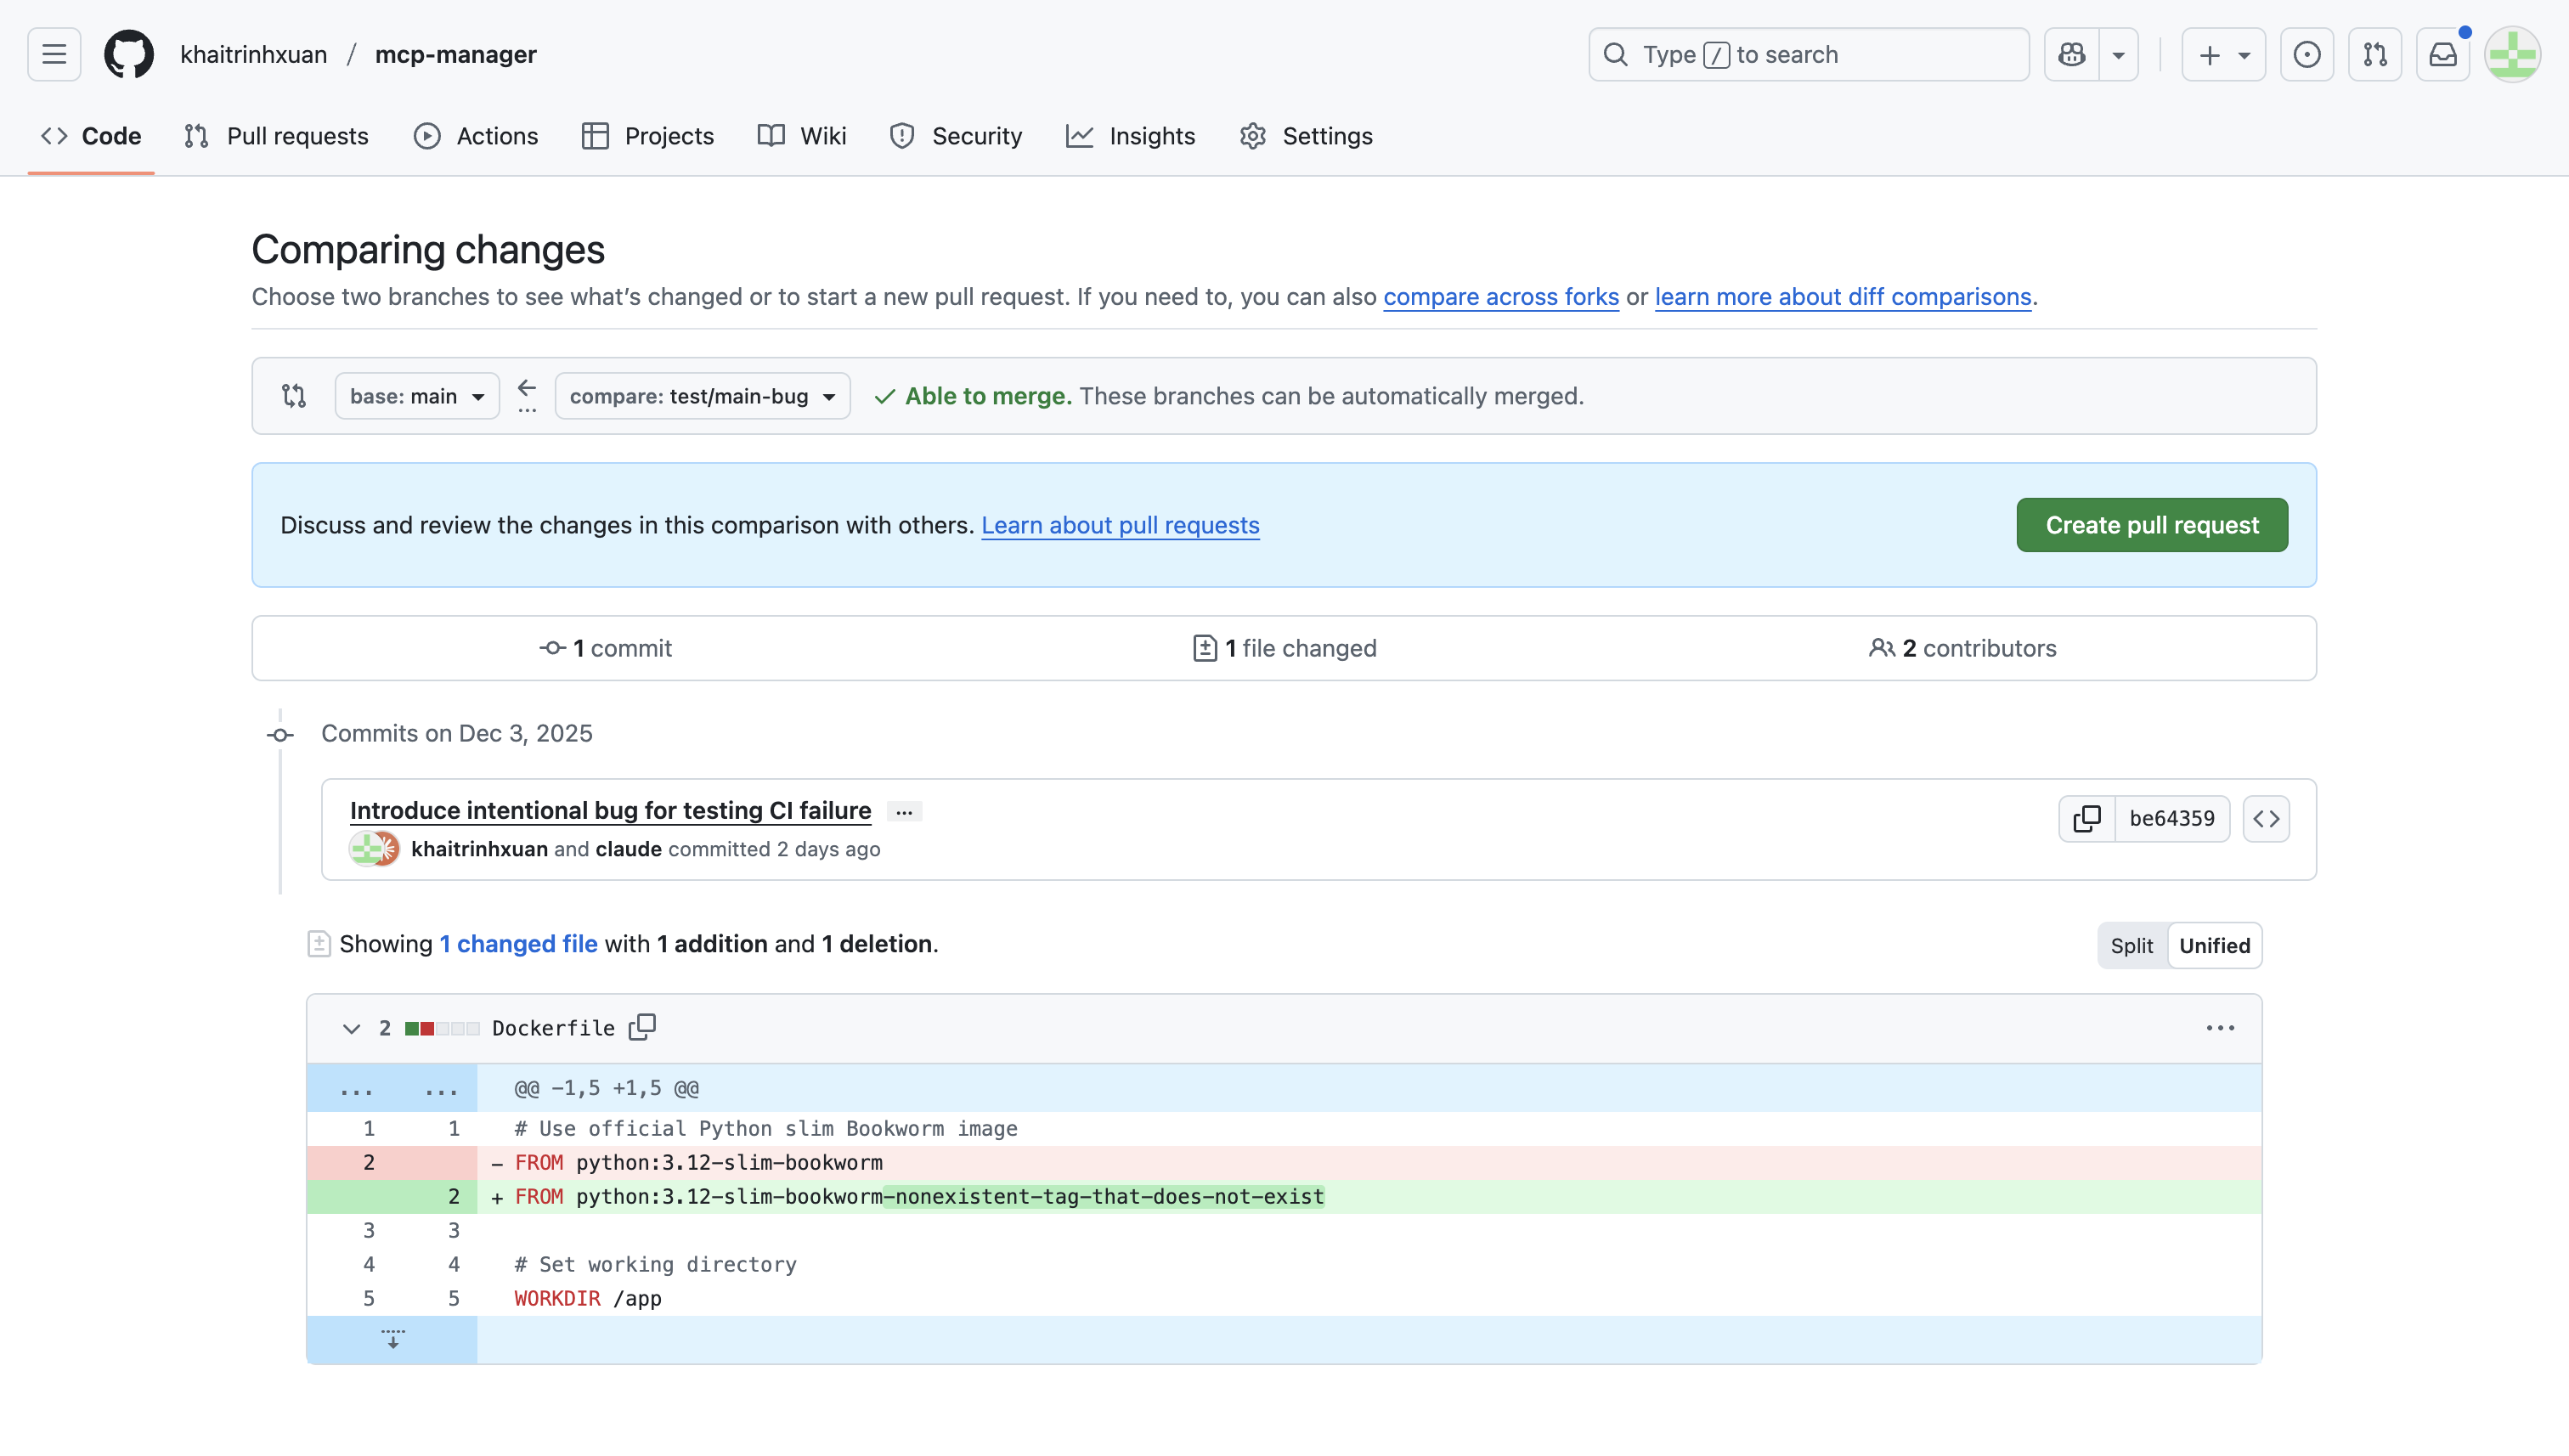
## Create a pull request
Navigate to your connected repository on GitHub, GitLab, Bitbucket, or Azure DevOps.
Create a new pull request with your code changes. CloudThinker detects the PR, analyzes the diff, and posts a summary comment plus inline comments — typically within 1–2 minutes, no manual trigger needed.
## Configure webhooks
GitHub and Bitbucket register webhooks automatically — no action is needed. GitLab and Azure DevOps require manual webhook configuration:
After connecting your GitLab account, configure a webhook in your GitLab project or group:
1. Go to your project/group → **Settings** → **Webhooks**
2. Paste the webhook URL shown in the setup wizard
3. Enter the secret token provided
4. Enable these triggers:
* **Merge request events**
* **Comments**
* **Pipeline events**
5. Click **Add webhook**
After connecting your Azure DevOps project, create **4 separate service hooks** in Azure DevOps:
1. Go to **Project Settings** → **Service hooks**
2. Click **Create subscription** and select **Web Hooks**
3. Create one hook for each of these events:
* **Pull request created**
* **Pull request updated**
* **Pull request commented on**
* **Build completed**
4. For each hook, paste the webhook URL shown in the setup wizard
5. Use **Basic authentication** with the secret token as the password (leave username empty)
## Create a pull request
Navigate to your connected repository on GitHub, GitLab, Bitbucket, or Azure DevOps.
Create a new pull request with your code changes. CloudThinker detects the PR, analyzes the diff, and posts a summary comment plus inline comments — typically within 1–2 minutes, no manual trigger needed.
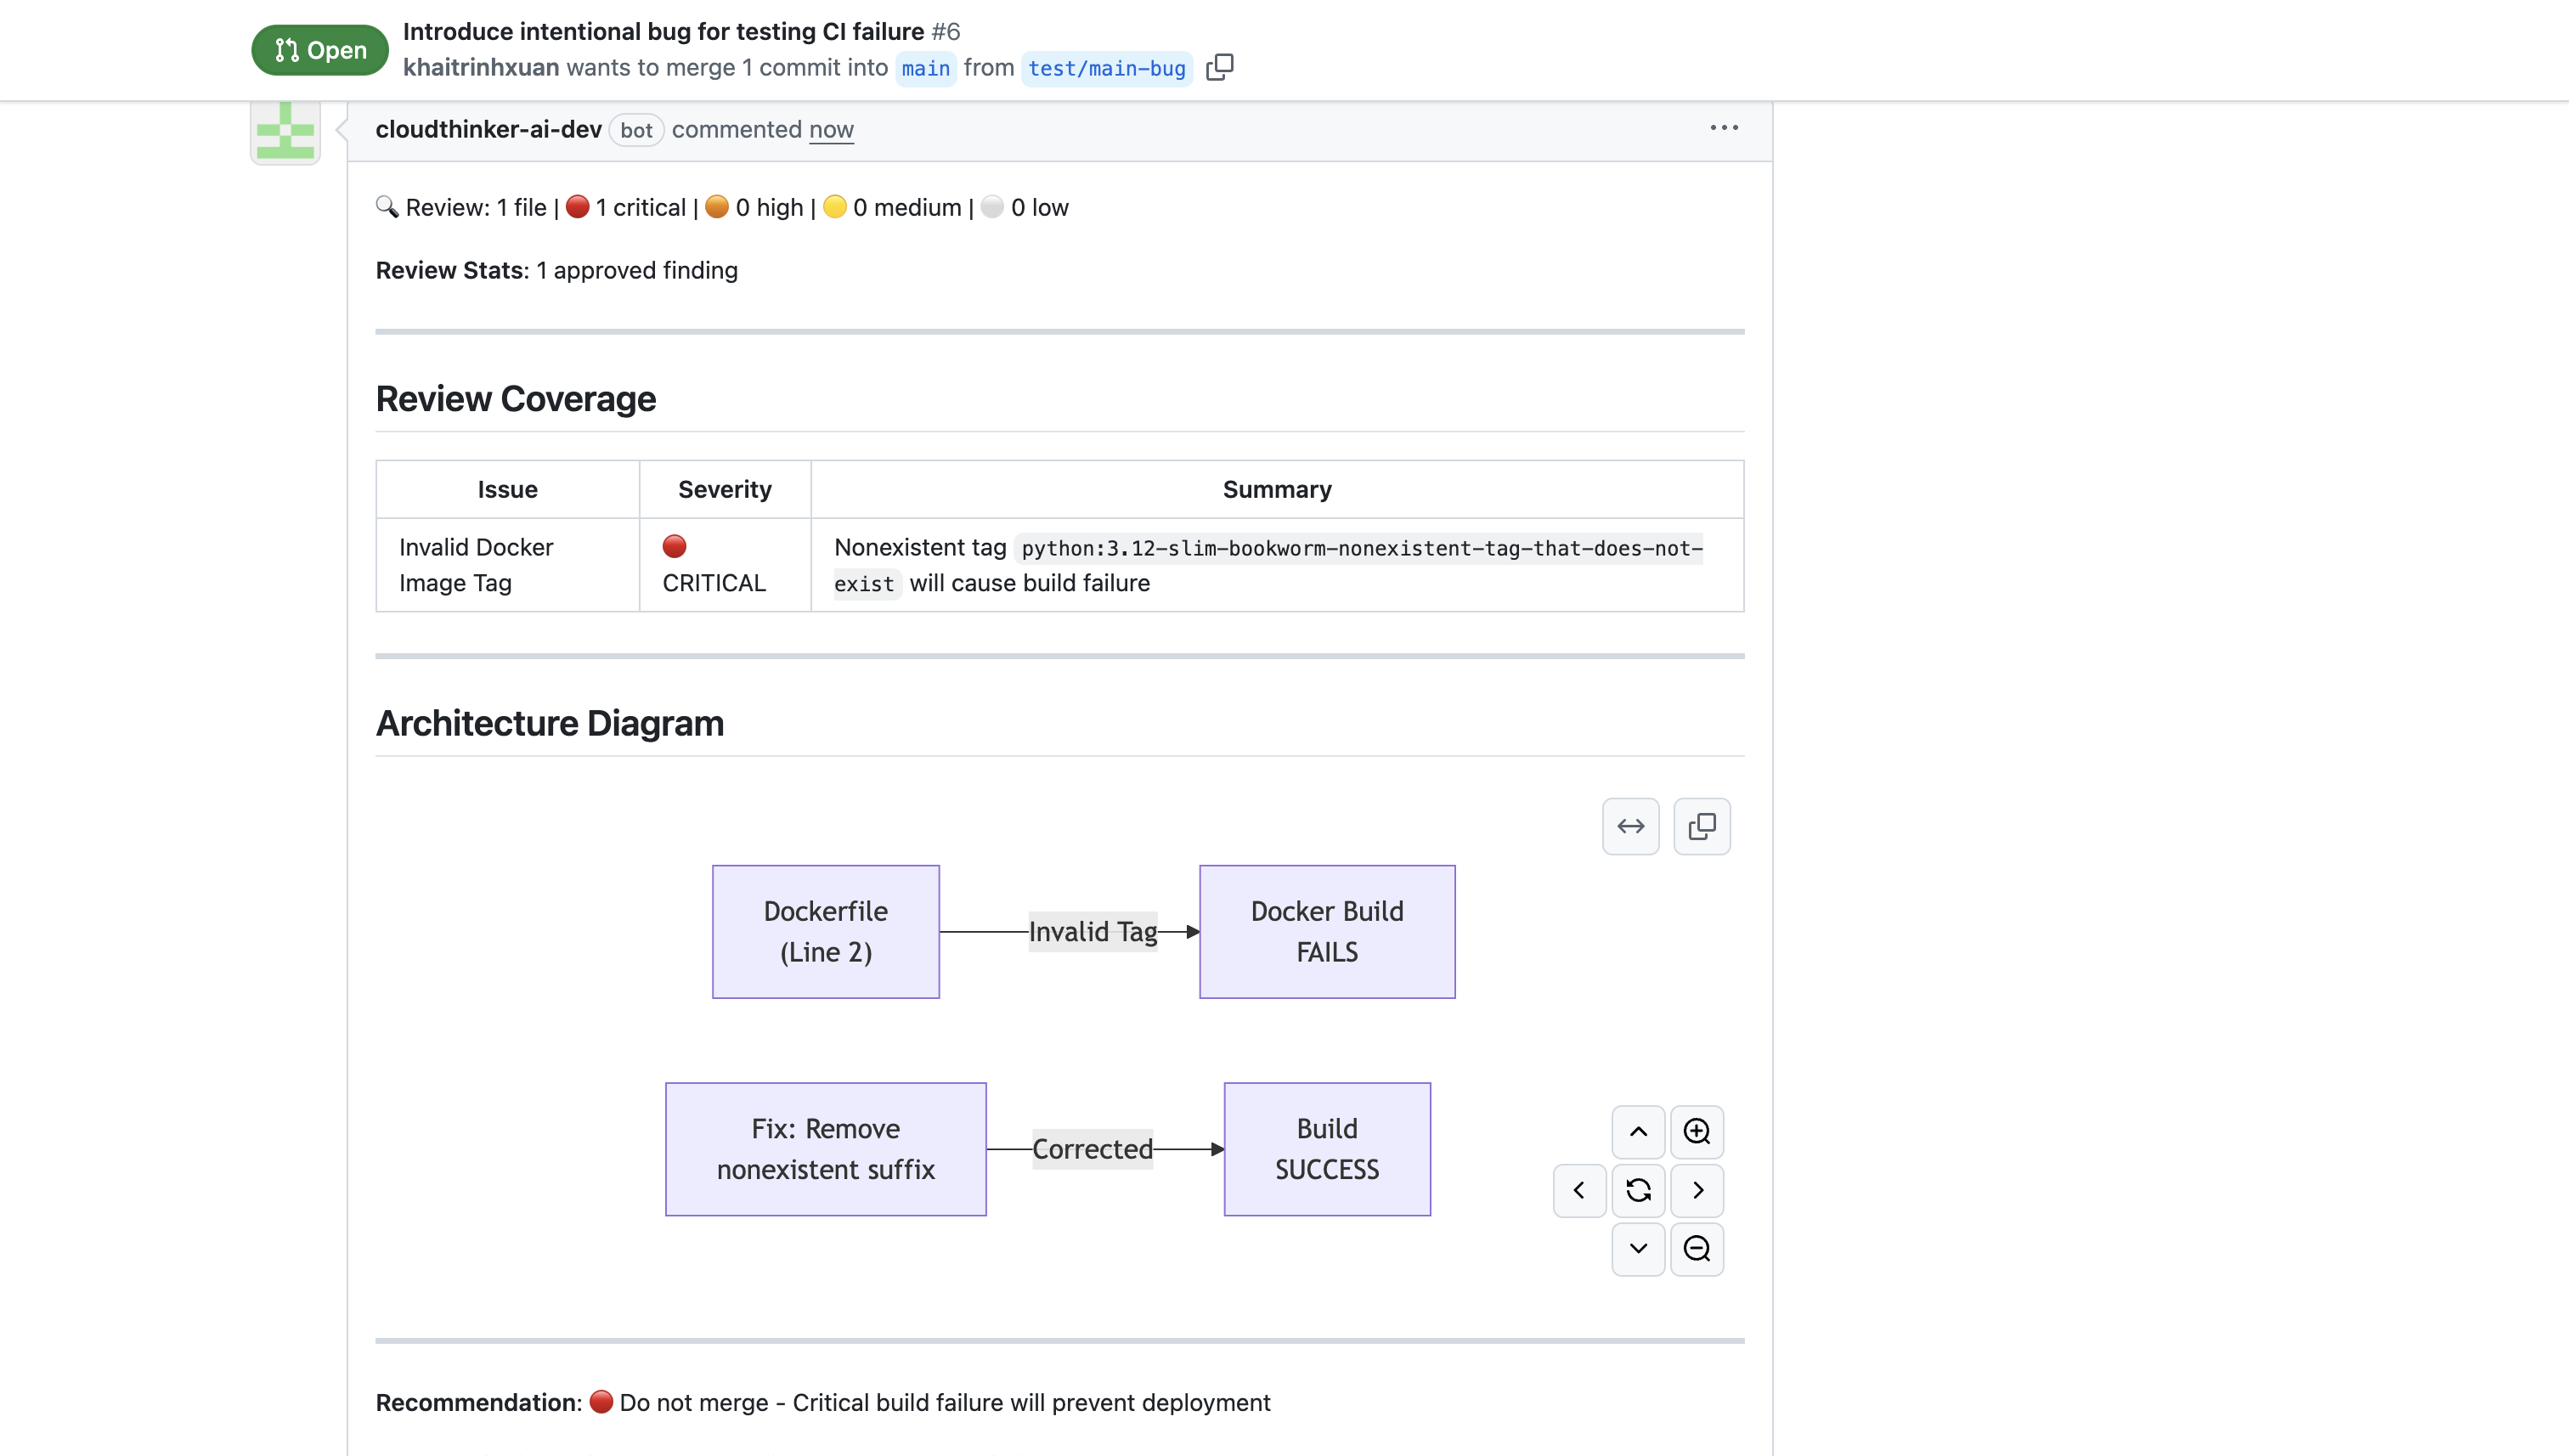
 Findings cover bug detection (logic errors, null references, race conditions), security vulnerabilities (injection risks, hardcoded secrets), code quality (naming, complexity, duplication), and performance (inefficient queries, N+1 patterns).
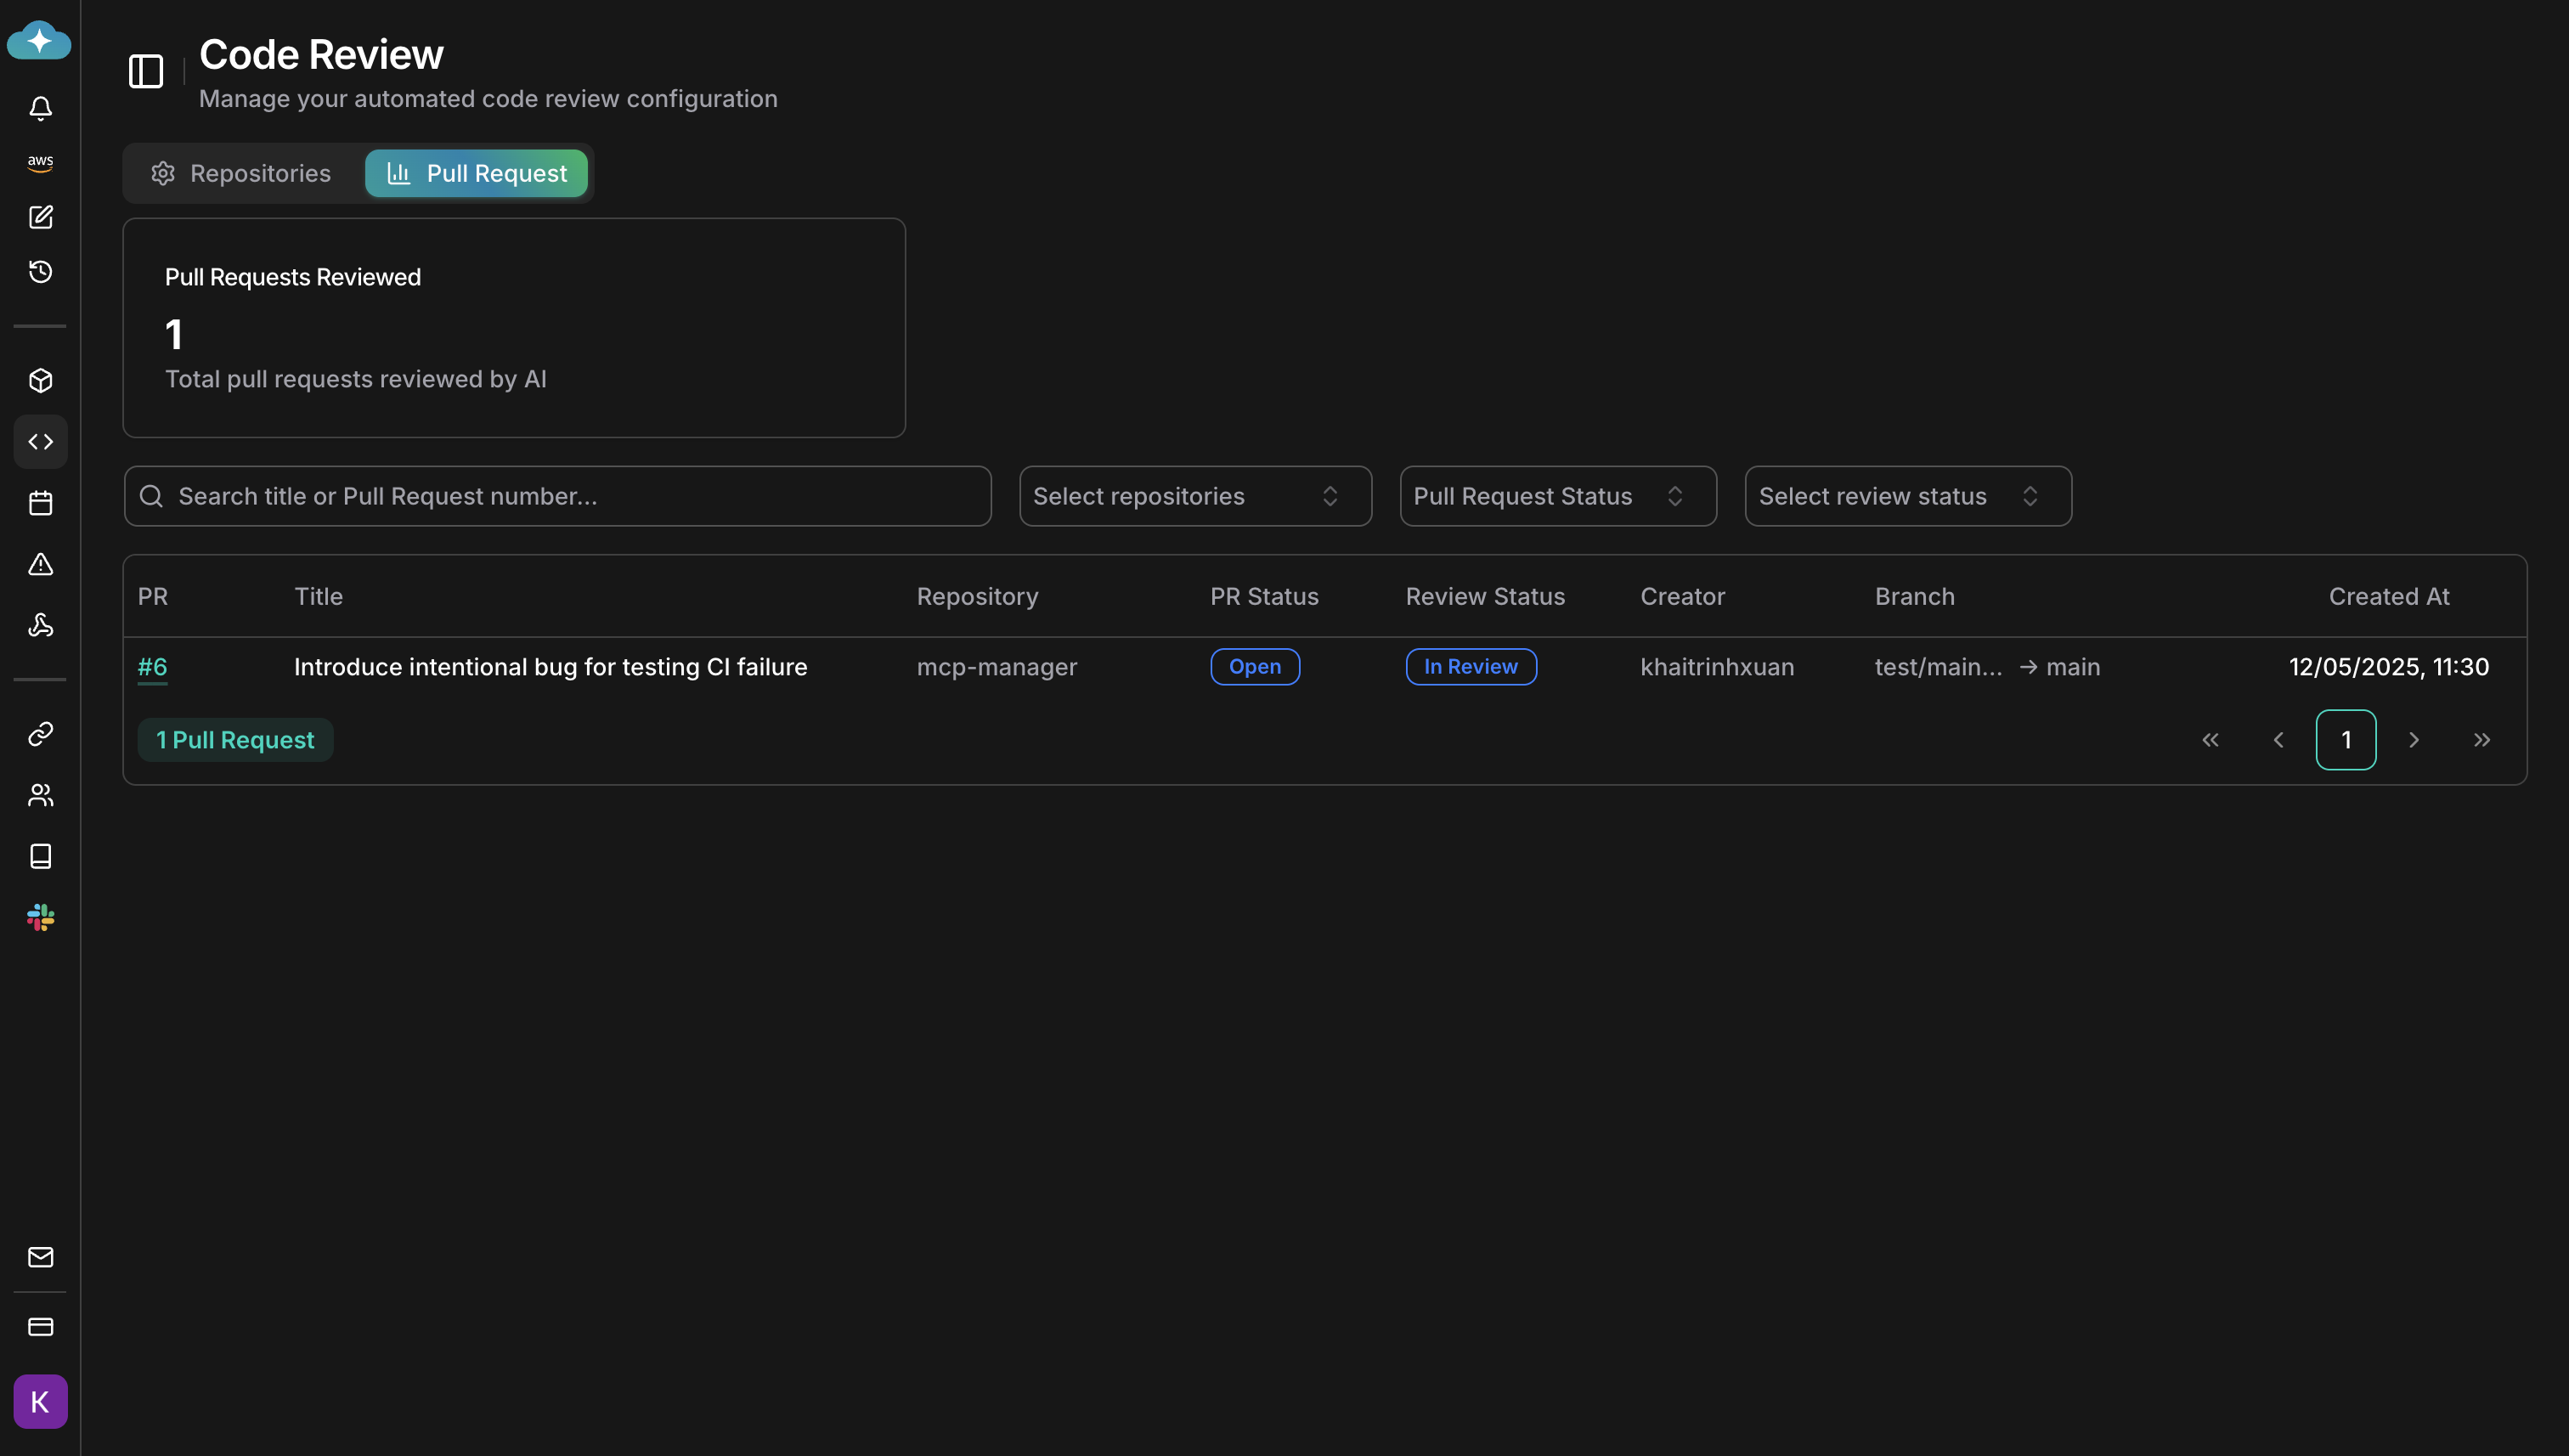
## Review the findings
View the review status for all your pull requests in the CloudThinker dashboard.
Findings cover bug detection (logic errors, null references, race conditions), security vulnerabilities (injection risks, hardcoded secrets), code quality (naming, complexity, duplication), and performance (inefficient queries, N+1 patterns).
## Review the findings
View the review status for all your pull requests in the CloudThinker dashboard.
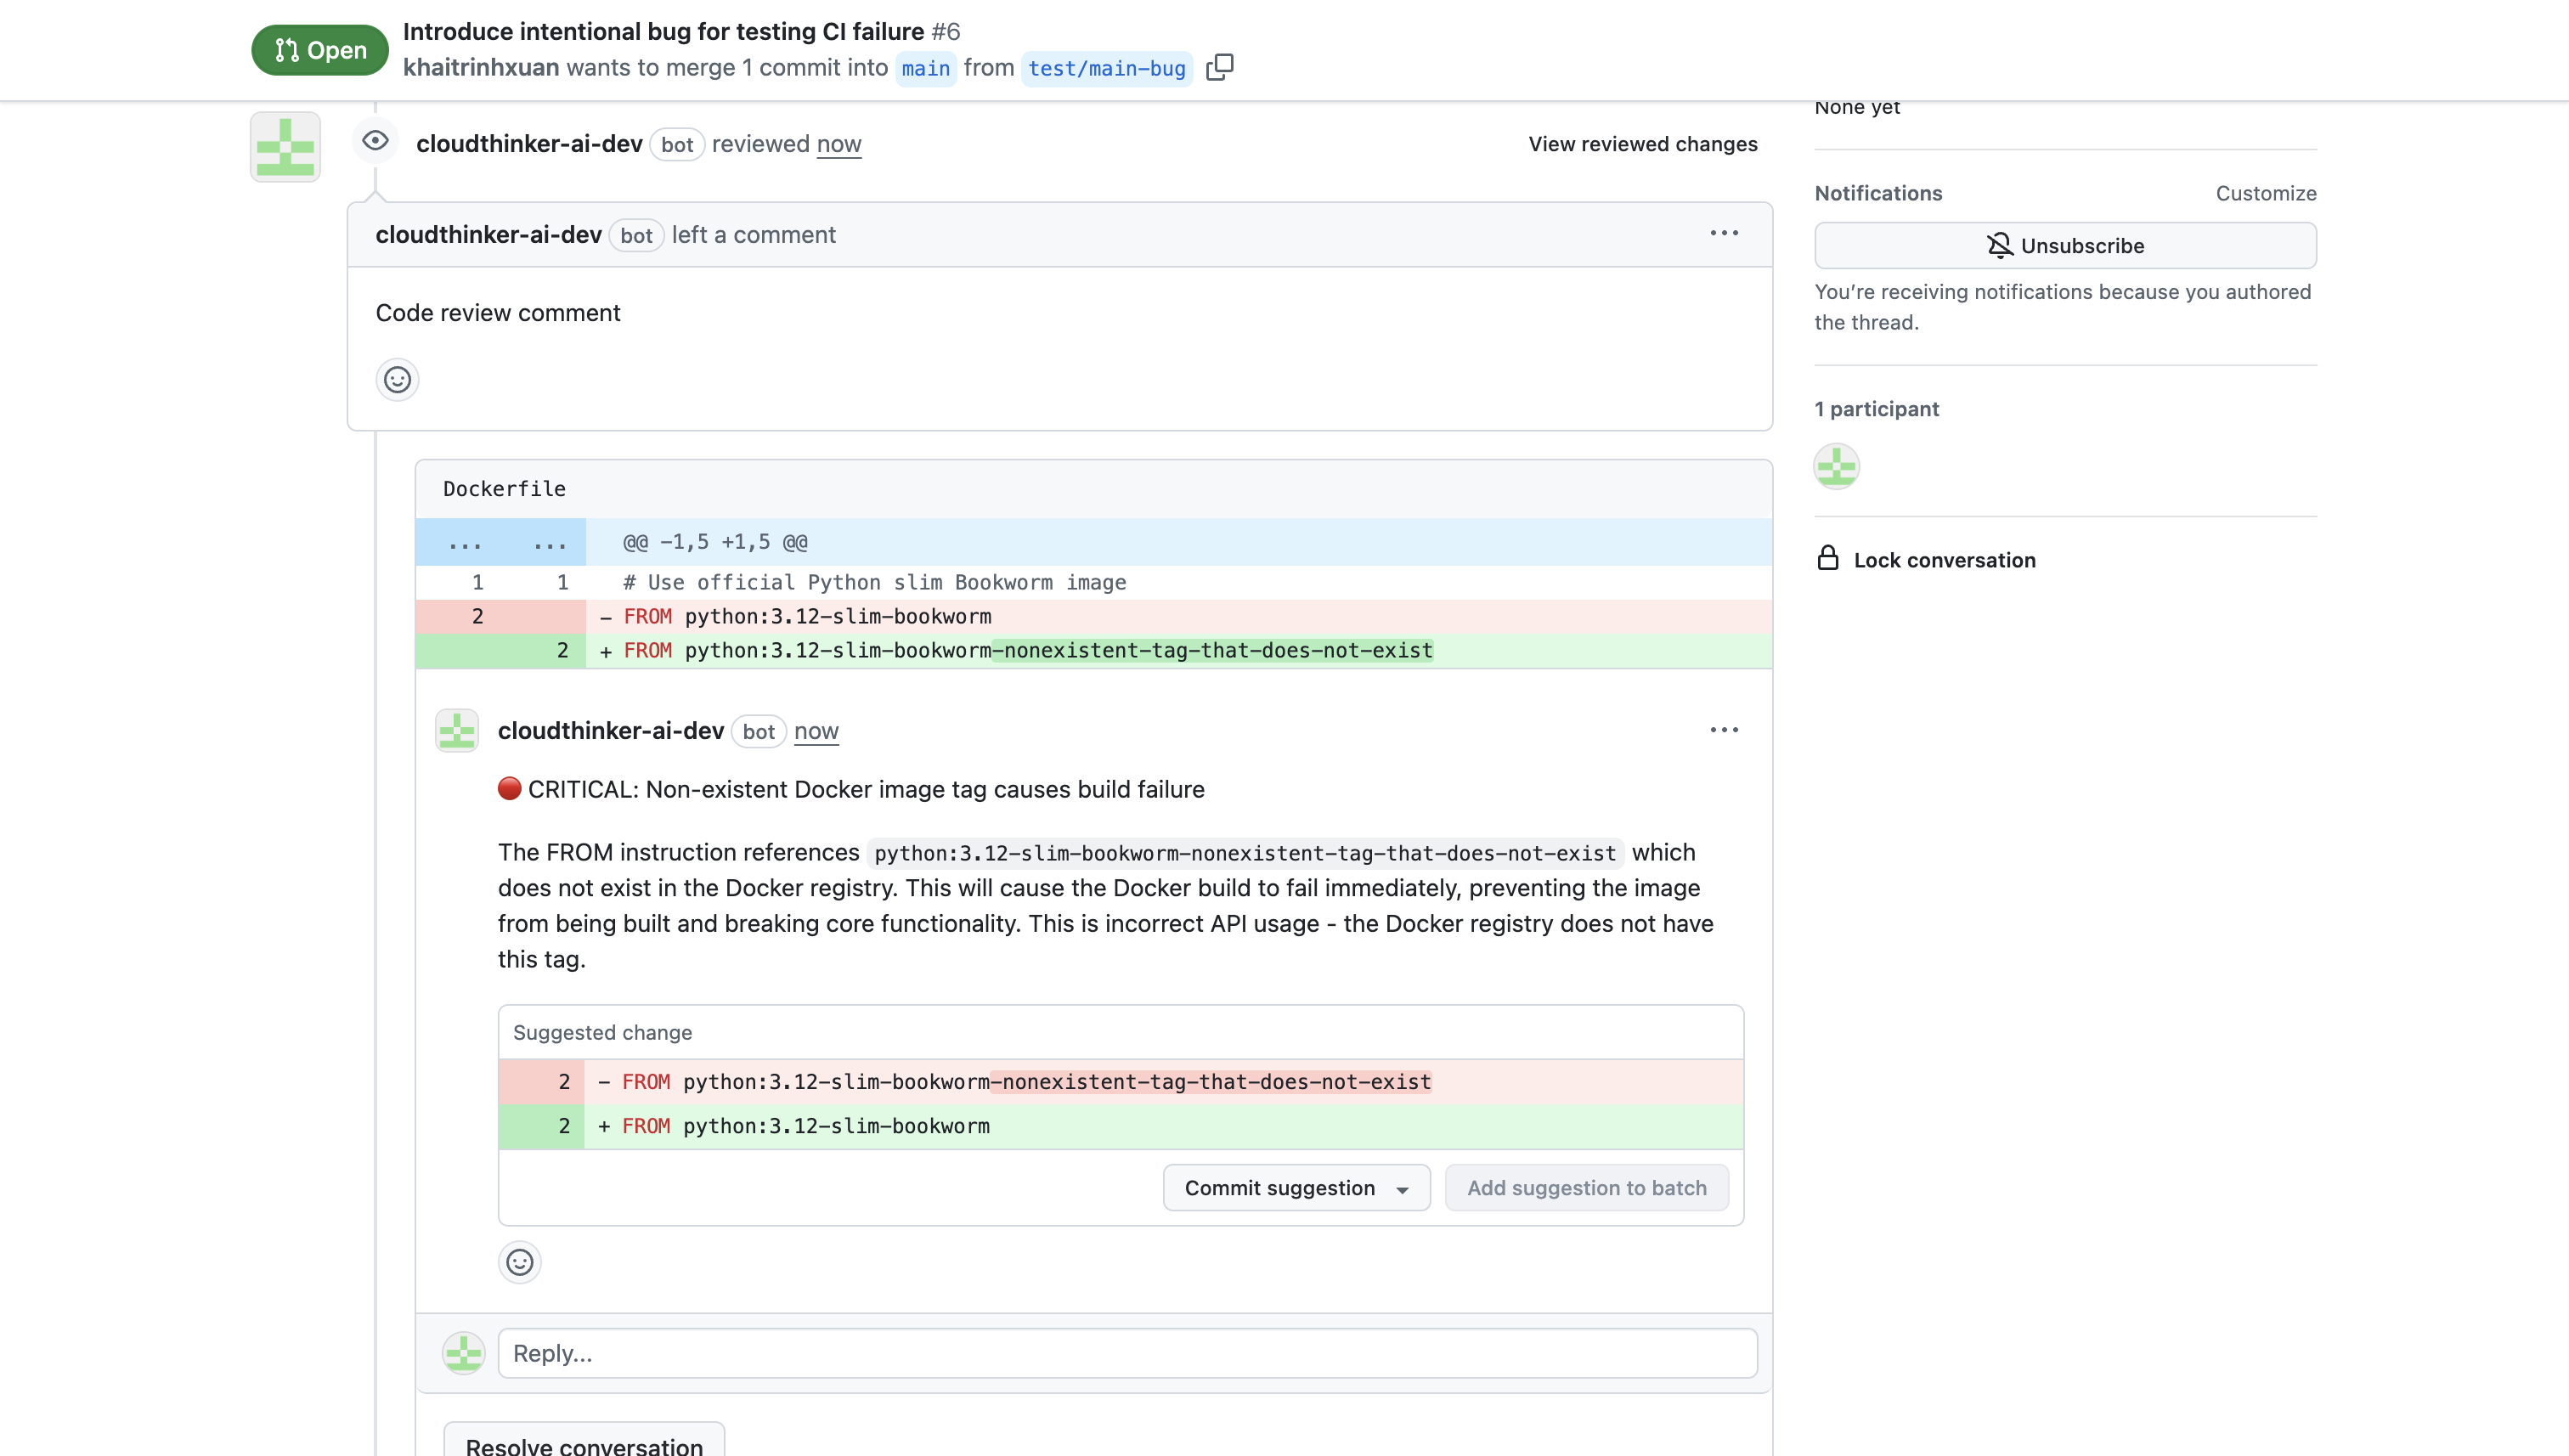
 Open your pull request to see the AI-generated summary and inline code comments. Each comment includes a severity level (Critical, High, Medium, Low), an explanation of the issue, and a suggested fix.
 Reply to `@cloudthinker-ai` on the PR to ask questions, request a re-review, or skip a review — see [mention commands](/guide/code-review/mention-commands).
## Review modes
Configure the review mode per repository and switch at any time in repository settings:
| Mode | Description |
| ------------ | ---------------------------------------------------------------------------------------------------------------------------------- |
| **Fast** | Quick analysis, lower cost. Ideal for small PRs and rapid feedback. |
| **Advanced** | Deep analysis split across specialist agents for security, performance, correctness, and patterns. Best for critical repositories. |
## Pipeline monitoring
CloudThinker monitors your CI/CD pipelines for failures. When a pipeline fails, CloudThinker:
1. Detects the failed pipeline run
2. Fetches and analyzes the failed job logs
3. Posts findings and suggested fixes directly on the PR
Pipeline monitoring can be toggled on or off per workspace and is **enabled by default**. For Azure DevOps, CloudThinker monitors `build.complete` events alongside pull request events (`git.pullrequest.created`, `git.pullrequest.updated`).
## Filter configuration
Control which PRs and MRs CloudThinker reviews using per-repository filters:
* **Label filters**: Include or exclude PRs with specific labels
* **Author filters**: Include or exclude specific authors (useful for excluding bot authors)
* **Branch filters**: Include or exclude branches matching specific patterns (filters by target branch — the branch being merged into)
**Exclude** filters are checked first. **Include** filters must all pass. PRs that match an exclude filter are marked as **FILTERED** and skipped entirely.
## Incremental reviews
When you push new commits to an open PR, CloudThinker performs an **incremental review** — only the new changes are analyzed, not the entire PR. This keeps reviews fast and focused on what actually changed.
## Next steps
Interact with the review bot from PR comments — re-review, ask questions, or skip a review
Track team review activity and measure code quality improvements over time
Teach reviews your team's coding conventions using files already in your repository
Configure where code review findings are delivered
Reply to `@cloudthinker-ai` on the PR to ask questions, request a re-review, or skip a review — see [mention commands](/guide/code-review/mention-commands).
## Review modes
Configure the review mode per repository and switch at any time in repository settings:
| Mode | Description |
| ------------ | ---------------------------------------------------------------------------------------------------------------------------------- |
| **Fast** | Quick analysis, lower cost. Ideal for small PRs and rapid feedback. |
| **Advanced** | Deep analysis split across specialist agents for security, performance, correctness, and patterns. Best for critical repositories. |
## Pipeline monitoring
CloudThinker monitors your CI/CD pipelines for failures. When a pipeline fails, CloudThinker:
1. Detects the failed pipeline run
2. Fetches and analyzes the failed job logs
3. Posts findings and suggested fixes directly on the PR
Pipeline monitoring can be toggled on or off per workspace and is **enabled by default**. For Azure DevOps, CloudThinker monitors `build.complete` events alongside pull request events (`git.pullrequest.created`, `git.pullrequest.updated`).
## Filter configuration
Control which PRs and MRs CloudThinker reviews using per-repository filters:
* **Label filters**: Include or exclude PRs with specific labels
* **Author filters**: Include or exclude specific authors (useful for excluding bot authors)
* **Branch filters**: Include or exclude branches matching specific patterns (filters by target branch — the branch being merged into)
**Exclude** filters are checked first. **Include** filters must all pass. PRs that match an exclude filter are marked as **FILTERED** and skipped entirely.
## Incremental reviews
When you push new commits to an open PR, CloudThinker performs an **incremental review** — only the new changes are analyzed, not the entire PR. This keeps reviews fast and focused on what actually changed.
## Next steps
Interact with the review bot from PR comments — re-review, ask questions, or skip a review
Track team review activity and measure code quality improvements over time
Teach reviews your team's coding conventions using files already in your repository
Configure where code review findings are delivered