

What you can change
Open Agents to start. The left panel groups agents into Core Team (the five defaults) and Custom (your own). Click any agent to open its settings dialog — two tabs (Identity, Connections). Personality (Instructions, Language, Learning mode) lives at the bottom of the Identity tab.Customizing agents requires the workspace Admin role. Developers and Viewers can chat with agents but can’t edit them.
Default agents come pre-optimized for specialized tasks (cloud, security, database, Kubernetes, and Anna for coordination). Their identity and instructions stay locked so the tuning isn’t lost — you can still adjust Language, Learning mode, and Connections to fit your workflow. To change how an agent reasons about your environment, create a custom agent instead.
Plan tiers
Editing default agents works on every plan. Only the number of custom agents changes.
Hit the limit? Delete an unused agent or upgrade your plan.
Create a custom agent
Need an agent for something the defaults don’t cover — a billing analyst, an on-call summarizer, a documentation specialist? Build your own. Click the + next to Custom on the Agents page, then pick how to create it. You can also reach agent settings from Chat Settings (the gear icon beside the + button in the chat prompt box) under Agent Configuration → Agents.- Create with AI
- Create manually
Best when you know what the agent should do but don’t want to fill every field yourself.Describe what you want in one sentence — Anna takes it from there. She typically confirms:
- Name and @mention — suggests options based on your description.
- Role and Goal — drafts both for you to approve or tweak.
- Model Tier — recommends Light / Pro / Ultra based on task complexity.
- Instructions — generates a first draft you can refine.
- Connections — asks which to attach (cloud, database, Kubernetes, or MCP — an open standard for plugging in external tools).
- Learning mode — whether the agent saves new skills (reusable know-how it picks up from your work) automatically (Auto) or asks first (Offer).
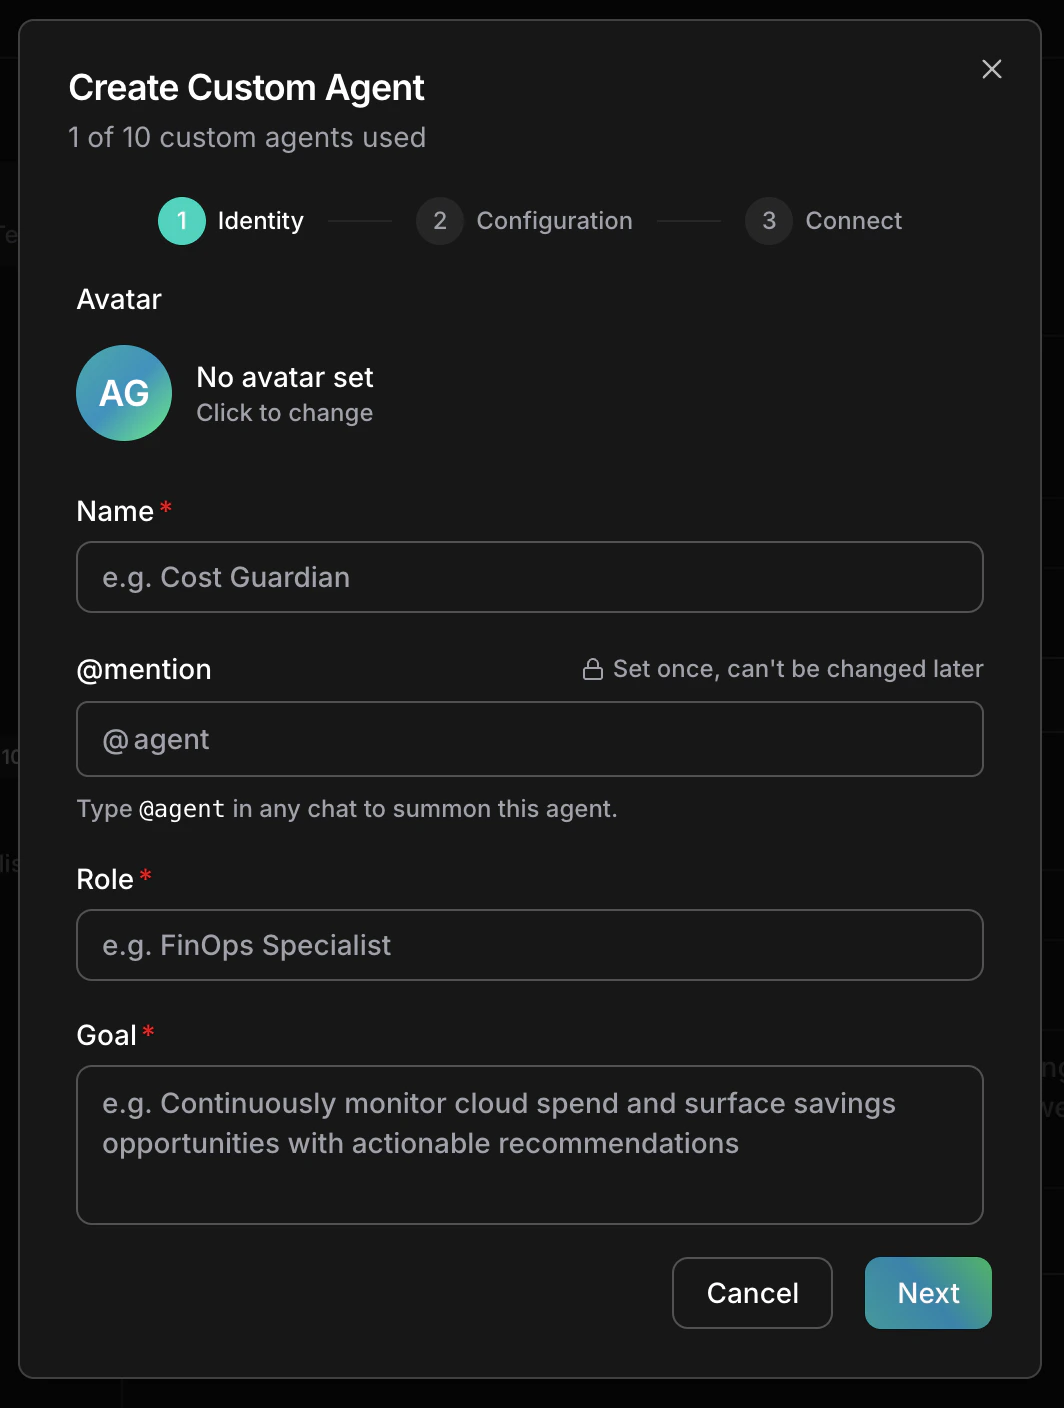
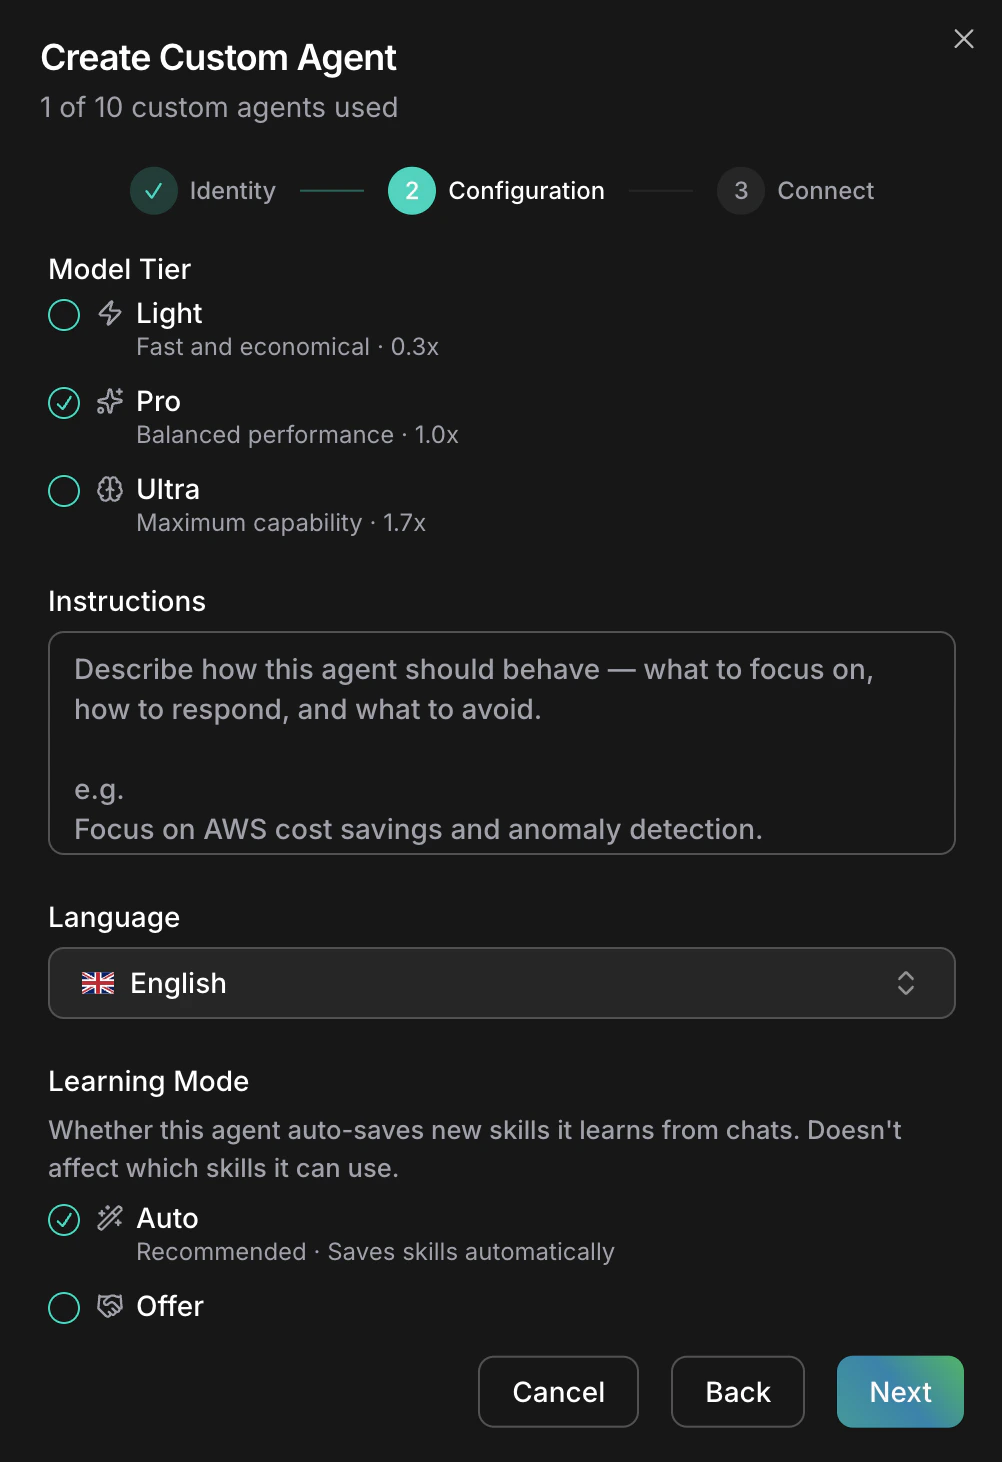
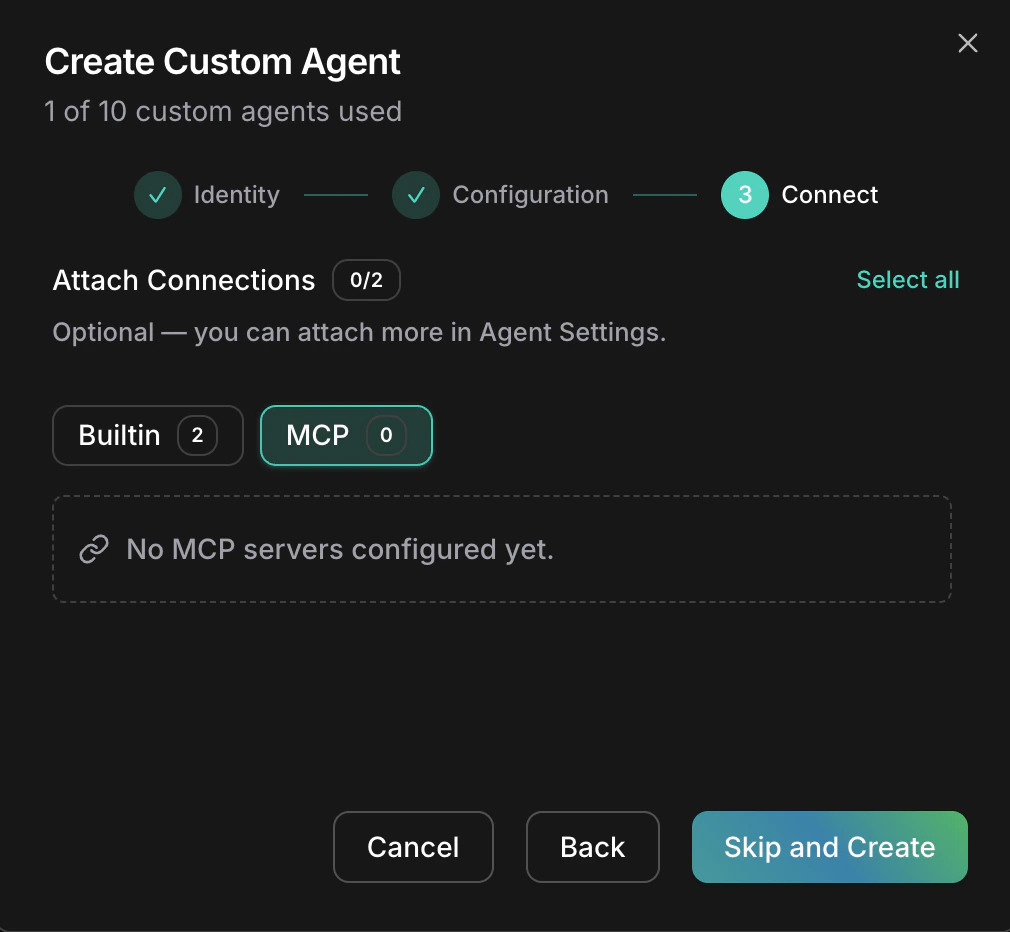
Edit a default agent
Change the reply language and learning mode. The agent’s identity (name, @mention, role, goal) and instructions stay locked — only how it speaks and saves skills changes.1
Open the agent
Go to Agents and click an agent in Core Team. The dialog opens on the Identity tab.
2
Edit the unlocked fields
On the Identity tab, Name, Role, Goal, and Instructions are locked with a “Set by CloudThinker, can’t be changed” hint; @mention shows “Set once, can’t be changed later”. Scroll down on the same tab to edit:
- Language — reply language.
- Learning mode — Auto saves new skills automatically; Offer asks before saving.
3
Save
Click Save in the bottom-right. Your changes apply on the next message.
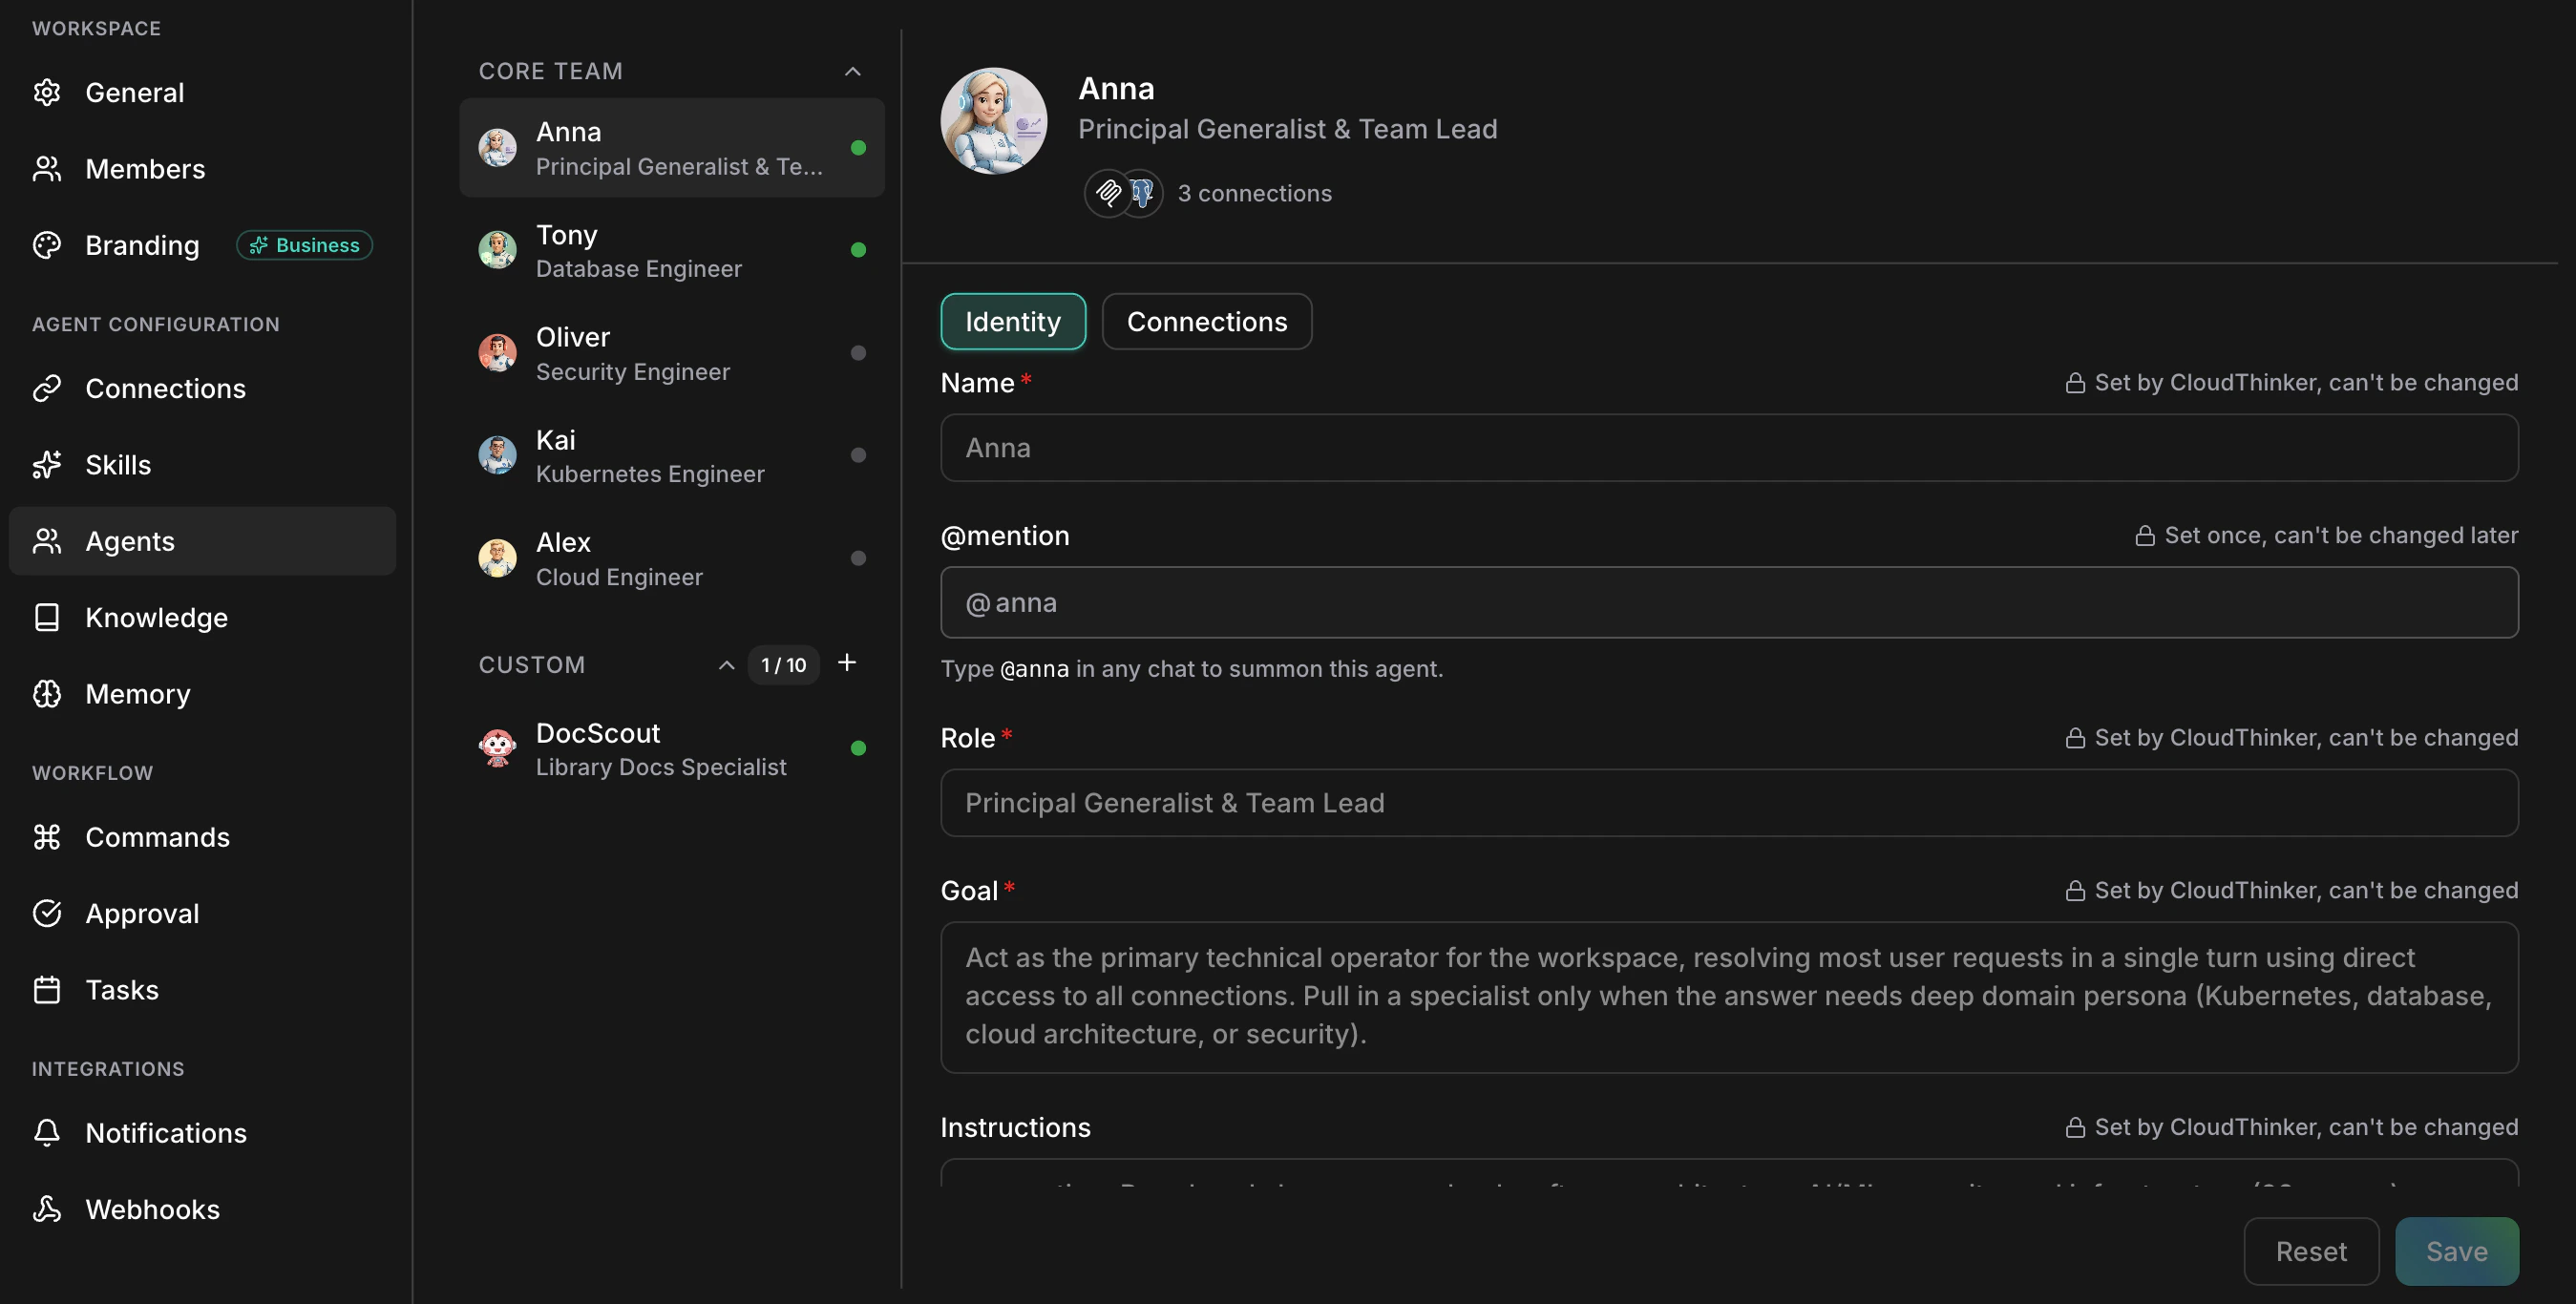
Attach connections
Connections are how an agent reaches your cloud, databases, Kubernetes, or MCP servers. Alex, Oliver, Tony, and Kai start with no connections — you decide what each can touch. Every agent has the same set of builtin tools — there is no per-agent tool toggle, so scope an agent by choosing its connections. An agent accepts up to 64 connections.1
Open the Connections tab
From the agent dialog, click Connections. The header shows the count (e.g. “3 connections”).
2
Pick Builtin or MCP
Use the sub-tabs to switch between Builtin (cloud, database, Kubernetes) and MCP.
3
Add or remove
Click Add to attach, Remove to detach. Save to apply.
A default agent with no connections is automatically off — attach at least one to turn it back on.
Anna’s connections are managed for you. Anna coordinates the other agents and inherits their reach, so her Connections tab is read-only. Attach connections to Alex, Oliver, Tony, or Kai instead.
Examples
Good instructions cover three areas: role context (expertise for your environment), scope limits (what the agent should and shouldn’t touch), and operational guidelines (procedures and escalation paths). For example:
Things to know
- Edits apply on the next message — in-flight chats finish under the old settings.
- Pick a custom agent’s @mention carefully — it’s set once and you’ll be living with it.
- Custom and default agents alike act under your workspace’s autonomy mode — Manual or Auto. See Auto Mode.
Next steps
Set up connections
Wire up cloud, database, Kubernetes, and MCP connections
Meet the default agents
Profiles for Alex, Oliver, Tony, Kai, and Anna
Custom skills
Add domain knowledge to any agent
CloudThinker language
@agent #tool mention syntax