

App Pentesting is in beta. Find it under App Pentesting in the navigation menu.
Prerequisites
- A domain you own, and the ability to add a DNS record for it.
- Optional: a connected Git provider, if you want Oliver to read your source code.
Register your app
1
Open App Pentesting
Go to App Pentesting from the navigation menu, then click Register your first app. If you already have apps, click New app instead.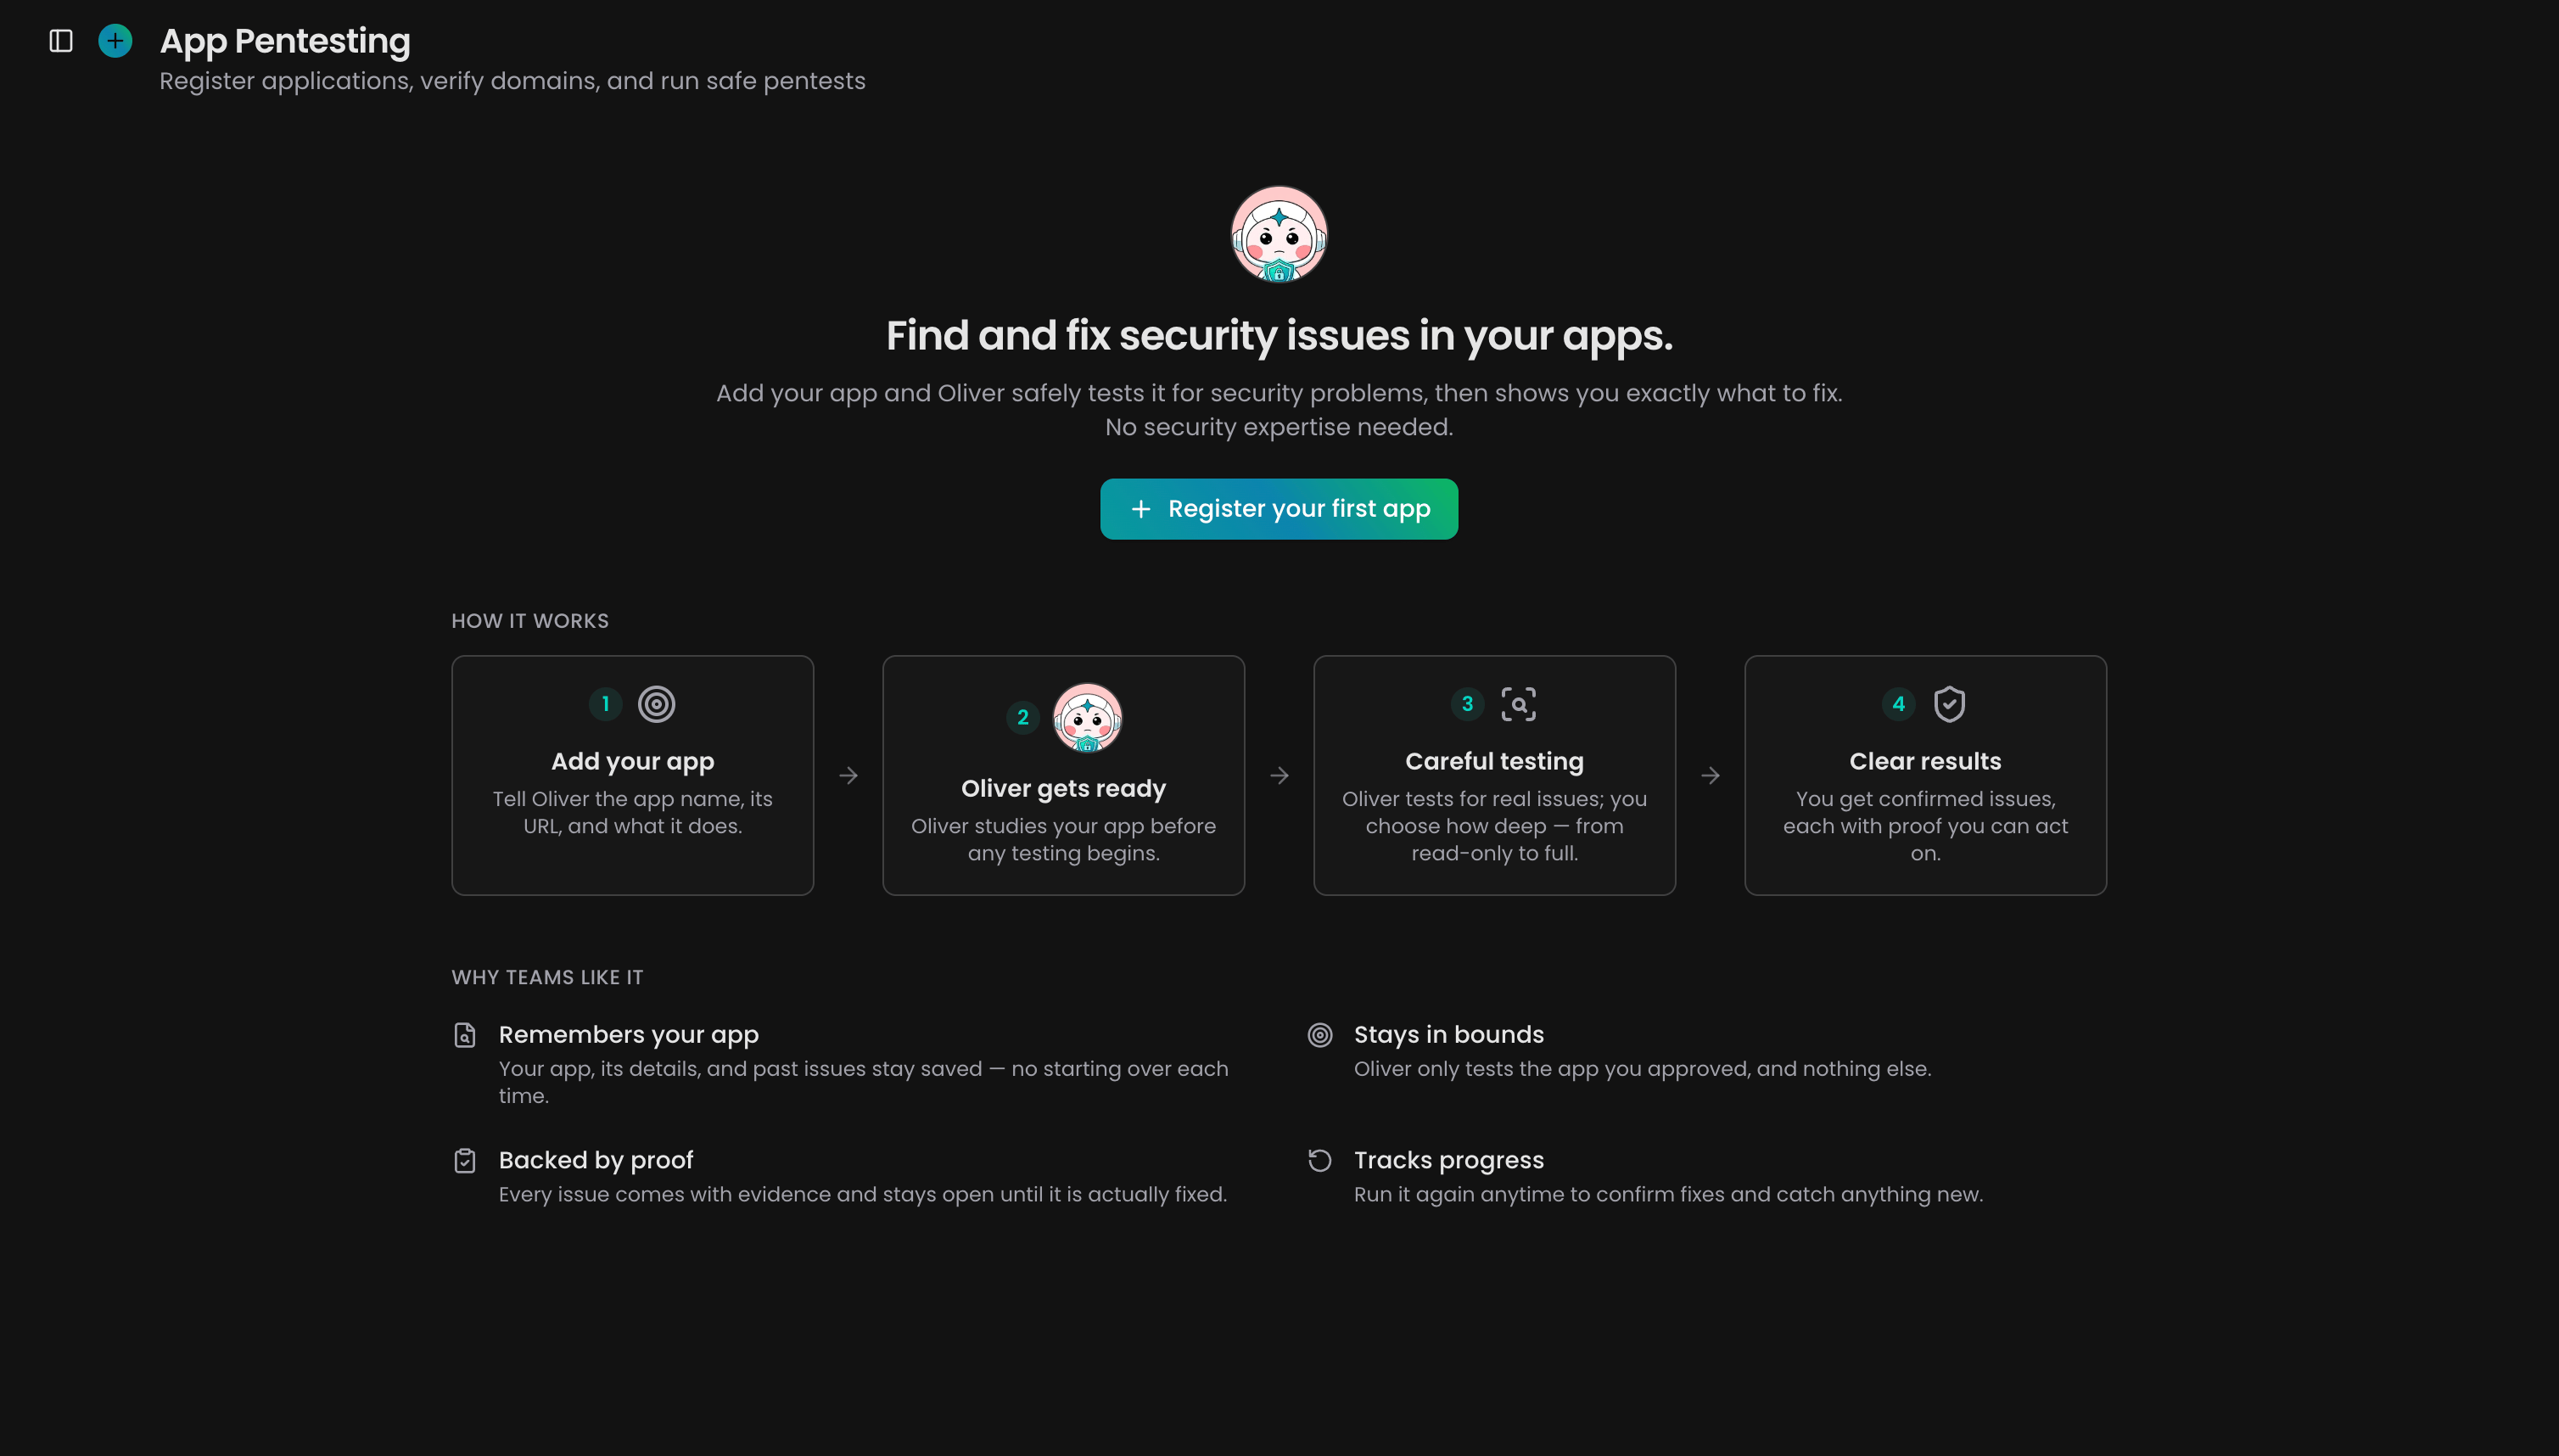
2
Describe the target
Enter an App name and a Target — a domain like 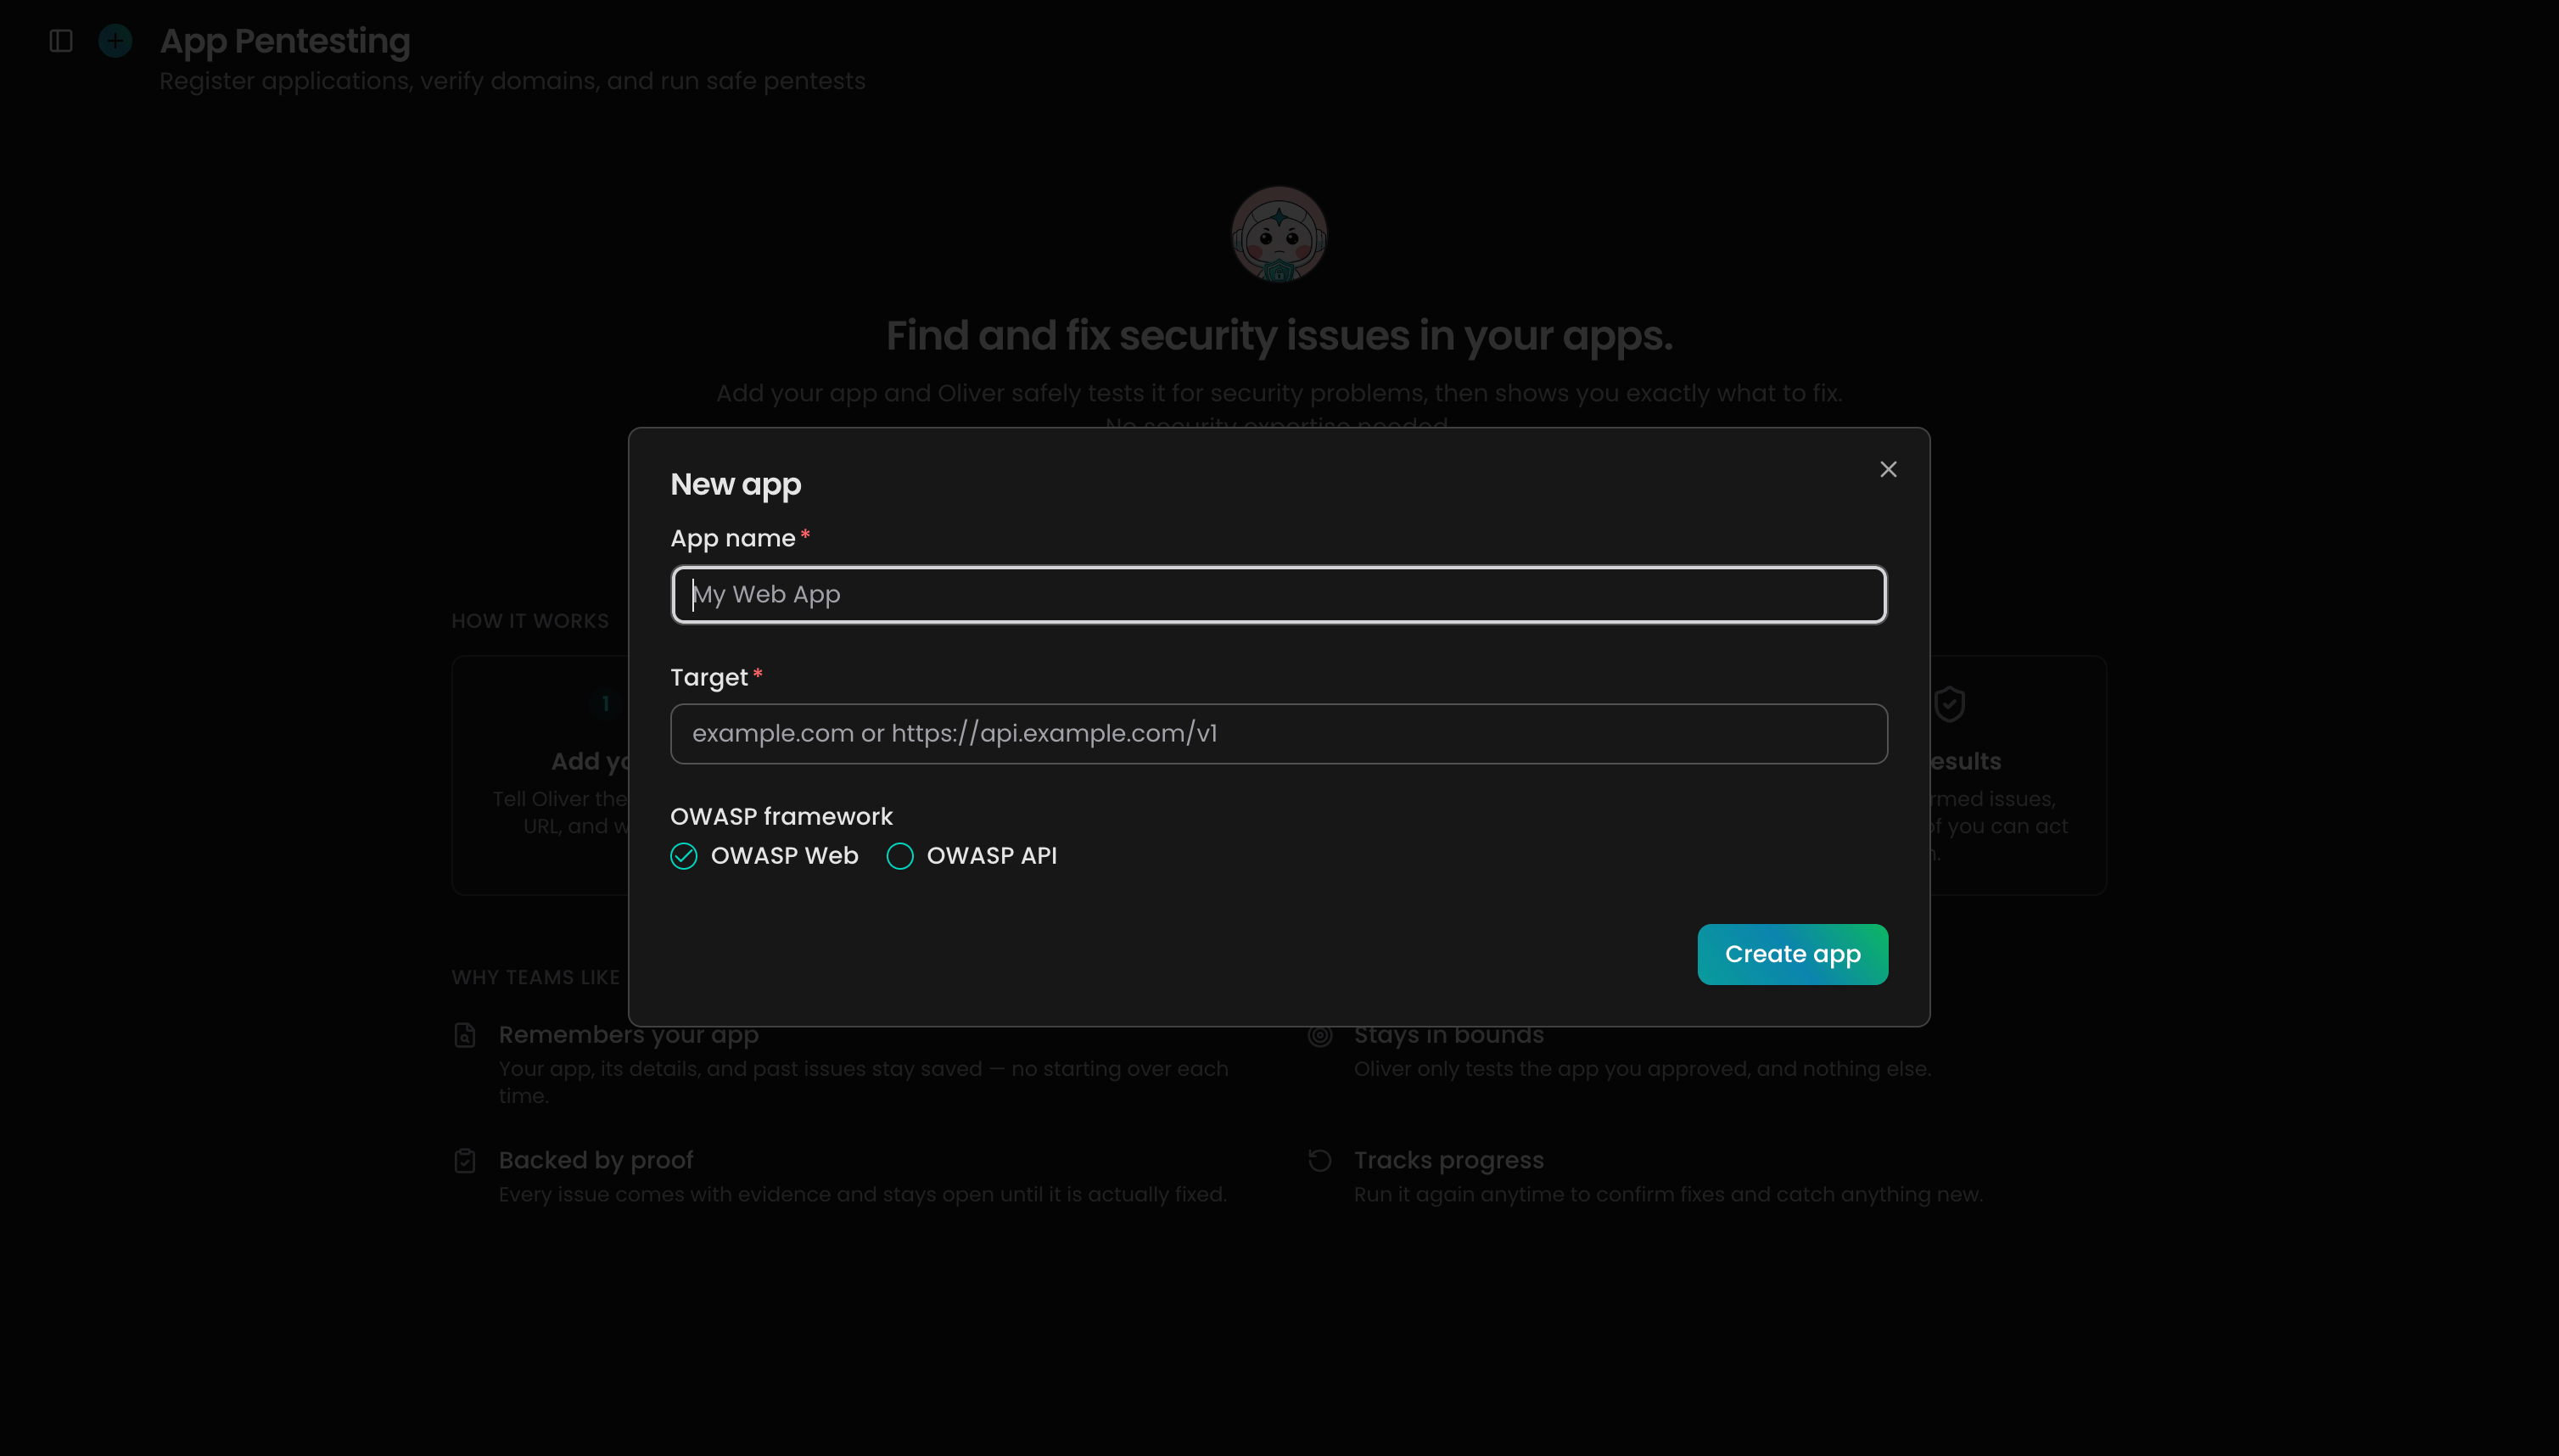
example.com or an API base URL like https://api.example.com/v1. CloudThinker suggests an OWASP framework from the target: OWASP Web for a site, OWASP API for an API URL. Change it if the suggestion is wrong.3
Create the app
Click Create app.Success state: the app overview opens and shows No pentests yet, with a Verify domain button. Verify the domain next — you can’t run a pentest until you do.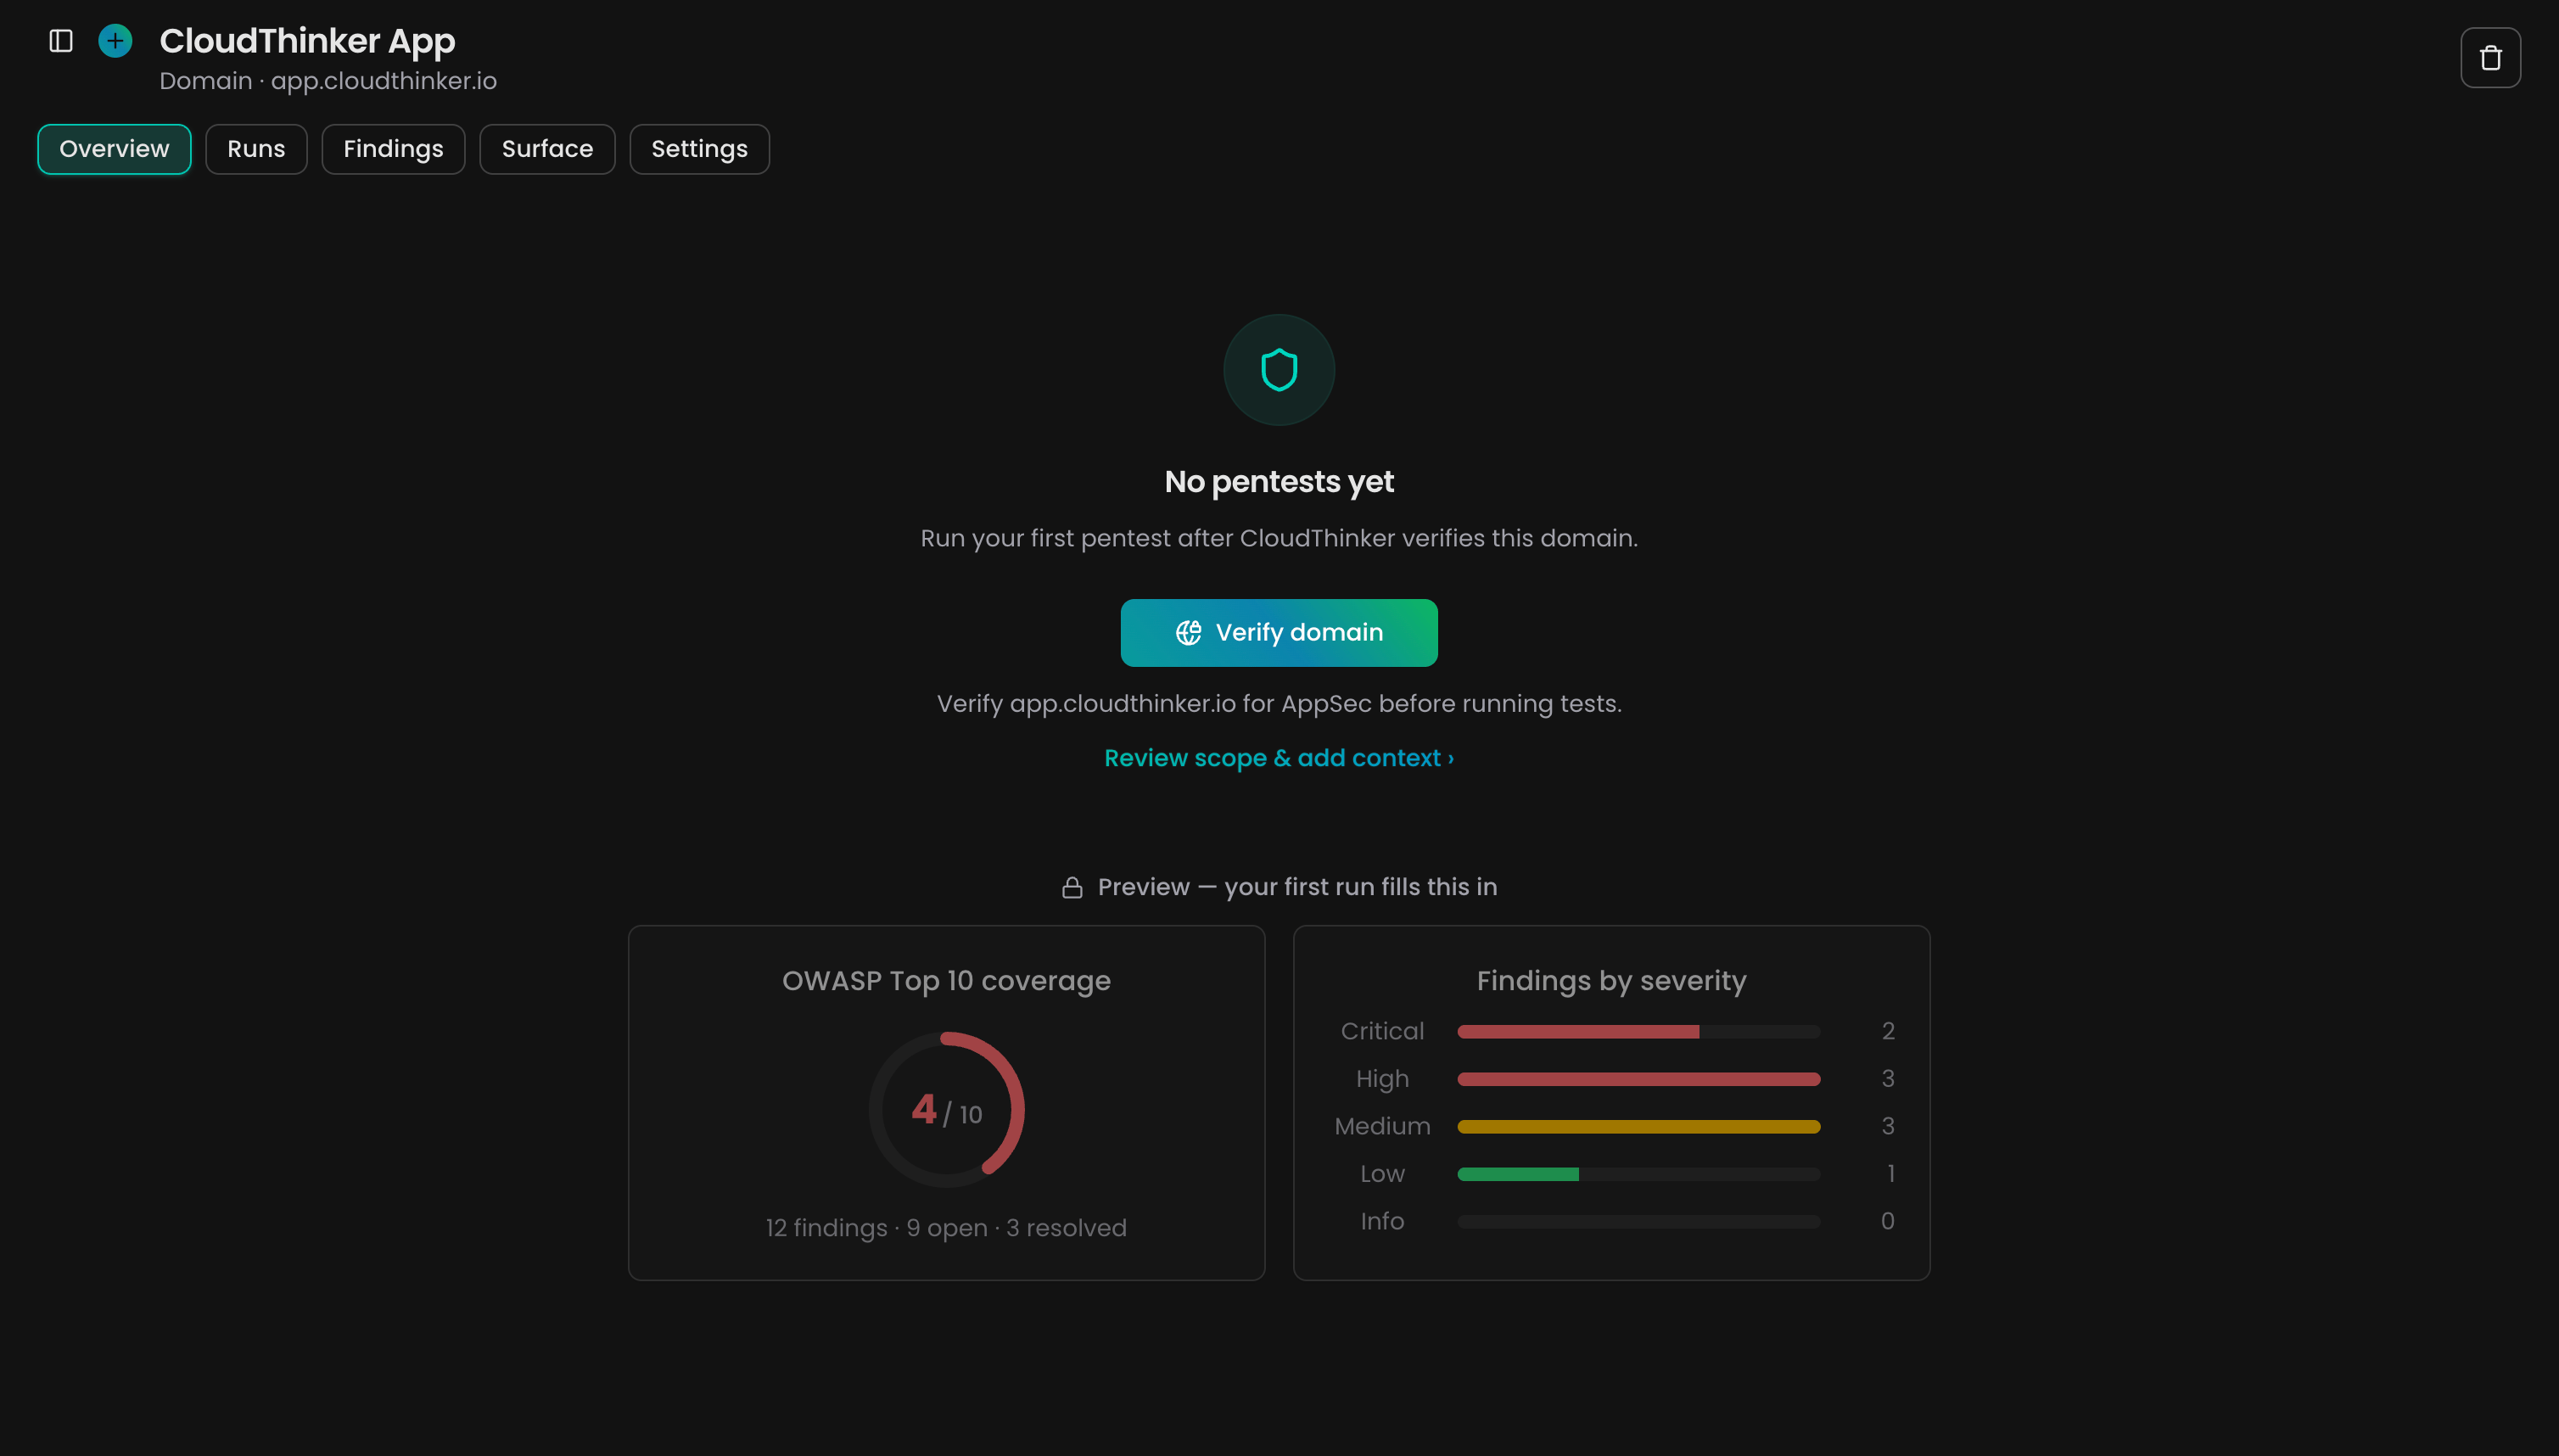
Verify the domain
CloudThinker only tests sites you can prove you own. You do this once per domain, and every app on that domain reuses the proof.1
Add the domain
Open App Pentesting → Settings. Under Verified domains, click Add domain — or Manage domains if you have verified one before — and enter the host in the Domain field.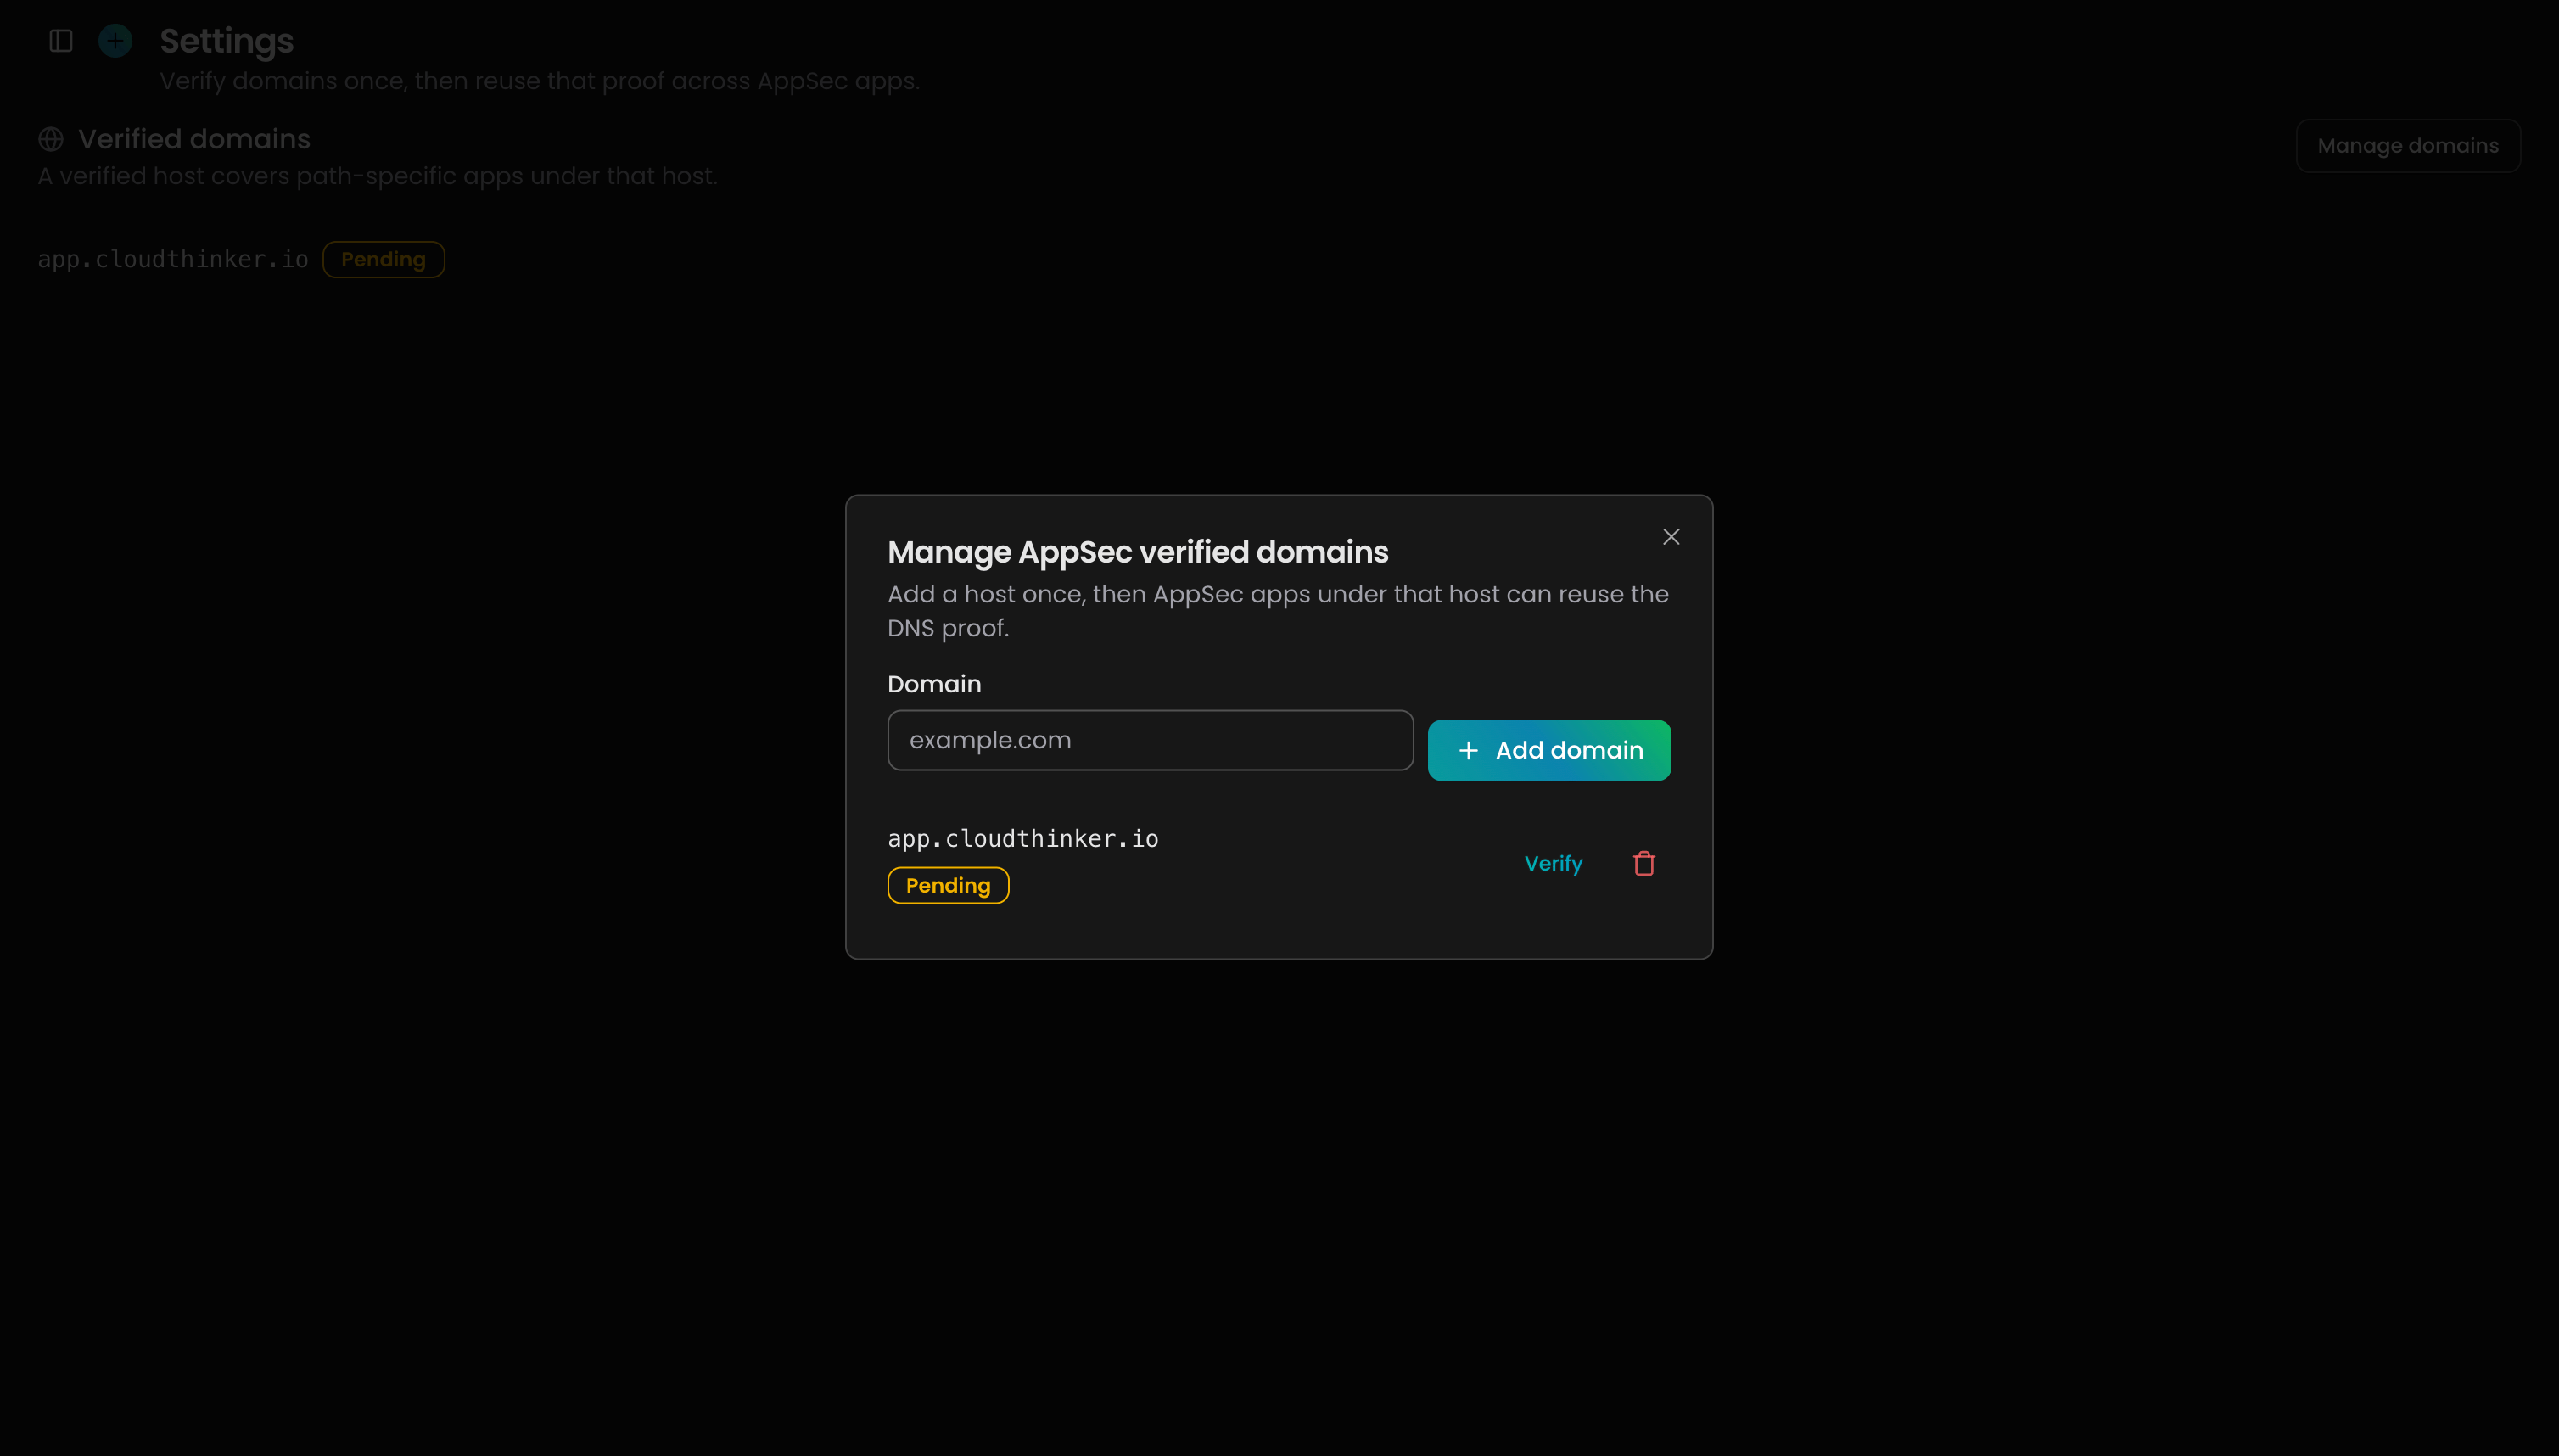
2
Publish the TXT record
Copy the TXT name and TXT value, add them at your DNS provider, then click Check DNS. DNS propagation can take a few minutes, so retry if the first check fails.Success state: the domain badge reads Verified.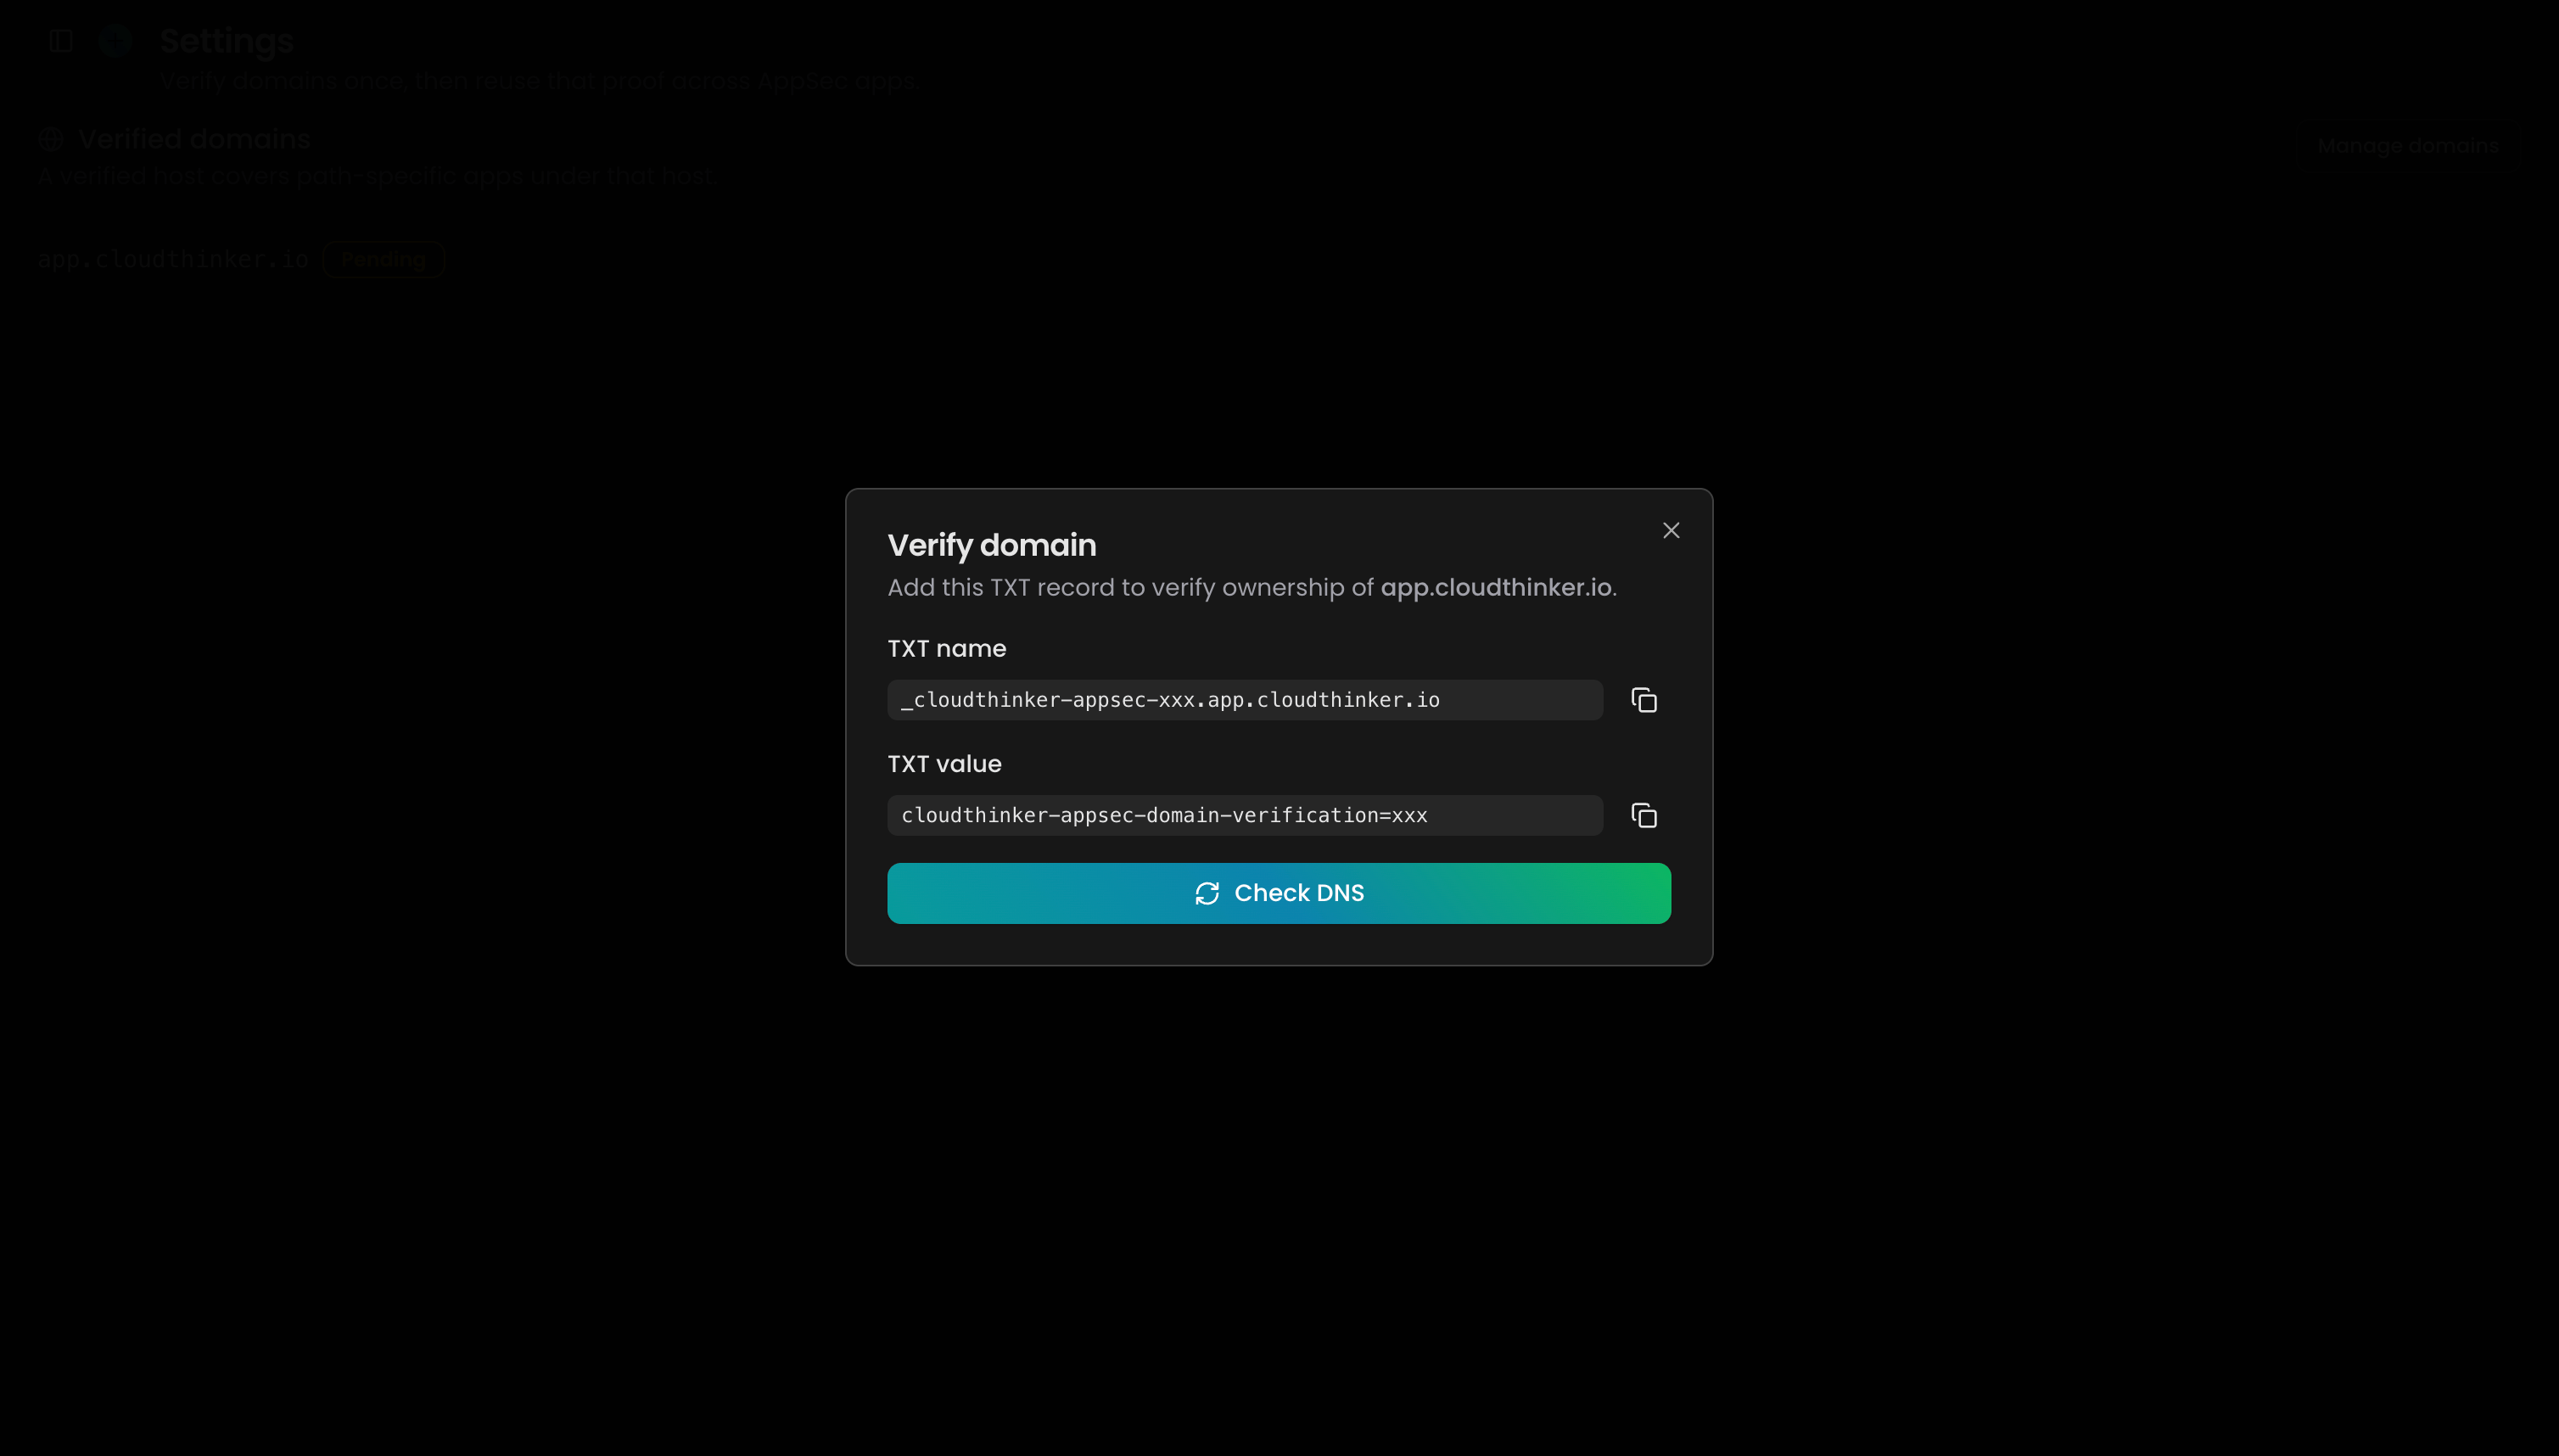
Set the boundaries
Open the app’s Settings tab. What you set here decides how much Oliver can find. Everything saves as you type — there’s no save button.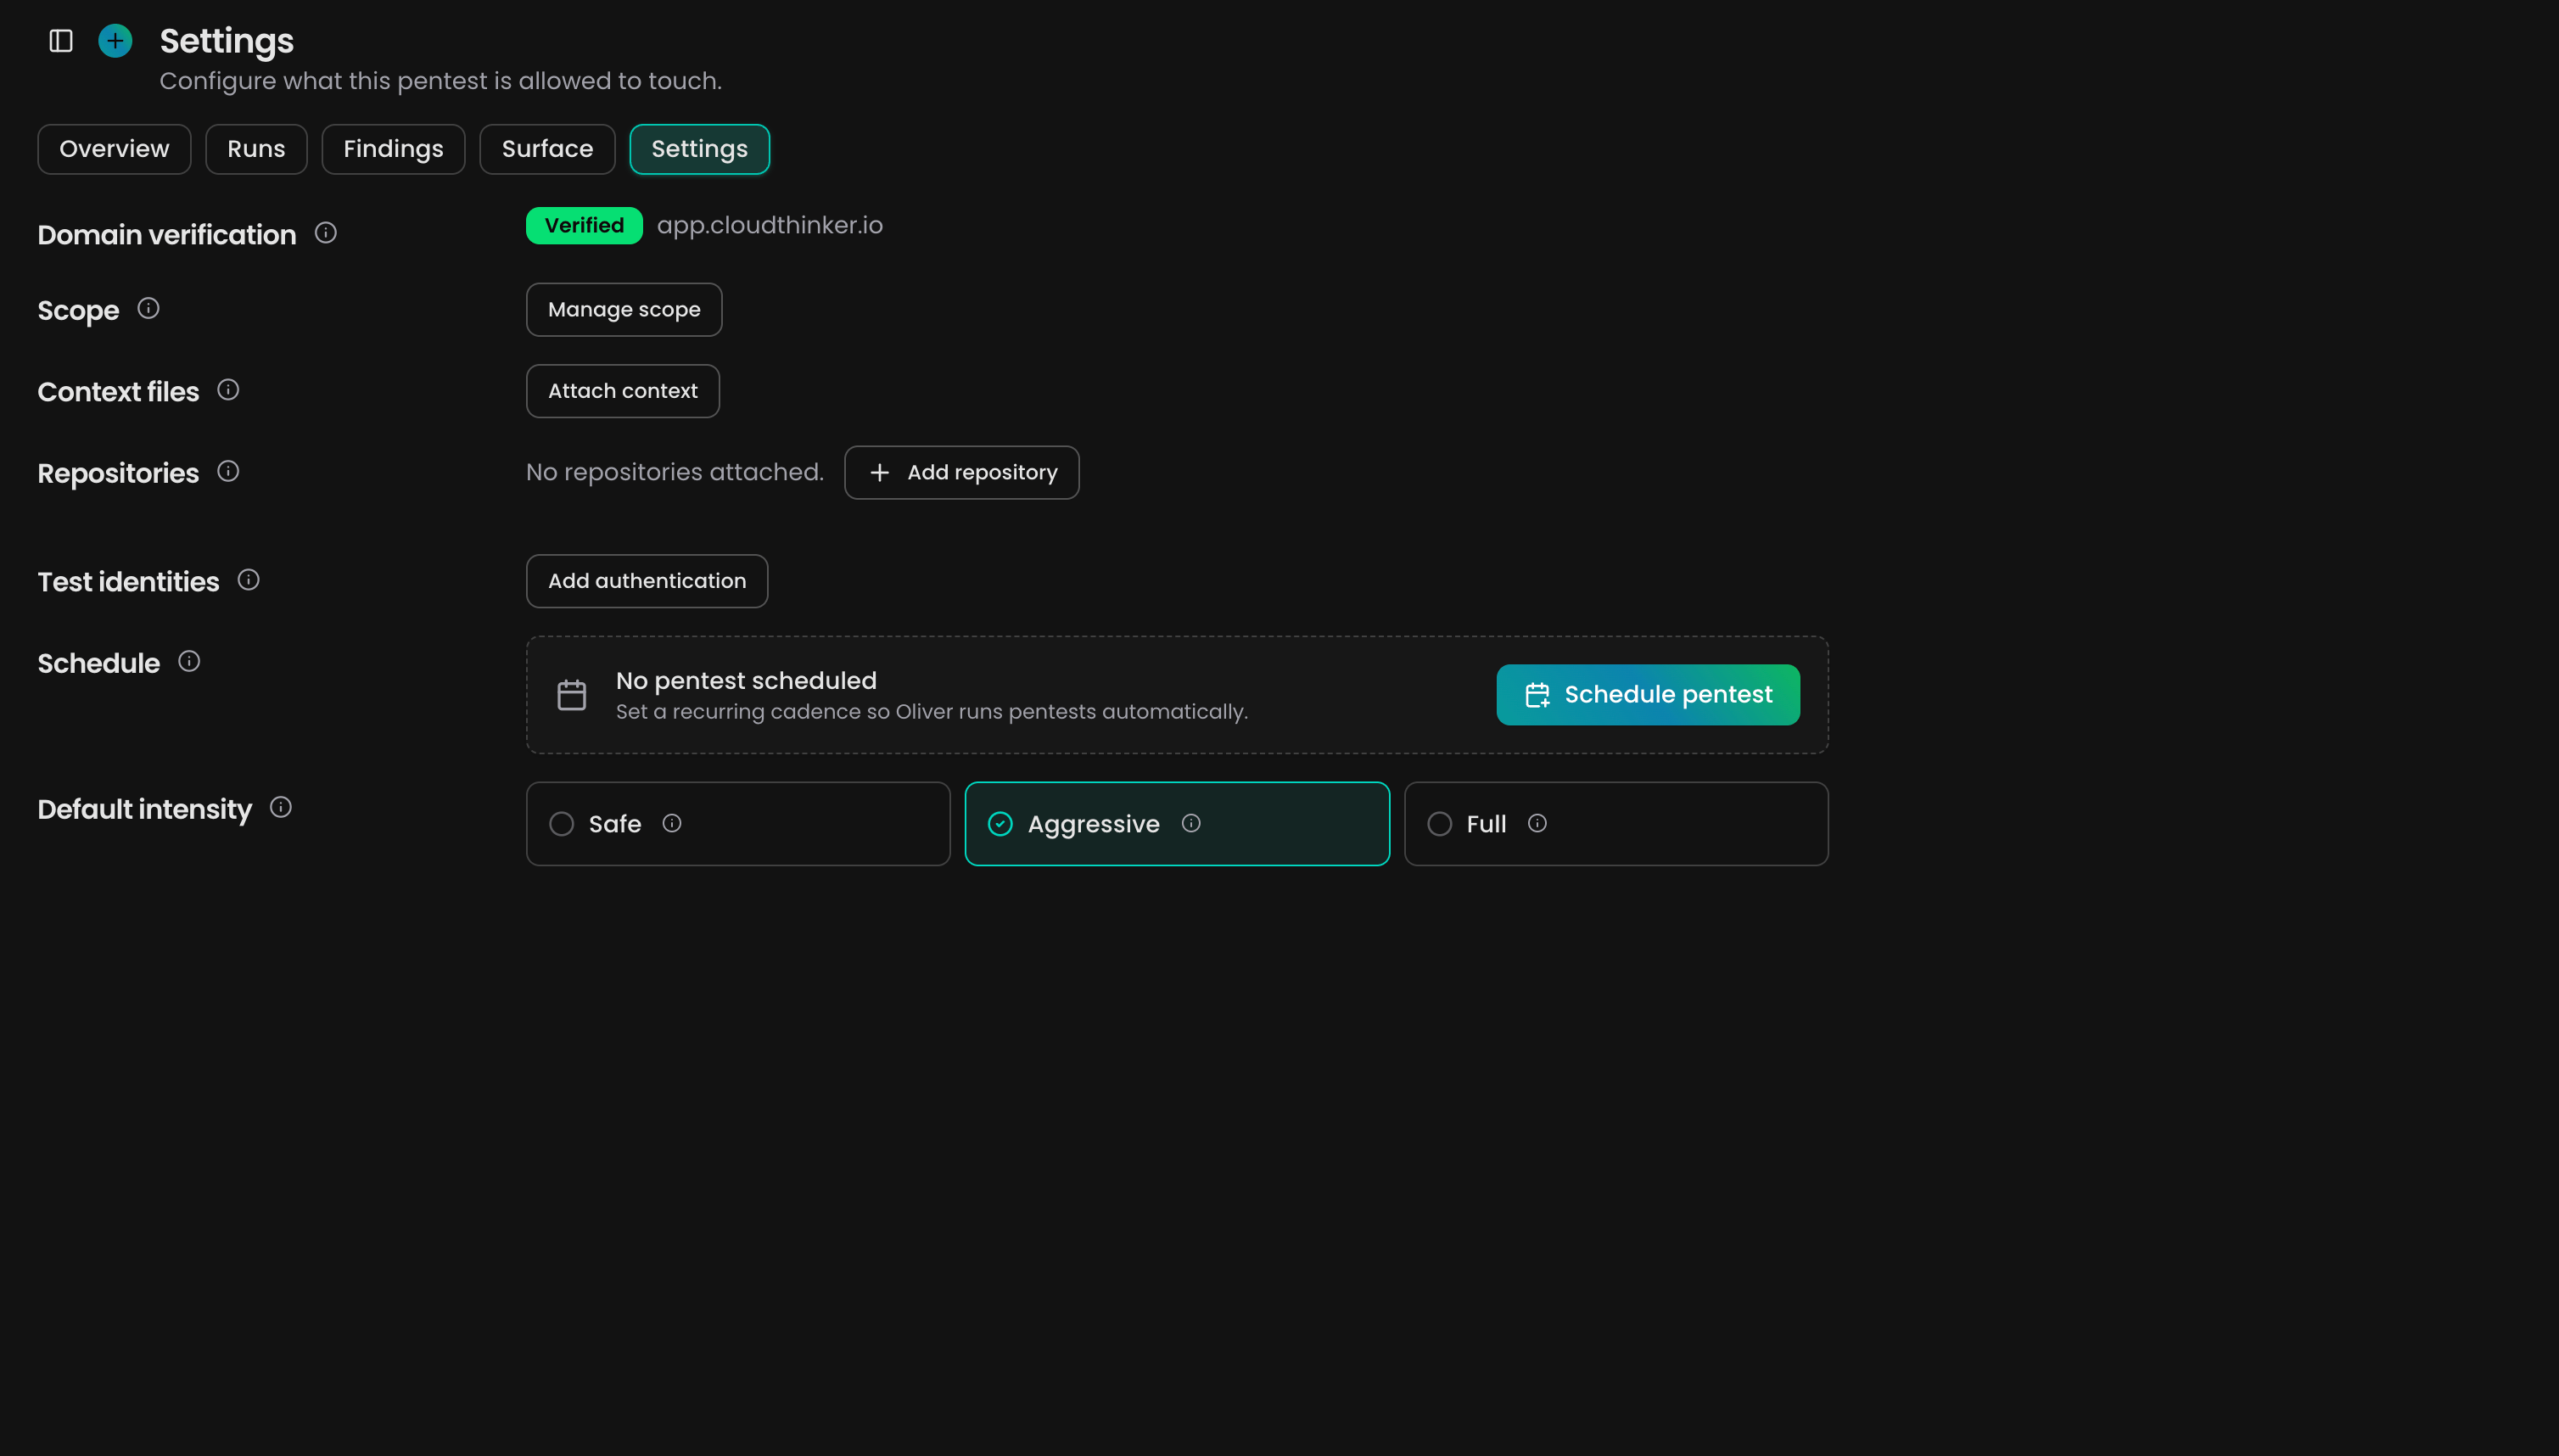
Attach a login
Attach two logins and Oliver can prove the most valuable thing of all: that one customer cannot read another’s data. Name them something likevictim and attacker, and describe what each is allowed to see — their role, their team, the records they own. That description is how Oliver knows which access is a bug.
- Session token
- Long-lived token
Best for web apps. Sign in, open your browser’s developer tools, find any request on the Network tab, copy it as cURL, and paste it in. Click Verify and attach — CloudThinker replays it to confirm the login works before saving.
How deep Oliver goes
The more you attach, the more Oliver can reach. You don’t choose this — Oliver takes the deepest level available and shows it as an Access level badge in the run dialog.
One catch: browser sessions expire. An app with only a session tests as gray-box when you click Run now, but drops to black-box on a schedule, because the session dies before the scheduled run fires. Attach a long-lived token or a repository to keep the depth.
Run the pentest
Click Run pentest. Everything lives in one dialog. Setup at the top repeats your target, framework, and scope so you can catch a mistake before anything is sent — Edit setup › takes you back to fix it. Most runs finish in a few minutes and stop at 30.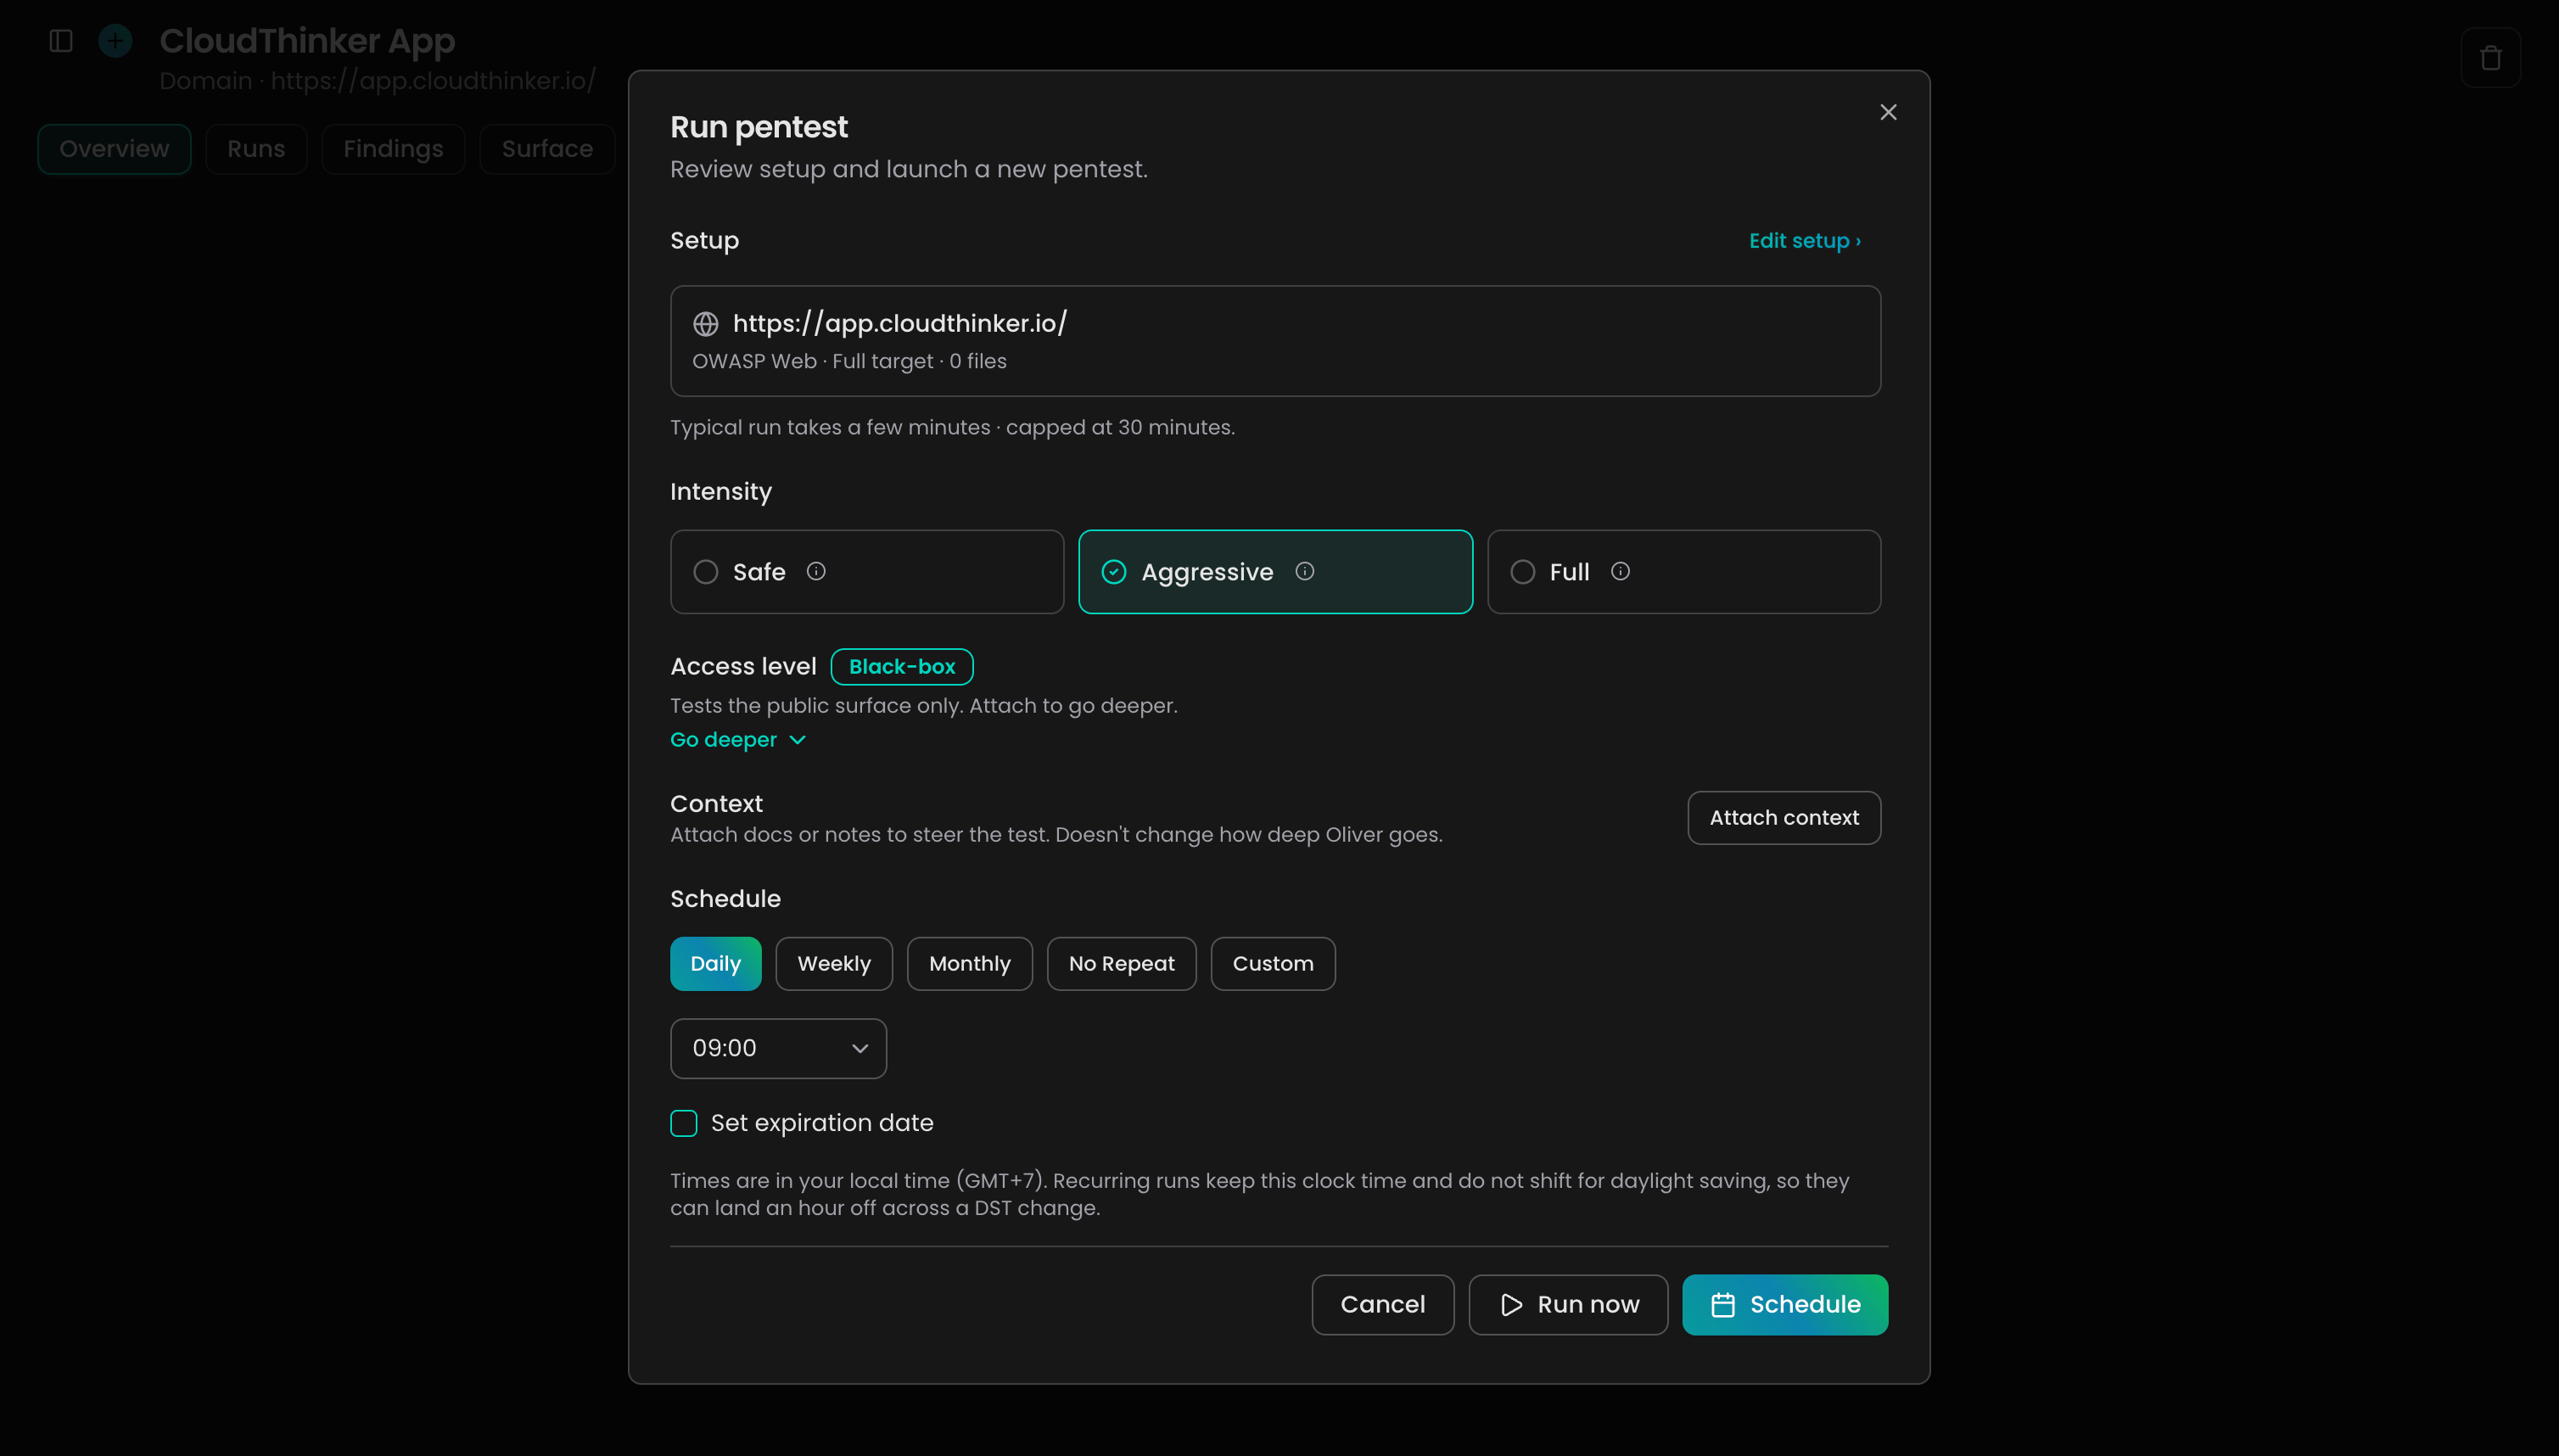
Access level shows how deep this run goes; Go deeper tells you what to add to unlock more. If you attached a repository, you also pick a Scan scope: Incremental checks only what changed since your last run, Full checks everything. Your first run is always Full.
Then finish one of two ways:
- Run now starts immediately and opens the workbench.
- Schedule repeats it — Daily, Weekly, Monthly, No Repeat, or Custom — at a time you set, with an optional end date. Times use your local time and keep the same clock time year-round, so a run can land an hour off across a daylight saving change.
Read the results
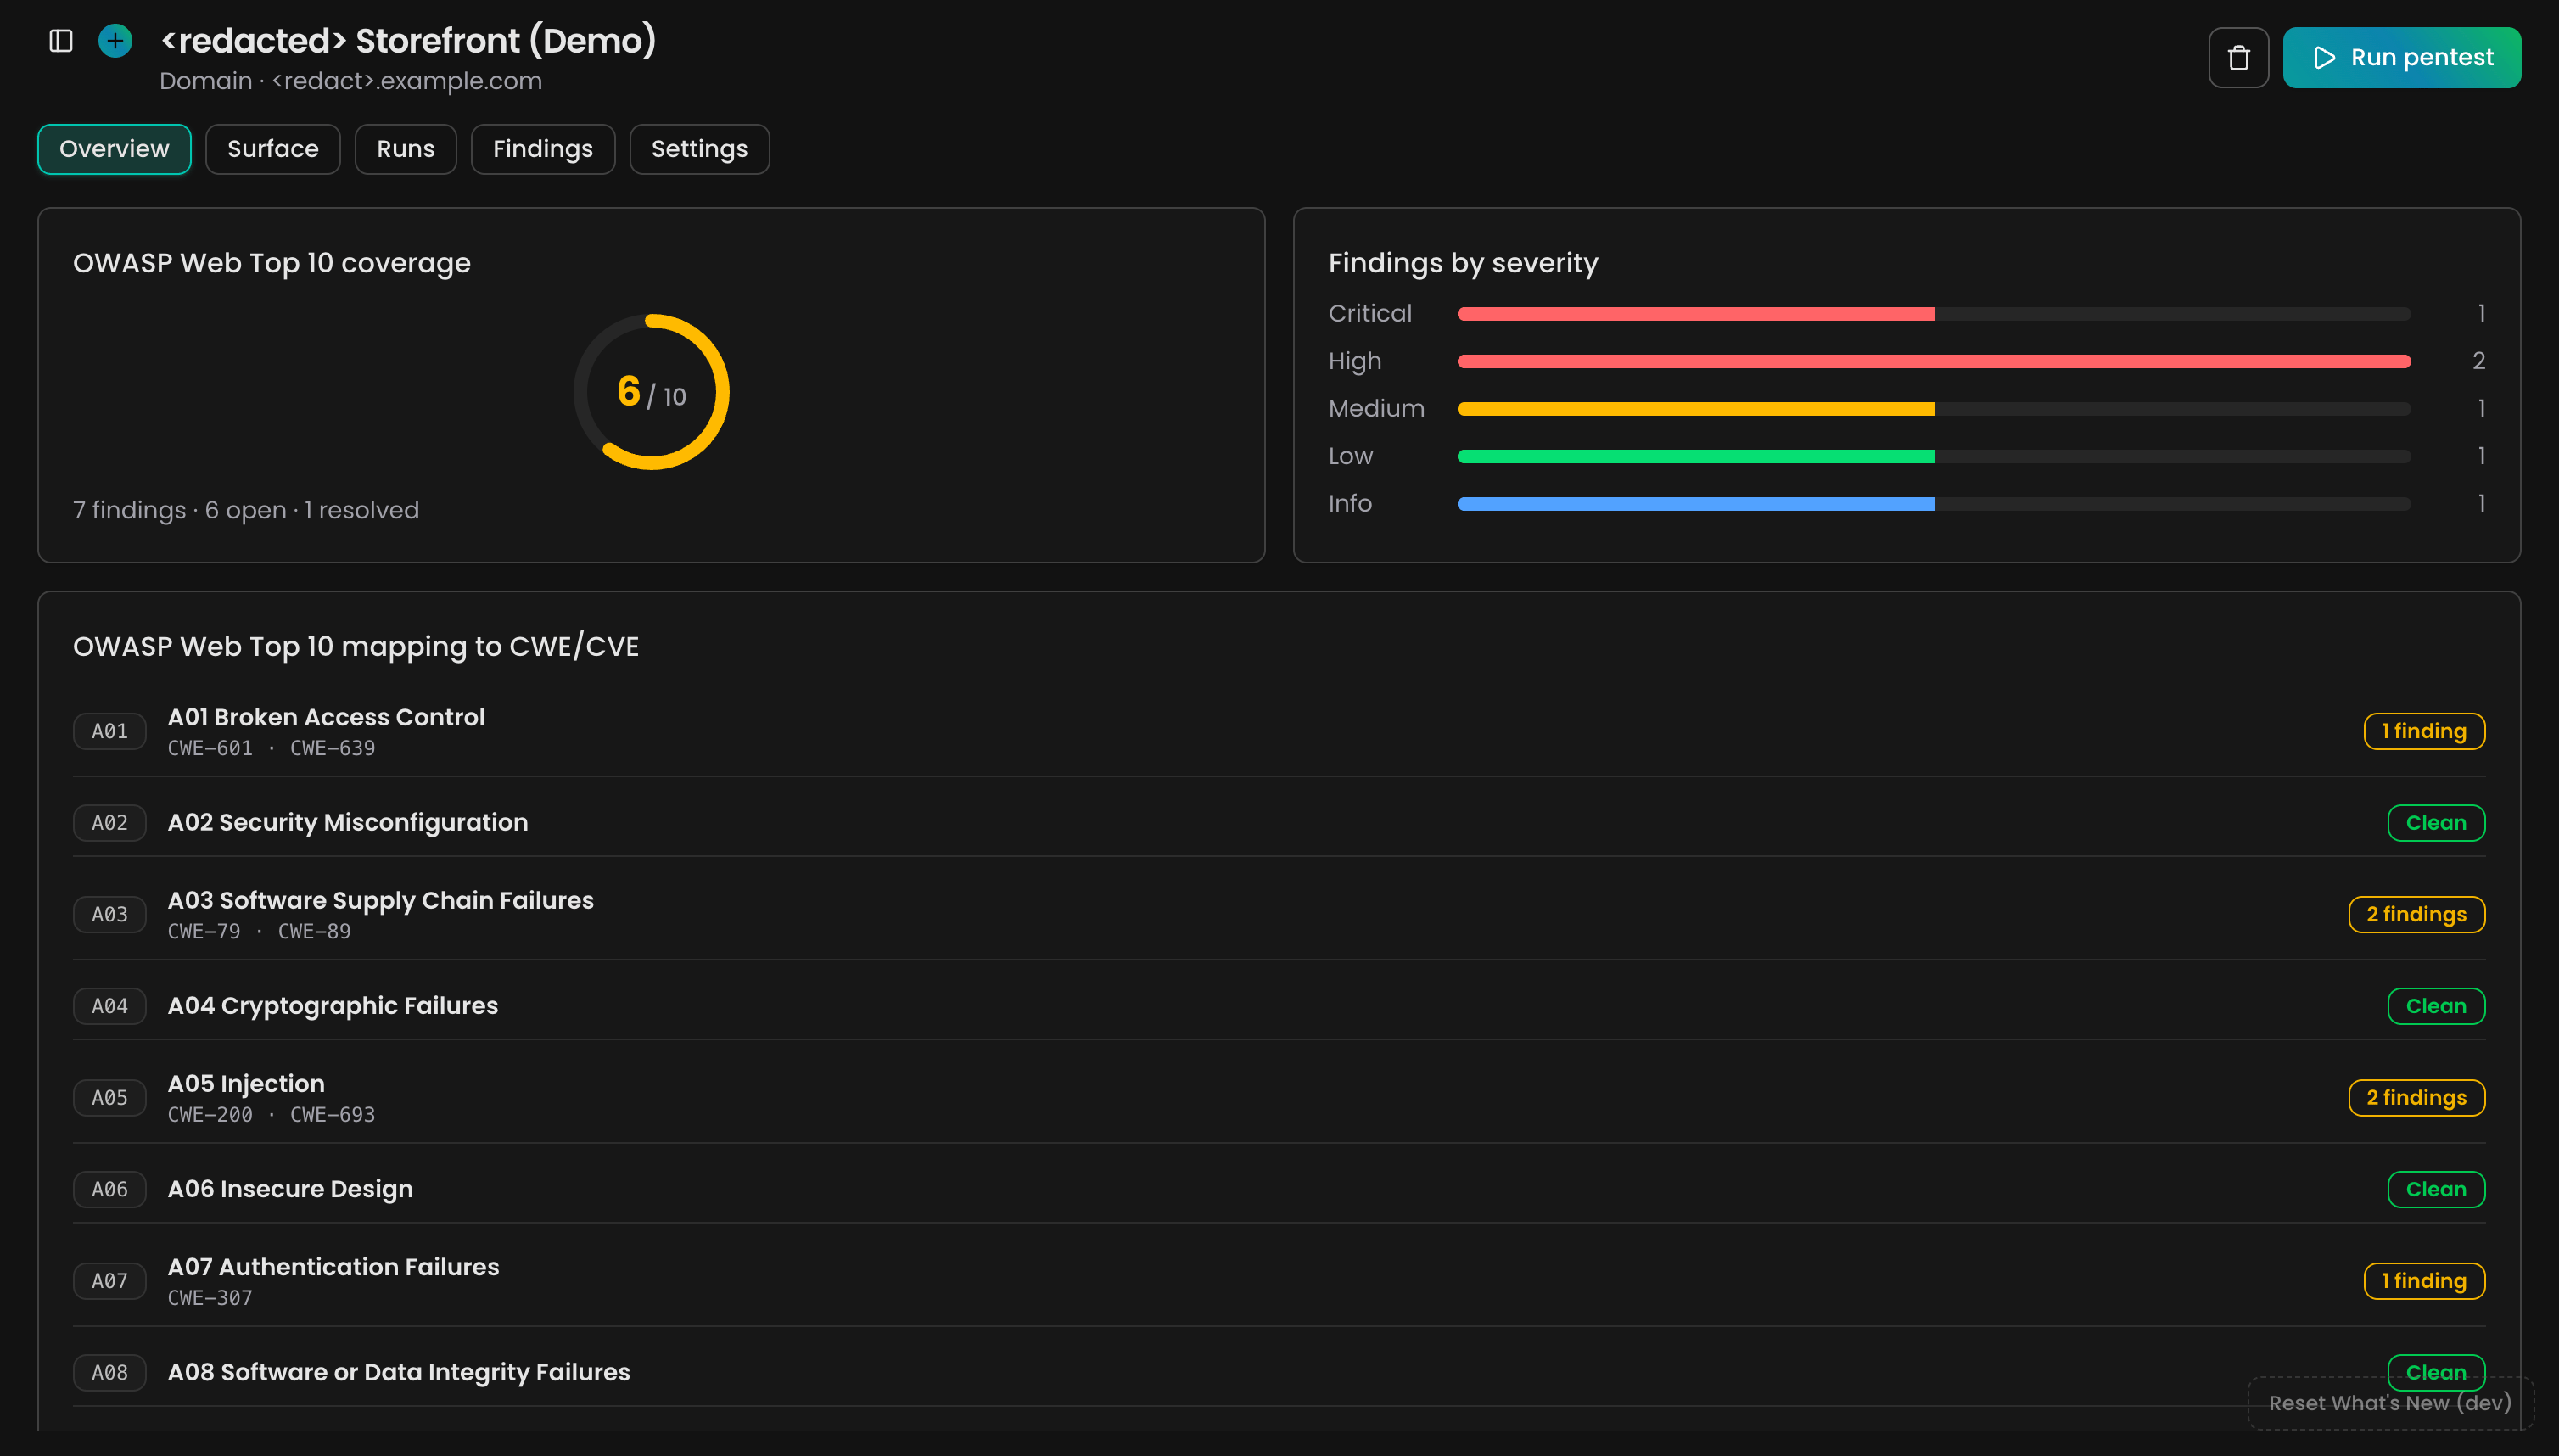
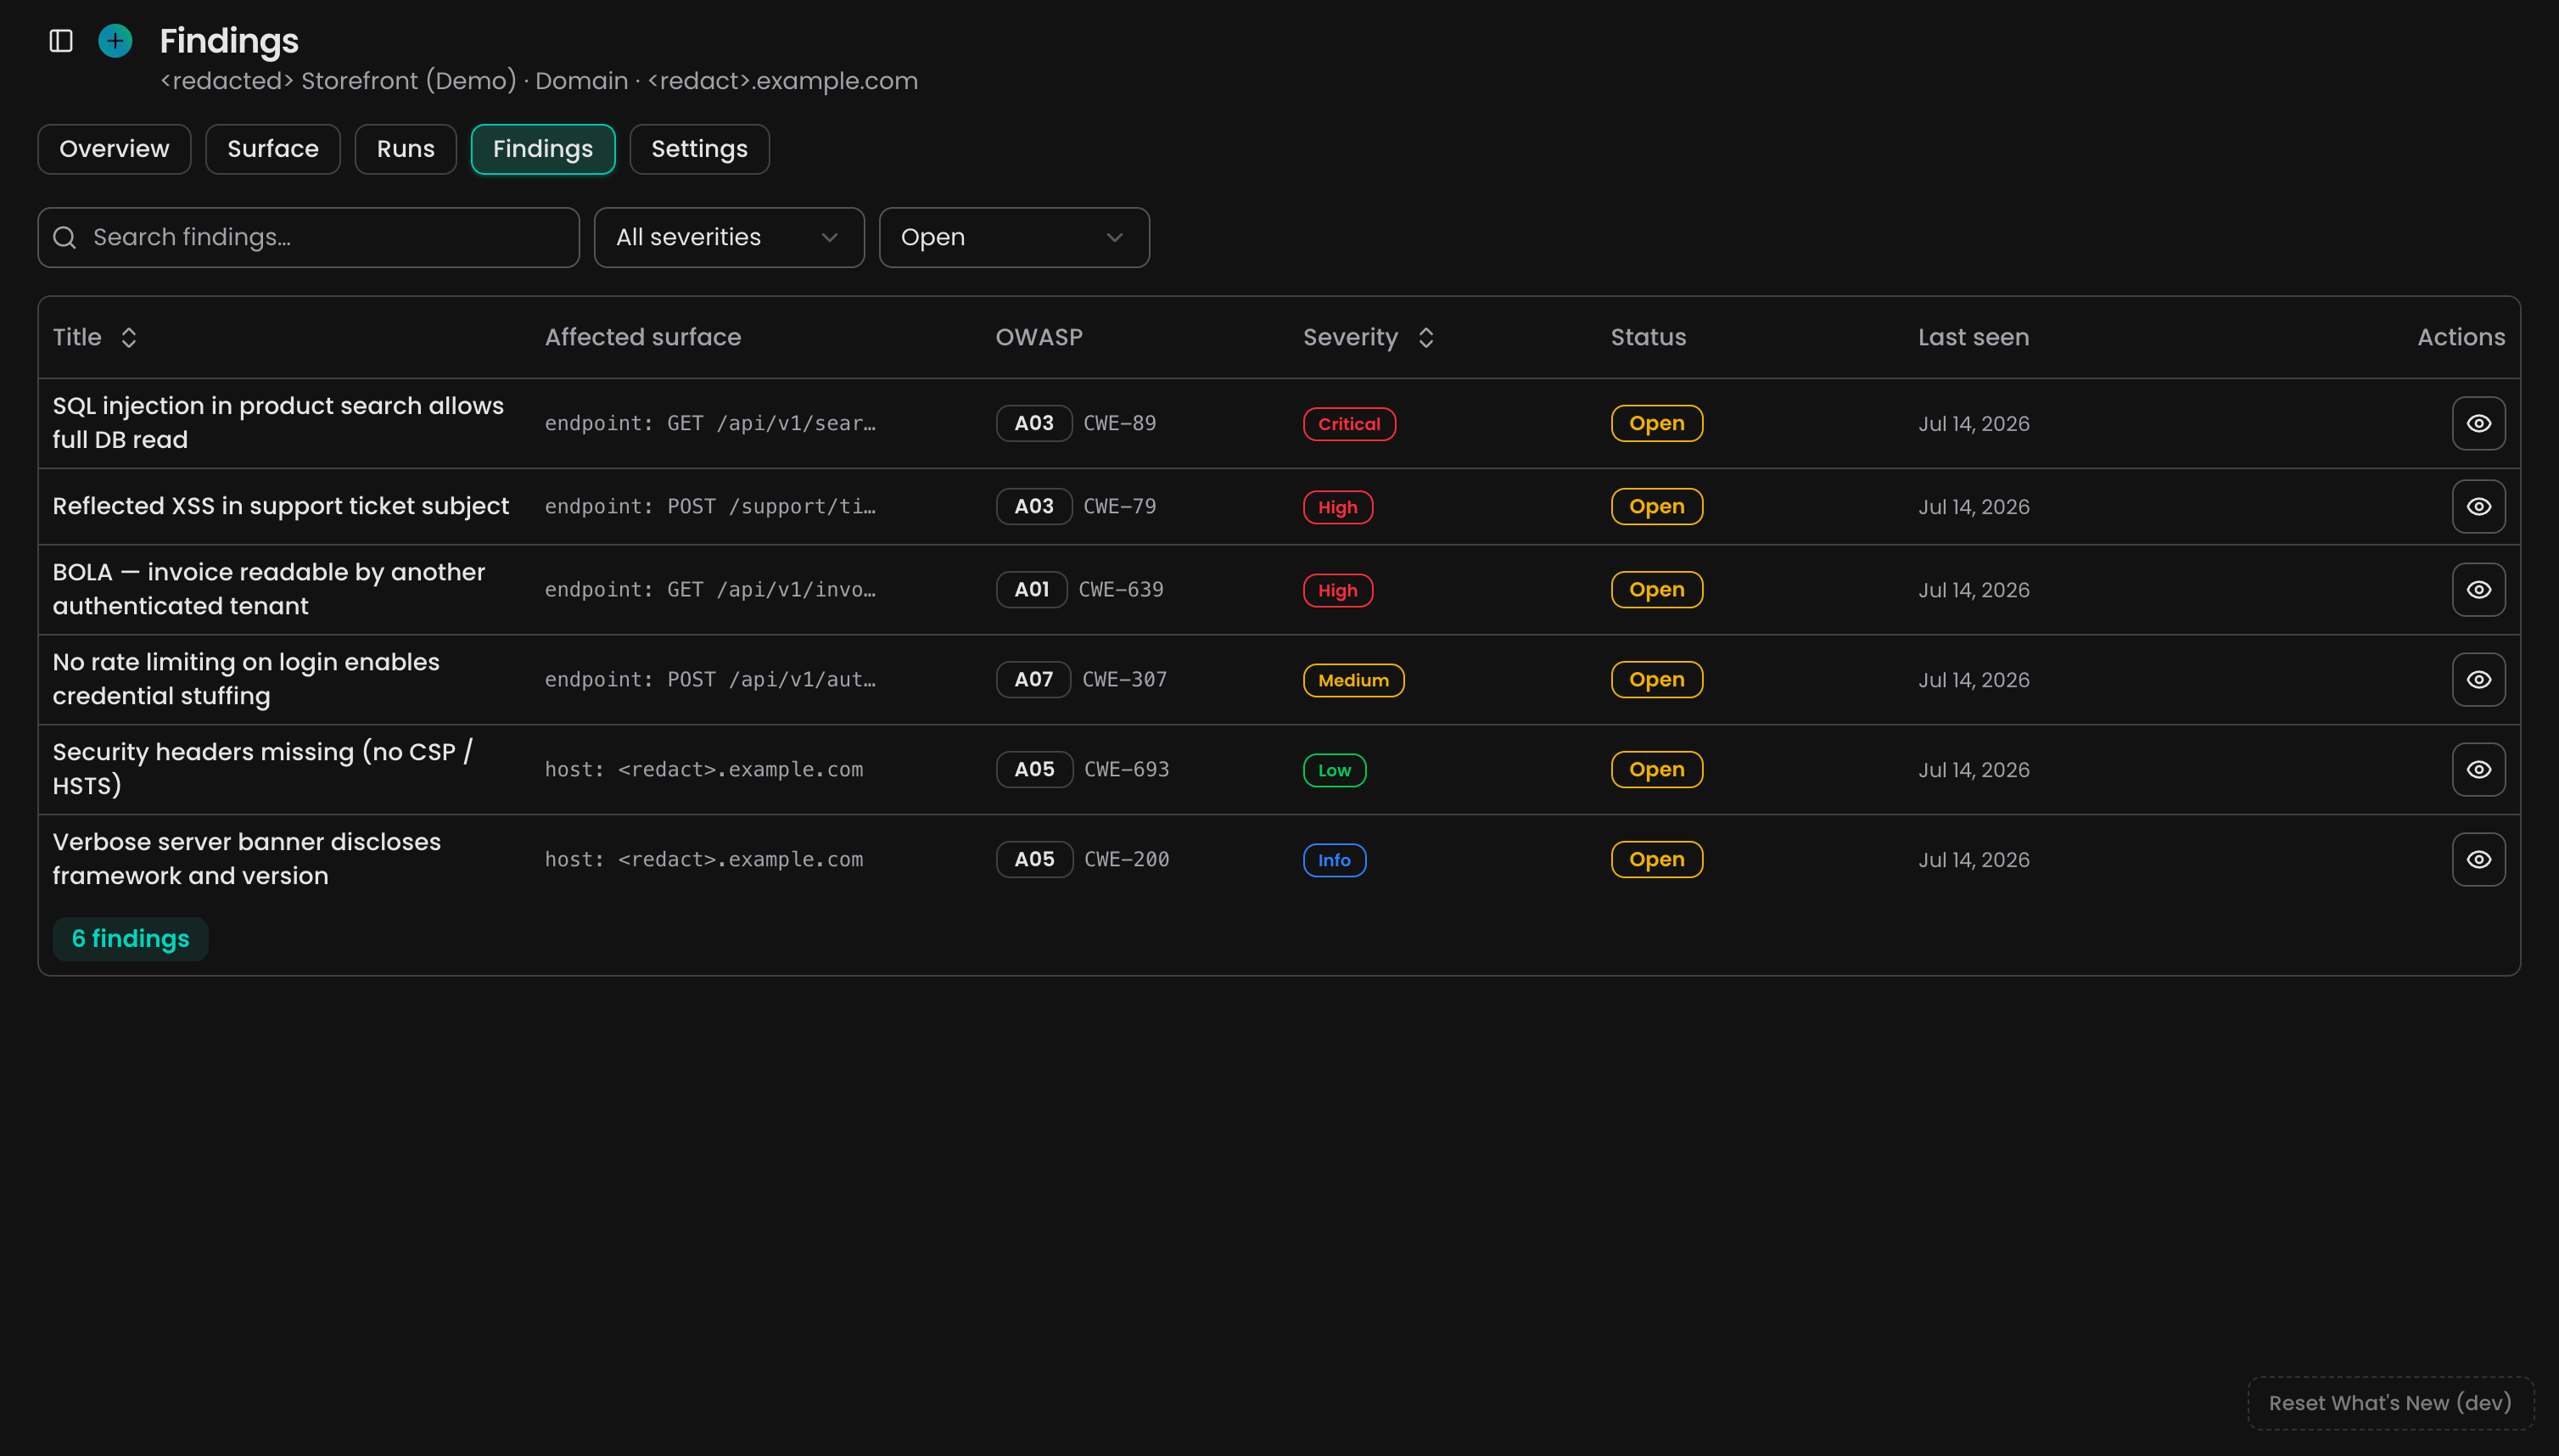
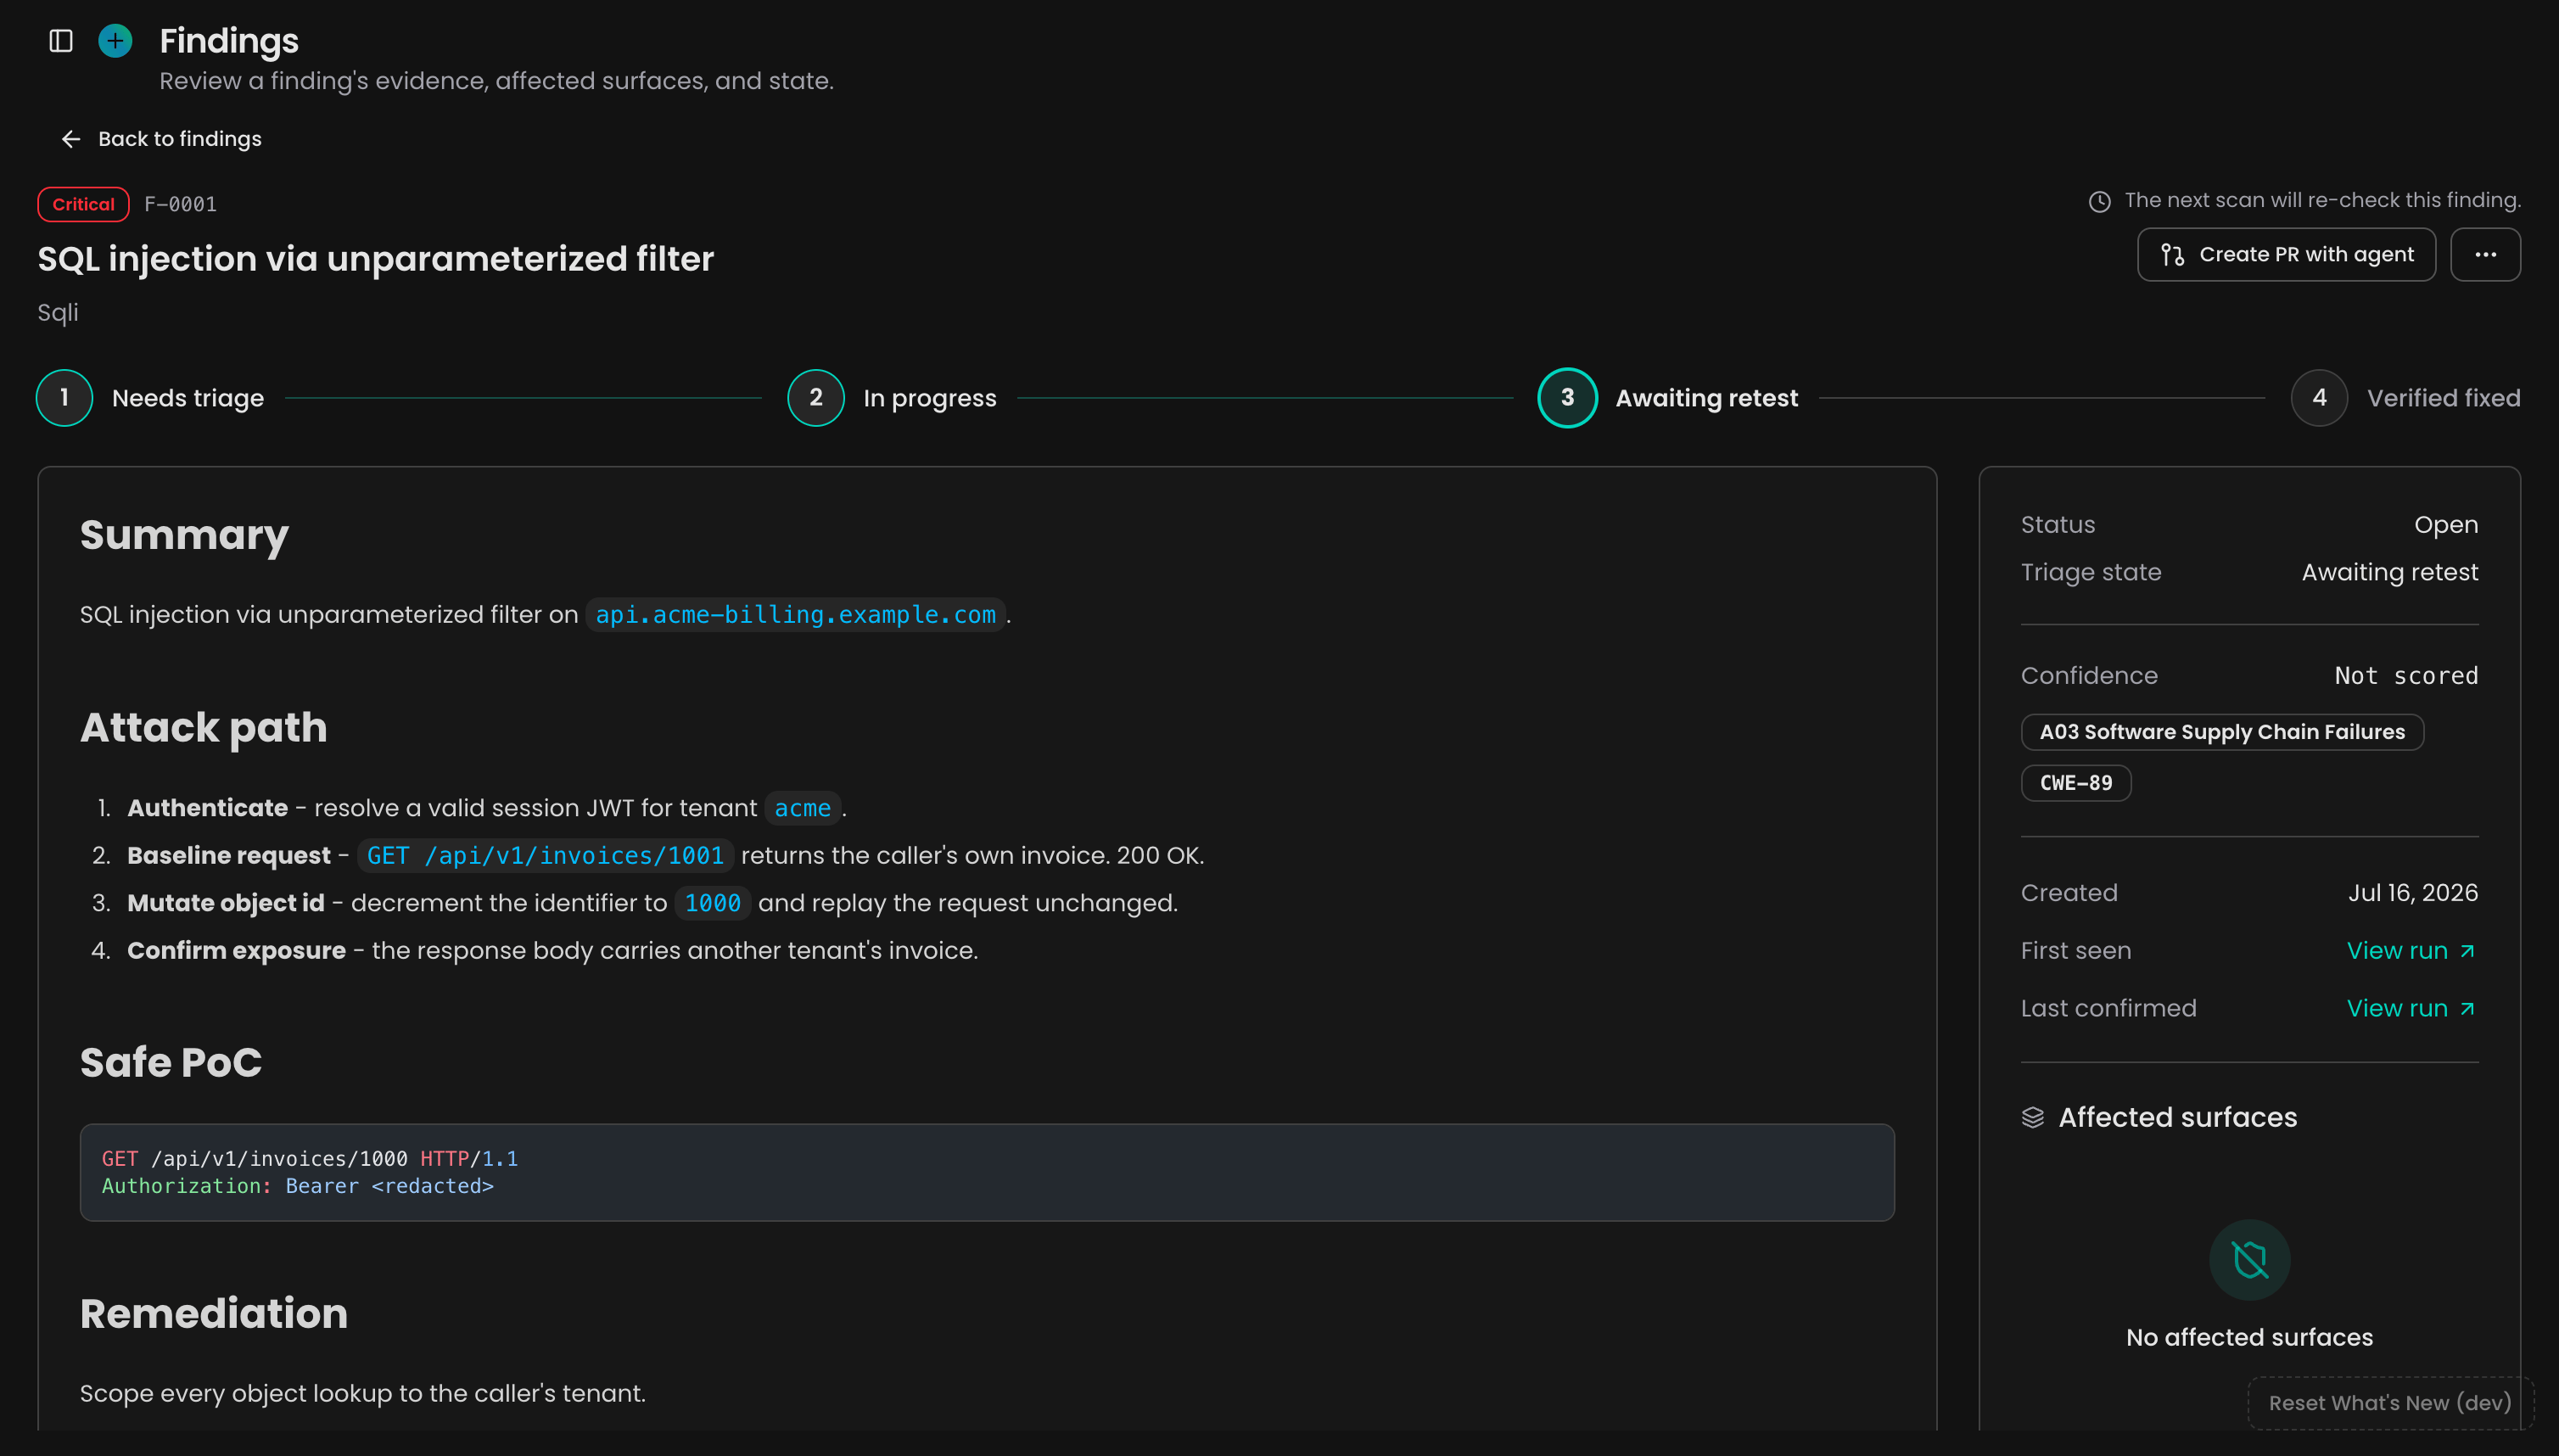
Watch the run happen. The Timeline in the middle narrates each step as Oliver works, findings appear on the right the moment they’re confirmed, and past runs sit in Run history on the left. The full Report arrives when the run finishes.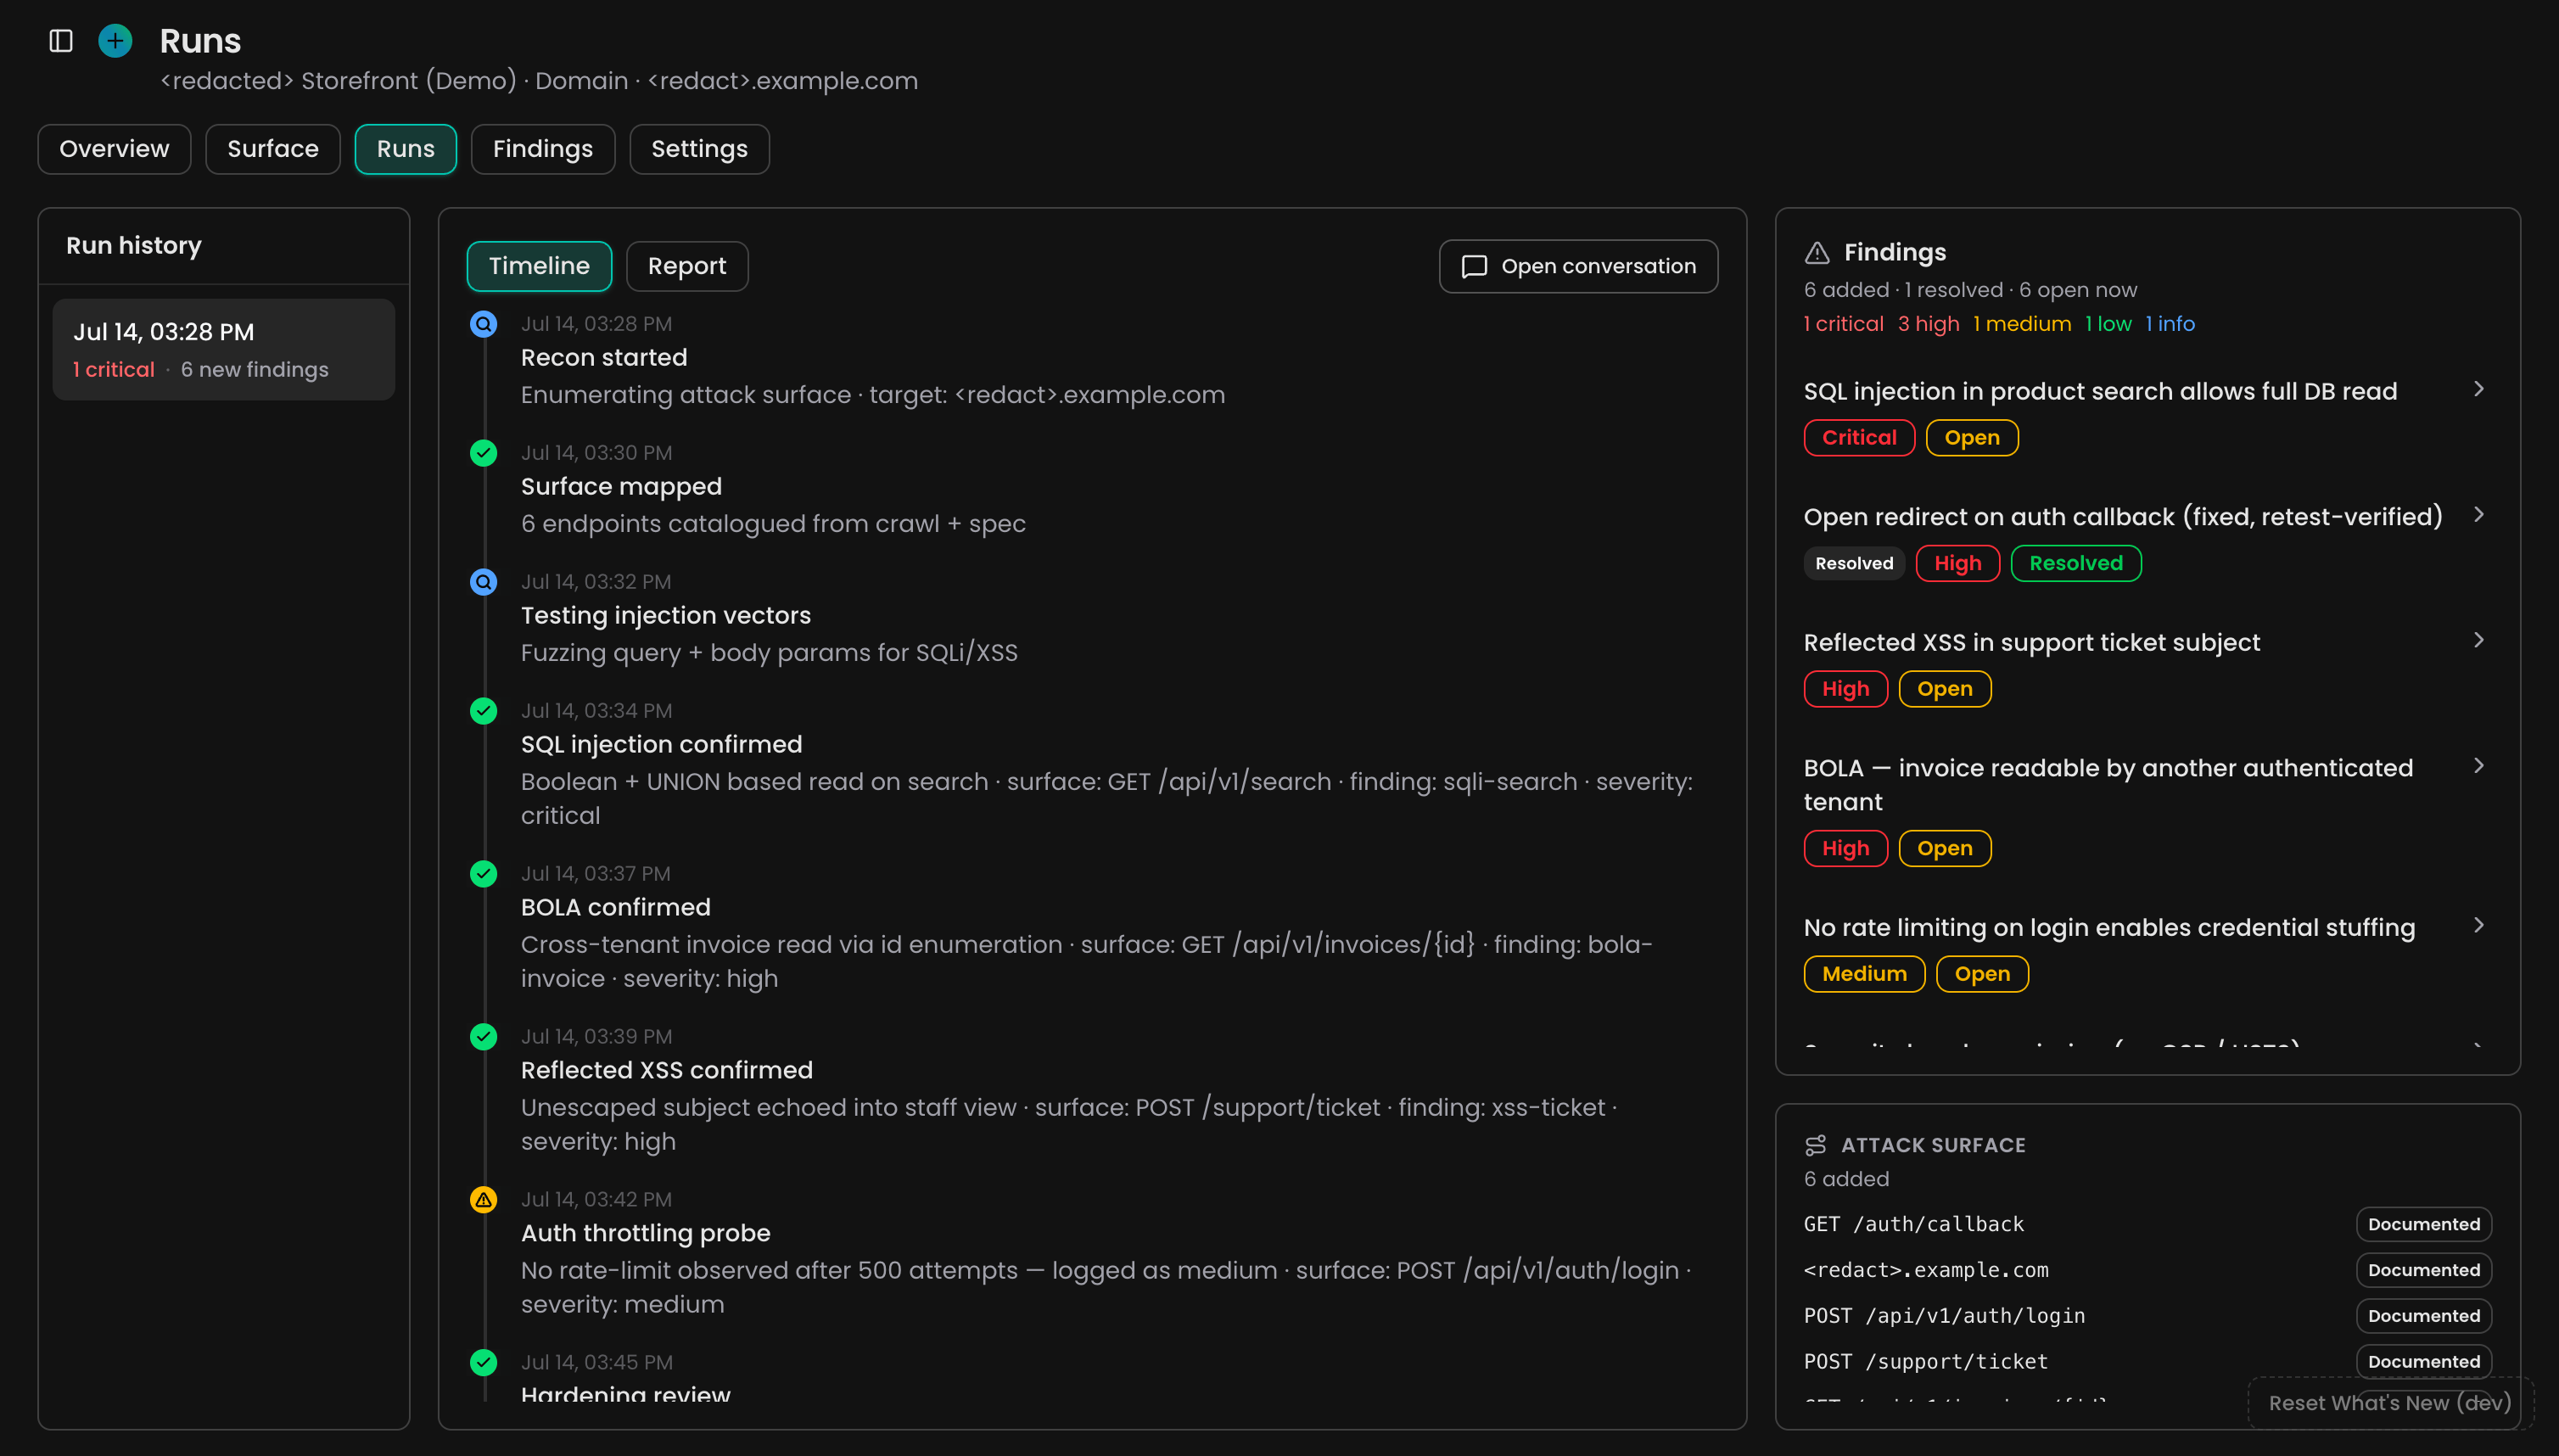
Troubleshooting
A saved login no longer works
A saved login no longer works
Your session expired. Rather than quietly testing as a logged-out visitor and reporting less than it should, Oliver stops. Click Update login, remove the one marked Needs refresh, and add a fresh one. If this keeps happening, attach a long-lived token instead — those don’t expire.
Domain verification required
Domain verification required
Your TXT record is missing, or DNS hasn’t caught up yet. Compare the record at your DNS provider against the TXT name and TXT value in the verify dialog, wait a few minutes, then click Check DNS again.
The repository dialog shows Connect provider
The repository dialog shows Connect provider
No Git provider is connected to your workspace yet. Click Connect provider, finish connecting, then reopen the dialog.
Incremental scan scope is greyed out
Incremental scan scope is greyed out
Incremental compares against your last successful run, so you need one first. Run a Full scan, and Incremental becomes available after it.
Next steps
Oliver
Meet the Security Engineer agent that runs your pentests and triages the findings
Code Review
Catch the same classes of vulnerability on every pull request, before they ship
Security
Harden workspace access itself with MFA, SSO, and single-purpose API keys
Connections
Connect the Git provider that unlocks white-box testing against your source